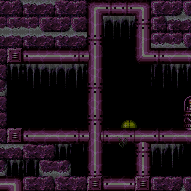
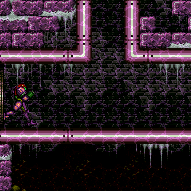
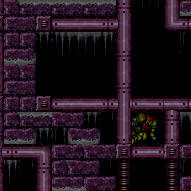
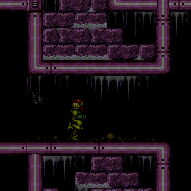
canPowerBombItemOverloadPLMs (Extreme)
Ability to overload PLMs by having a Power Bomb explosion interact with an item, while being able to optimally place them to overload PLMs with as few Power Bombs as possible. The number of PLMs spawned is highly dependent on the distance between the bomb and the item.
There is a special distance from the item in which two Power Bombs can fully overload PLMs - 16 tiles away horizontally or 12 tiles vertically away from the item. This magic distance forms a rectangle around the item, which is approximately one tile thick. Slightly outside this rectangle will not spawn any PLMs, slightly inside of it will require dozens of Power Bombs to overload them. Without being able to place a Power Bomb within this special region, then the closer to the item, the more the PLMs are spawned - particularly when extremely close to it. A Power Bomb placed one pixel from the item requires just two Power Bombs, while placing them two tiles away from the item will typically require 7-8 explosions. This requires the item to be uncollected and Samus to be in Direct G-mode for visible and Chozo Ball items, but hidden items can be Power Bombed even if it is collected or in indirect G-mode.
Dependencies: canUseEnemies, canPreciseReserveRefill, canManageReserves, canGMode
Dev note: Note that this tech does not have any Power Bomb requirements - those are all included on the strat, because the number required varies significantly.
Strats ()
From: 1
Top Left Door
To: 5
Bottom Junction (Right of Boyons)
Place the PBs exactly two tiles left of the Morph tunnel. Be sure not to touch the item if this strat will be needed again in the future. It is possible to cross the spike pit with spring flings and two spike hits. Pause then jump just before the fade out ends and turn Spring Ball off in order to get more horizontal distance at the start and avoid one spike hit. Turn Spring Ball off and on again while jumping on the spikes to get across to avoid another. Entrance condition: {
"comeInWithGMode": {
"mode": "direct",
"morphed": true
}
}Requires: "canPowerBombItemOverloadPLMs"
{
"itemNotCollectedAtNode": 3
}
"canRiskPermanentLossOfAccess"
"h_artificialMorphPowerBomb"
"h_artificialMorphPowerBomb"
{
"or": [
{
"and": [
"h_artificialMorphSpringBall",
{
"spikeHits": 4
}
]
},
{
"and": [
"h_artificialMorphSpringBall",
"h_artificialMorphBombHorizontally",
{
"spikeHits": 3
}
]
},
{
"and": [
"h_artificialMorphSpringFling",
"canTrickyJump",
{
"spikeHits": 2
}
]
},
{
"and": [
"Morph",
{
"or": [
"SpaceJump",
{
"and": [
{
"spikeHits": 1
},
{
"or": [
"canUseIFrames",
{
"spikeHits": 1
}
]
}
]
}
]
}
]
}
]
} |
|
Wall jump up 5 times, placing a Power Bomb precisely in the top right corner to overload PLMs with as few Power Bombs as possible. This only works in direct G-mode with the item still uncollected. Entrance condition: {
"comeInWithGMode": {
"mode": "direct",
"morphed": false
}
}Requires: "canPowerBombItemOverloadPLMs"
{
"notable": "G-Mode Up with Power Bombs"
}
{
"itemNotCollectedAtNode": 3
}
"canConsecutiveWallJump"
"Morph"
{
"or": [
"canRiskPermanentLossOfAccess",
{
"and": [
"canComplexGMode",
"canLongXRayClimb",
"canBeVeryPatient"
]
}
]
}
{
"ammo": {
"type": "PowerBomb",
"count": 5
}
}
"canBePatient"
{
"or": [
"Ice",
"canTrickyDodgeEnemies",
"ScrewAttack",
{
"and": [
"h_getBlueSpeedMaxRunway",
"h_blueJump"
]
},
{
"enemyKill": {
"enemies": [
[
"Boyon",
"Boyon",
"Boyon",
"Boyon"
]
],
"excludedWeapons": [
"Bombs"
]
}
},
{
"enemyDamage": {
"enemy": "Boyon",
"type": "contact",
"hits": 1
}
},
{
"and": [
"canBeVeryPatient",
"h_useMorphBombs"
]
}
]
}Dev note: Using this strat doesn't have canRiskPermanentLossOfAccess if the player could x-ray climb instead: this requires direct G-mode and Samus can freely doorstuck here, and there is no benefit to going to the item instead of the top left door, unless the item is there. FIXME: Placing the Power Bombs lower, on the magic tile, could overload PLMs with fewer, likely with as low as 2 Power Bombs. |
From: 17
G-Mode Morph Junction Direct (By Left Door)
To: 1
Lower Section - Bottom Left Door
To overload the PLMs, place a Power Bomb precisely to the right of the bottom of the second overhang above the bottom left door. This is at the max jump height without HiJump. Placing the Power Bomb higher or lower will not overload the PLMs without many Power Bombs. Requires: "canPowerBombItemOverloadPLMs"
"canComplexGMode"
{
"notable": "G-mode Overload PLMs by Power Bombing Morph Maze Item"
}
"h_usePowerBomb"
{
"or": [
"SpaceJump",
"canLongIBJ",
{
"and": [
"canTrickyDashJump",
"canTrickySpringBallJump",
"HiJump"
]
}
]
}Collects items: 10 Dev note: This requires the item to not be collected, but there is no reason to do this without it being there, so there is no canRiskPermanentLossOfAccess. |
From: 17
G-Mode Morph Junction Direct (By Left Door)
To: 16
G-Mode Morph Overloaded PLMs (By Left Door)
To overload the PLMs, place a Power Bomb precisely to the right of the bottom of the second overhang above the bottom left door. This is at the max jump height without HiJump. Placing the Power Bomb higher or lower will not overload the PLMs without many Power Bombs. Requires: "canPowerBombItemOverloadPLMs"
"canComplexGMode"
{
"notable": "G-mode Overload PLMs by Power Bombing Morph Maze Item"
}
{
"itemNotCollectedAtNode": 10
}
"canRiskPermanentLossOfAccess"
{
"or": [
"h_artificialMorphLongIBJ",
"Morph",
{
"and": [
"h_artificialMorphSpringBall",
{
"or": [
"HiJump",
"h_artificialMorphBombThings"
]
}
]
}
]
}
"h_artificialMorphPowerBomb" |
From: 5
G-Mode Morph Junction (Bottom)
To: 2
Top Left Door
Overload PLMs with a single Power Bomb by hitting the ceiling block item. This can be done with a single precisely placed Power Bomb. There should be one empty tile between Samus and the right wall. Because the item is in a shot block, this does not require Direct G-mode, nor does it require the item to be uncollected. Requires: "canPowerBombItemOverloadPLMs"
"canGMode"
"h_artificialMorphPowerBomb"
"h_artificialMorphMovement"
{
"or": [
"canConsecutiveWallJump",
"SpaceJump",
{
"and": [
{
"blueSuitShinecharge": {}
},
{
"or": [
{
"shinespark": {
"frames": 32,
"excessFrames": 3
}
},
{
"and": [
"HiJump",
{
"shinespark": {
"frames": 29,
"excessFrames": 3
}
}
]
}
]
}
]
}
]
}Clears obstacles: B, C Dev note: This strat is useless if Samus has Morph, so there will be no flashing lights. |
Direct G-Mode Morph, Power Bomb the Item, Collect Item and Return
(Extreme)
Etecoon Energy Tank Room
From: 3
Bottom Left Door
To: 3
Bottom Left Door
Place two precisely positioned Power Bombs to overload PLMs. This is at the same height as the tile above the door. This ends up being the max height Samus can jump and place it while at the very bottom of the room, with a midair morph or artificially morphed Spring Ball jump. Because PLMs are overloaded, Samus needs to exit G-mode at the item to collect it before returning through the crumble blocks. Entrance condition: {
"comeInWithGMode": {
"mode": "direct",
"morphed": true
}
}Requires: "canPowerBombItemOverloadPLMs"
"canComplexGMode"
{
"itemNotCollectedAtNode": 5
}
{
"or": [
"Morph",
"h_artificialMorphSpringBall"
]
}
{
"ammo": {
"type": "PowerBomb",
"count": 2
}
}
{
"or": [
"canWallJump",
"SpaceJump",
{
"and": [
"HiJump",
"canSpringBallJumpMidAir"
]
},
"h_artificialMorphLongIBJ",
{
"and": [
{
"blueSuitShinecharge": {}
},
{
"or": [
{
"shinespark": {
"frames": 13,
"excessFrames": 3
}
},
{
"and": [
"HiJump",
{
"shinespark": {
"frames": 9,
"excessFrames": 3
}
}
]
}
]
}
]
}
]
}Collects items: 5 Dev note: This does not require canRiskPermanentLossOfAccess if Samus returns through the crumble blocks. |
From: 3
Bottom Left Door
To: 5
Top Item
Place two precisely positioned Power Bombs to overload PLMs. This is at the same height as the tile above the door. This ends up being the max height Samus can jump and place it while at the very bottom of the room, with a midair morph or artificially morphed Spring Ball jump. Entrance condition: {
"comeInWithGMode": {
"mode": "direct",
"morphed": true
}
}Requires: "canPowerBombItemOverloadPLMs"
{
"itemNotCollectedAtNode": 5
}
"canRiskPermanentLossOfAccess"
{
"or": [
"Morph",
"h_artificialMorphSpringBall"
]
}
{
"ammo": {
"type": "PowerBomb",
"count": 2
}
}
{
"or": [
"canWallJump",
"SpaceJump",
{
"and": [
"HiJump",
"canSpringBallJumpMidAir"
]
},
"h_artificialMorphLongIBJ",
{
"and": [
{
"blueSuitShinecharge": {}
},
{
"or": [
{
"shinespark": {
"frames": 13,
"excessFrames": 3
}
},
{
"and": [
"HiJump",
{
"shinespark": {
"frames": 9,
"excessFrames": 3
}
}
]
}
]
}
]
}
]
}Dev note: This requires canRiskPermanentLossOfAccess unless Samus returns through the crumble blocks. |
Direct G-Mode Morph Through Spikeway, Power Bomb the Item, Collect Item and Return
(Extreme)
Etecoon Energy Tank Room
From: 4
Bottom Right Door
To: 3
Bottom Left Door
Cross the room while killing the Beetoms, then use two precisely positioned Power Bombs to overload PLMs. Place the Power Bombs at the same height as the tile above the door. This ends up being the max height Samus can jump and place it while at the very bottom of the room, with a midair morph or artificially morphed Spring Ball jump. Because PLMs are overloaded, Samus needs to exit G-mode at the item to collect it before returning through the crumble blocks. Entrance condition: {
"comeInWithGMode": {
"mode": "direct",
"morphed": true
}
}Requires: "canPowerBombItemOverloadPLMs"
"canComplexGMode"
{
"itemNotCollectedAtNode": 5
}
{
"or": [
"Morph",
"h_artificialMorphSpringBall"
]
}
{
"or": [
{
"ammo": {
"type": "PowerBomb",
"count": 3
}
},
{
"and": [
"Morph",
{
"or": [
"ScrewAttack",
"Ice",
{
"ammo": {
"type": "Missile",
"count": 5
}
},
{
"ammo": {
"type": "Super",
"count": 5
}
}
]
}
]
}
]
}
{
"ammo": {
"type": "PowerBomb",
"count": 2
}
}
{
"or": [
"canWallJump",
"SpaceJump",
{
"and": [
"HiJump",
"canSpringBallJumpMidAir"
]
},
"h_artificialMorphLongIBJ"
]
}Clears obstacles: A Collects items: 5 Dev note: This does not require canRiskPermanentLossOfAccess if Samus returns through the crumble blocks. |
Direct G-Mode Morph with Blue Suit, Power Bomb the Item, Collect Item and Return
(Extreme)
Etecoon Energy Tank Room
From: 4
Bottom Right Door
To: 3
Bottom Left Door
Cross the room while killing the Beetoms, then use two precisely positioned Power Bombs to overload PLMs. Place the Power Bombs at the same height as the tile above the door. This ends up being the max height Samus can jump and place it while at the very bottom of the room, with a midair morph or artificially morphed Spring Ball jump. Because PLMs are overloaded, Samus needs to exit G-mode at the item to collect it before returning through the crumble blocks. Entrance condition: {
"comeInWithGMode": {
"mode": "direct",
"morphed": true
}
}Requires: "h_blueSuitGMode"
"canPowerBombItemOverloadPLMs"
"canComplexGMode"
{
  "itemNotCollectedAtNode": 5
}
{
  "or": [
    "Morph",
    "h_artificialMorphSpringBall"
  ]
}
{
  "ammo": {
    "type": "PowerBomb",
    "count": 2
  }
}
{
  "or": [
    "canWallJump",
    "SpaceJump",
    {
      "and": [
        "HiJump",
        "canSpringBallJumpMidAir"
      ]
    },
    "h_artificialMorphLongIBJ",
    {
      "and": [
        {
          "blueSuitShinecharge": {}
        },
        {
          "or": [
            {
              "shinespark": {
                "frames": 13,
                "excessFrames": 3
              }
            },
            {
              "and": [
                "HiJump",
                {
                  "shinespark": {
                    "frames": 9,
                    "excessFrames": 3
                  }
                }
              ]
            }
          ]
        }
      ]
    }
  ]
}Clears obstacles: A Collects items: 5 Dev note: This does not require canRiskPermanentLossOfAccess if Samus returns through the crumble blocks. FIXME: This could include a Crystal Flash before shinesparking. |
From: 4
Bottom Right Door
To: 5
Top Item
Cross the room while killing the Beetoms, then use two precisely positioned Power Bombs to overload PLMs. Place the Power Bombs at the same height as the tile above the door. This ends up being the max height Samus can jump and place it while at the very bottom of the room, with a midair morph or artificially morphed Spring Ball jump. Entrance condition: {
"comeInWithGMode": {
"mode": "direct",
"morphed": true
}
}Requires: "canPowerBombItemOverloadPLMs"
{
"itemNotCollectedAtNode": 5
}
"canRiskPermanentLossOfAccess"
"h_artificialMorphMovement"
{
"or": [
{
"and": [
{
"ammo": {
"type": "PowerBomb",
"count": 3
}
},
{
"or": [
"canComplexGMode",
{
"ammo": {
"type": "PowerBomb",
"count": 1
}
}
]
}
]
},
{
"and": [
"Morph",
{
"or": [
"ScrewAttack",
"Ice",
{
"ammo": {
"type": "Missile",
"count": 5
}
},
{
"ammo": {
"type": "Super",
"count": 5
}
}
]
}
]
}
]
}
{
"ammo": {
"type": "PowerBomb",
"count": 2
}
}
{
"or": [
"canWallJump",
"SpaceJump",
{
"and": [
"HiJump",
"canSpringBallJumpMidAir"
]
},
"h_artificialMorphLongIBJ"
]
}Clears obstacles: A Dev note: This requires canRiskPermanentLossOfAccess unless Samus returns through the crumble blocks. |
From: 4
Bottom Right Door
To: 5
Top Item
Samus is only able to kill enemies with blue suit while moving and not falling. With bombs as the only movement option, Samus should only touch the enemies while grounded and moving horizontally. After crossing the spikeway, use two precisely positioned Power Bombs to overload PLMs. Place the Power Bombs at the same height as the tile above the door. This ends up being the max height Samus can jump and place it while at the very bottom of the room, with a midair morph or artificially morphed Spring Ball jump. Entrance condition: {
"comeInWithGMode": {
"mode": "direct",
"morphed": true
}
}Requires: "h_blueSuitGMode"
"canPowerBombItemOverloadPLMs"
{
"itemNotCollectedAtNode": 5
}
"canRiskPermanentLossOfAccess"
{
"or": [
"Morph",
"h_artificialMorphSpringBall",
"h_artificialMorphIBJ"
]
}
{
"ammo": {
"type": "PowerBomb",
"count": 2
}
}
{
"or": [
"canWallJump",
"SpaceJump",
{
"and": [
"HiJump",
"canSpringBallJumpMidAir"
]
},
"h_artificialMorphLongIBJ",
{
"and": [
{
"blueSuitShinecharge": {}
},
{
"or": [
{
"shinespark": {
"frames": 13,
"excessFrames": 3
}
},
{
"and": [
"HiJump",
{
"shinespark": {
"frames": 9,
"excessFrames": 3
}
}
]
}
]
}
]
}
]
}Clears obstacles: A Dev note: This requires canRiskPermanentLossOfAccess unless Samus returns through the crumble blocks. FIXME: This could include a Crystal Flash before shinesparking. |
From: 9
Right Etecoon Shaft - Top Left Door
To: 13
Below Power Bomb Blocks - Main Junction
Place bombs against the item Chozo ball to overload PLMs. Then go through the bomb blocks and tunnel, then exit G-mode. Alternatively, with Spring Ball and a Power Bomb, place a Power Bomb 3 tiles in from the left opening to overload PLMs all at once. Entrance condition: {
"comeInWithGMode": {
"mode": "any",
"morphed": true
}
}Requires: {
"itemNotCollectedAtNode": 11
}
"canRiskPermanentLossOfAccess"
{
"or": [
"h_artificialMorphIBJ",
{
"and": [
"canPowerBombItemOverloadPLMs",
"h_artificialMorphSpringBall",
"h_artificialMorphPowerBomb"
]
}
]
} |
From: 3
Left Side - Top Middle Door (Main Entrance)
To: 13
Central Junction
As long as the Sidehoppers haven't been lured to the right, fall into the pit and use a Power Bomb to kill them or dodge them. Place a Power Bomb one tile below the Morph tunnel to the left to overload PLMs using the item. Exit G-mode, grab the item and return. Entrance condition: {
"comeInWithGMode": {
"mode": "direct",
"morphed": true
}
}Requires: "canPowerBombItemOverloadPLMs"
"h_artificialMorphSpringBall"
{
"or": [
"canInsaneJump",
"h_artificialMorphPowerBomb",
{
"haveBlueSuit": {}
},
{
"enemyDamage": {
"enemy": "Sm. Sidehopper",
"type": "contact",
"hits": 1
}
}
]
}
"h_artificialMorphPowerBomb"Clears obstacles: B Collects items: 10 Dev note: This does not include canRiskPermanentLossOfAccess because the only use of the strat is to collect the item. This is also why C is not cleared. Only this door and the one just below the hopper pit on the right will benefit from this, and only without Morph or Bombs, otherwise PLMs could be overloaded simpler ways. |
From: 3
Left Side - Top Middle Door (Main Entrance)
To: 14
G-Mode Morph, Behind the Power Bomb Blocks
As long as the Sidehoppers haven't been lured to the right, fall into the pit and use a Power Bomb to kill them or dodge them. Place a Power Bomb one tile below the Morph tunnel to the left to overload PLMs using the item. Entrance condition: {
"comeInWithGMode": {
"mode": "direct",
"morphed": true
}
}Requires: "canPowerBombItemOverloadPLMs"
{
"itemNotCollectedAtNode": 10
}
"canRiskPermanentLossOfAccess"
"h_artificialMorphSpringBall"
{
"or": [
"canInsaneJump",
"h_artificialMorphPowerBomb",
{
"haveBlueSuit": {}
},
{
"enemyDamage": {
"enemy": "Sm. Sidehopper",
"type": "contact",
"hits": 1
}
}
]
}
"h_artificialMorphPowerBomb"Clears obstacles: B, C Dev note: Techincally, obstacles B and C are not cleared until exiting G-mode, but those obstacles are not used by G-mode strats. Only this door and the one just below the hopper pit on the right will benefit from this, and only without Morph or Bombs, otherwise PLMs could be overloaded simpler ways. |
From: 4
Left Side - Door Behind Power Bomb Blocks
To: 12
Bottom Chozo Item
On entry, artificial morph and land on the doorsill without touching the crumble blocks below. Place 8 Power Bombs to hit the item just above and overload PLMs while killing the Sidehoppers. It is possible to save one Power Bomb by placing 6 of them up against the ceiling, then the 7th low to kill the Sidehoppers. Entrance condition: {
"comeInWithGMode": {
"mode": "direct",
"morphed": true
}
}Requires: "canPowerBombItemOverloadPLMs"
"canComplexGMode"
{
"itemNotCollectedAtNode": 10
}
"canRiskPermanentLossOfAccess"
"canArtificialMorph"
{
"ammo": {
"type": "PowerBomb",
"count": 7
}
}
{
"or": [
"h_artificialMorphMovement",
"h_artificialMorphPowerBomb"
]
} |
From: 4
Left Side - Door Behind Power Bomb Blocks
To: 15
G-Mode Morph Junction (Middle Right)
On entry, artificial morph and land on the doorsill without touching the crumble blocks below. Place 8 Power Bombs to hit the item just above and overload PLMs while killing the Sidehoppers. It is possible to save one Power Bomb by placing 6 of them up against the ceiling, then the 7th low to kill the Sidehoppers. Entrance condition: {
"comeInWithGMode": {
"mode": "direct",
"morphed": true
}
}Requires: "canPowerBombItemOverloadPLMs"
"canComplexGMode"
{
"itemNotCollectedAtNode": 10
}
"canRiskPermanentLossOfAccess"
"canArtificialMorph"
"h_artificialMorphMovement"
{
"ammo": {
"type": "PowerBomb",
"count": 7
}
} |
From: 6
Right Side - Top Middle Door
To: 13
Central Junction
As long as the Sidehoppers haven't been lured to the right, fall into the pit and use a Power Bomb to kill them or dodge them. Place a Power Bomb one tile below the Morph tunnel to the left to overload PLMs using the item. Exit G-mode, grab the item and return. Entrance condition: {
"comeInWithGMode": {
"mode": "direct",
"morphed": true
}
}Requires: "canPowerBombItemOverloadPLMs"
"h_artificialMorphSpringBall"
{
"or": [
"canInsaneJump",
"h_artificialMorphPowerBomb",
{
"haveBlueSuit": {}
},
{
"enemyDamage": {
"enemy": "Sm. Sidehopper",
"type": "contact",
"hits": 1
}
}
]
}
"h_artificialMorphPowerBomb"Clears obstacles: B Collects items: 10 Dev note: This does not include canRiskPermanentLossOfAccess because the only use of the strat is to collect the item. This is also why C is no cleared. Only this door and the one just above the hopper pit on the left will benefit from this, and only without Morph or Bombs, otherwise PLMs could be overloaded simpler ways. |
From: 6
Right Side - Top Middle Door
To: 14
G-Mode Morph, Behind the Power Bomb Blocks
As long as the Sidehoppers haven't been lured to the right, fall into the pit and use a Power Bomb to kill them or dodge them. Place a Power Bomb one tile below the Morph tunnel to the left to overload PLMs using the item. Entrance condition: {
"comeInWithGMode": {
"mode": "direct",
"morphed": true
}
}Requires: "canPowerBombItemOverloadPLMs"
{
"itemNotCollectedAtNode": 10
}
"canRiskPermanentLossOfAccess"
"h_artificialMorphSpringBall"
{
"or": [
"canInsaneJump",
"h_artificialMorphPowerBomb",
{
"haveBlueSuit": {}
},
{
"enemyDamage": {
"enemy": "Sm. Sidehopper",
"type": "contact",
"hits": 1
}
}
]
}
"h_artificialMorphPowerBomb"Clears obstacles: B, C Dev note: Techincally, obstacles B and C are not cleared until exiting G-mode, but those obstacles are not used by G-mode strats. Only this door and the one just above the hopper pit on the left will benefit from this, and only without Morph or Bombs, otherwise PLMs could be overloaded simpler ways. |
From: 2
Bottom Right Door
To: 3
Item
Place two Power Bombs, precisely on the fourth tile in the morph tunnel to overload PLMs. Samus should be barely visible in the tunnel, if not, use the right edge of the screen to track her moved distance. Entrance condition: {
"comeInWithGMode": {
"mode": "direct",
"morphed": true
}
}Requires: "canPowerBombItemOverloadPLMs"
{
"itemNotCollectedAtNode": 3
}
"h_artificialMorphPowerBomb"
"h_artificialMorphPowerBomb"
{
"or": [
"h_artificialMorphSpringBall",
{
"ammo": {
"type": "PowerBomb",
"count": 4
}
},
{
"and": [
"Morph",
{
"or": [
"can4HighMidAirMorph",
{
"ammo": {
"type": "PowerBomb",
"count": 2
}
}
]
}
]
}
]
}Dev note: Because of the gates, it costs 2 Power Bombs to get into the tunnel and 2 to get out the other side. There is no canRiskPermanentLossOfAccess, because there is no reason to go here except to get the item and leave. This is only useful if Samus has Morph, or the item is Morph. |
From: 1
Right Door
To: 2
Item
Overload PLMs before touching the crumble block in the morph tunnel, then go through it after they are overloaded. This can be done with 2 Power Bombs by placing them on the center of the rightmost tile inside the ceiling morph tunnel. One tile left of the elevator. Entrance condition: {
"comeInWithGMode": {
"mode": "direct",
"morphed": true
}
}Requires: "canPowerBombItemOverloadPLMs"
"h_artificialMorphPowerBomb"
"h_additionalBomb"
{
"or": [
"h_artificialMorphSpringBall",
"h_additionalBomb"
]
}Dev note: This is only useful if the item is Morph. |
From: 2
Right Door
To: 1
Left Door
Placing a Power Bomb a 0.5 to 1 tile away from the item plinth to bounce Samus onto it (where the right item usually is) while also overloading PLMs as the explosion hits the left item. Wait for the explosion to completely finish before touching the crumble blocks or they will remain solid. The camera will not scroll to the left side of the room, but it is possible to kill the Sova with the Power Bomb boost. Entrance condition: {
"comeInWithGMode": {
"mode": "direct",
"morphed": true
}
}Requires: "canPowerBombItemOverloadPLMs"
{
"itemNotCollectedAtNode": 4
}
"canRiskPermanentLossOfAccess"
"h_artificialMorphPowerBomb"Collects items: 3 Dev note: FIXME: It is possible to avoid collecting 3 by using a second Power Bomb to boost through the item after PLMs are overloaded. |
|
Use 17 Power Bombs while pressed against the crumble blocks to overload PLMs and go through the crumble blocks. With Morph, exit G-mode near the item then return to the left, without, exit in the middle of the room to break the crumble blocks. Anywhere else in the left section of the room requires one more Power Bomb. Entrance condition: {
"comeInWithGMode": {
"mode": "direct",
"morphed": true
}
}Requires: "canComplexGMode"
"h_heatedGMode"
"canPowerBombItemOverloadPLMs"
{
"ammo": {
"type": "PowerBomb",
"count": 18
}
}
{
"heatFrames": 240
}Collects items: 3 Dev note: Returning to the left avoids canRiskPermanentLossOfAccess. This might be useful with a crystal flash. |
|
Use 17 Power Bombs while pressed against the crumble blocks to overload PLMs and go through the crumble blocks. Anywhere else in the left section of the room requires one more Power Bomb. Entrance condition: {
"comeInWithGMode": {
"mode": "direct",
"morphed": true
}
}Requires: "h_heatedGMode"
"canPowerBombItemOverloadPLMs"
{
"itemNotCollectedAtNode": 3
}
"canRiskPermanentLossOfAccess"
{
"ammo": {
"type": "PowerBomb",
"count": 17
}
}
{
"heatFrames": 50
}Dev note: It is possible to go to 3, but then it takes extra heat frames to get out, being almost the same as ending at 2 and going to 3. |
|
Use 9 Power Bombs against the right crumble blocks to overload PLMs and roll through the crumble blocks on the left. Entrance condition: {
"comeInWithGMode": {
"mode": "direct",
"morphed": true
},
"comesThroughToilet": "any"
}Requires: "canComplexGMode"
"h_heatedGMode"
"canPowerBombItemOverloadPLMs"
{
"itemNotCollectedAtNode": 3
}
"canRiskPermanentLossOfAccess"
{
"ammo": {
"type": "PowerBomb",
"count": 9
}
}
"h_heatedGModeOpenDifferentDoor" |
From: 10
Direct G-Mode Morph, On Ledge Above Speed Blocks
To: 6
Speed Blocked Item
Overloading the PLMs can be done with as few as 2 Power Bombs if they are placed precisely. Place them two ledges above the item - to the left of the morph tunnel item. It is important that they are placed on either of the flat tiles, not the sloped tile on the right. Samus can use the second Power Bomb to Crystal Flash to have enough Energy to take a crab hit or to get some Reserve Energy, but then she will not be able to use X-Ray to exit G-Mode, and will require a Reserve Trigger. If Samus uses the first Power Bomb to Crystal Flash, she is no longer able to place a second. Samus then needs to jump into the speed-locked item and hit the crab to trigger Reserves and exit G-Mode. This can be done with HiJump, Gravity, Spring Ball, or Ice. Turn around while inside the item to collect it. Requires: "canPowerBombItemOverloadPLMs"
{
"notable": "G-Mode Overload Speed Blocks then use Global Crab"
}
"canBePatient"
"h_navigateUnderwater"
"h_artificialMorphCrystalFlash"
{
"or": [
"h_artificialMorphPowerBomb",
{
"and": [
{
"itemNotCollectedAtNode": 7
},
"canRiskPermanentLossOfAccess"
]
}
]
}
{
"or": [
"HiJump",
"Gravity",
"canSpringBallJumpMidAir",
{
"and": [
"h_underwaterCrouchJump",
"canTrickyUseFrozenEnemies"
]
}
]
}
{
"autoReserveTrigger": {}
}Dev note: An item is expected at node 6, otherwise this strat isn't useful. It takes 2 PBs to overload PLMs, or only 1 if both items are uncollected. FIXME: If Samus has a lot of tanks, it could take too much time to damage down. Ice can be used to take multiple hits from a crab before it leaves. |
From: 10
Direct G-Mode Morph, On Ledge Above Speed Blocks
To: 11
G-Mode, Below Speed Blocks (Overloaded PLMs)
Overloading the PLMs can be done with as few as 2 Power Bombs if they are placed precisely. Place them two ledges above the item - to the left of the morph tunnel item. It is important that they are placed on either of the flat tiles, not the sloped tile on the right. Requires: "canPowerBombItemOverloadPLMs"
{
"notable": "G-Mode Overload Speed Blocks then use Global Crab"
}
"h_navigateUnderwater"
"h_artificialMorphPowerBomb"
{
"or": [
"h_artificialMorphPowerBomb",
{
"and": [
{
"itemNotCollectedAtNode": 7
},
"canRiskPermanentLossOfAccess"
]
}
]
}Dev note: An item is expected at node 6, otherwise this strat isn't useful. It takes 2 PBs to overload PLMs, or only 1 if both items are uncollected. |
From: 5
Right Door
To: 11
G-Mode Overloaded PLMs (By Bottom Left Door)
PLMs can be overloaded in direct G-Mode with a single Power Bomb if both items are still there and 2 PBs if only one item is. There is a row of tiles that works, just above and to the left of the right door. The row is one tile higher than the horizontal pipe that is part of the door frame, spanning from the left to one tile away from the right wall. Entrance condition: {
"comeInWithGMode": {
"mode": "direct",
"morphed": true
}
}Requires: "canPowerBombItemOverloadPLMs"
{
"notable": "G-Mode Overload PLMs - Power Bomb the Items"
}
"canRiskPermanentLossOfAccess"
{
"or": [
{
"itemNotCollectedAtNode": 7
},
{
"itemNotCollectedAtNode": 8
}
]
}
"h_artificialMorphSpringBall"
"h_artificialMorphPowerBomb"
"h_artificialMorphPowerBomb"Dev note: This canRiskPermanentLossOfAccess variant is only added from this door, as the only other place to use overloaded PLMs would be the top left bomb block, and if you can get here artificially morphed, you can get to the top left and instead use the bomb on the block. |
From: 13
Direct G-Mode Morph (By Bottom Left Door)
To: 7
Top Right Left Item
PLMs can be overloaded in direct G-Mode with a single Power Bomb if both items are still there and 2 PBs if only one item is. There is a row of tiles that works, just above and to the left of the right door. The row is one tile higher than the horizontal pipe that is part of the door frame, spanning from the left to one tile away from the right wall. Requires: "canPowerBombItemOverloadPLMs"
{
"notable": "G-Mode Overload PLMs - Power Bomb the Items"
}
{
"or": [
{
"itemNotCollectedAtNode": 7
},
{
"itemNotCollectedAtNode": 8
}
]
}
"h_artificialMorphSpringBall"
"h_artificialMorphPowerBomb"
"h_artificialMorphPowerBomb"
"h_navigateUnderwater"
"canSnailClimb"
{
"or": [
"Gravity",
{
"and": [
"HiJump",
{
"or": [
"h_underwaterCrouchJump",
"canDownGrab"
]
}
]
}
]
}Dev note: This does not include canRiskPermanentLossOfAccess, as it is only worth doing this strat if the items are there. |
From: 13
Direct G-Mode Morph (By Bottom Left Door)
To: 7
Top Right Left Item
It is barely possible to start a snail climb with just Spring Ball. Get a snail positioned such that it is on the bottom of an overhang above, and sticking out a bit to be usable as a platform. Use Spring Ball to jump and press against the snail for the maximum possible duration, in order to gain enough height to get onto it. PLMs can be overloaded in direct G-Mode with a single Power Bomb if both items are still there and 2 PBs if only one item is. There is a row of tiles that works, just above and to the left of the right door. The row is one tile higher than the horizontal pipe that is part of the door frame, spanning from the left to one tile away from the right wall. Climb one snail to place the Power Bomb, then another to reduce the distance of the wall jump climb. Requires: "canPowerBombItemOverloadPLMs"
{
"notable": "G-Mode Overload PLMs - Power Bomb the Items"
}
{
"or": [
{
"itemNotCollectedAtNode": 7
},
{
"itemNotCollectedAtNode": 8
}
]
}
"h_artificialMorphSpringBall"
"h_artificialMorphPowerBomb"
"h_artificialMorphPowerBomb"
"canSnailClimb"
"canBootless2WideUWJ"Dev note: This does not include canRiskPermanentLossOfAccess, as it is only worth doing this strat if the items are there. |
From: 13
Direct G-Mode Morph (By Bottom Left Door)
To: 7
Top Right Left Item
PLMs can be overloaded in direct G-Mode with a single Power Bomb if both items are still there and 2 PBs if only one item is. There is a row of tiles that works, just above and to the left of the right door. The row is one tile higher than the horizontal pipe that is part of the door frame, spanning from the left to one tile away from the right wall. Requires: "canPowerBombItemOverloadPLMs"
{
"notable": "G-Mode Overload PLMs - Power Bomb the Items"
}
{
"or": [
{
"itemNotCollectedAtNode": 7
},
{
"itemNotCollectedAtNode": 8
}
]
}
"h_usePowerBomb"
"h_usePowerBomb"
"h_navigateUnderwater"
"canSnailClimb"
{
"or": [
"Gravity",
"h_underwaterMaxHeightSpringBallJump",
{
"and": [
"HiJump",
{
"or": [
"h_underwaterCrouchJump",
"canDownGrab"
]
}
]
}
]
}Dev note: This does not include canRiskPermanentLossOfAccess, as it is only worth doing this strat if the items are there. |
From: 13
Direct G-Mode Morph (By Bottom Left Door)
To: 7
Top Right Left Item
PLMs can be overloaded in direct G-Mode with a single Power Bomb if both items are still there and 2 PBs if only one item is. There is a row of tiles that works, just above and to the left of the right door. The row is one tile higher than the horizontal pipe that is part of the door frame, spanning from the left to one tile away from the right wall. Climb one snail to place the Power Bomb, then another to reduce the distance of the wall jump climb. Requires: "canPowerBombItemOverloadPLMs"
{
"notable": "G-Mode Overload PLMs - Power Bomb the Items"
}
{
"or": [
{
"itemNotCollectedAtNode": 7
},
{
"itemNotCollectedAtNode": 8
}
]
}
"h_usePowerBomb"
"h_usePowerBomb"
"canSnailClimb"
"canBootless2WideUWJ"Dev note: This does not include canRiskPermanentLossOfAccess, as it is only worth doing this strat if the items are there. |


