canPreciseGrappleJump (Extreme)
The ability to set up a grapple jump in a precise way or in combination with other movements, including 1) Aiming a grapple fling with a precise angle, 2) Positioning using a mid-air turnaround or wiggle, 3) Performing actions between individual grapple jumps, such as arm pumping, shooting, or kago-ing an enemy, 4) Breaking a water line while grapple jumping.
If carrying a flash suit, special care is needed to avoid activating the shinespark: avoid holding jump during the initial fling, and hold forward after unmorphing in order to spin jump rather than crouch jump; underwater another option is to hold shot (after deselecting Grapple) in order to crouch jump.
Dependencies: canGrappleJump, canUseGrapple, canMidAirMorph, canTrivialMidAirMorph
Strats ()
|
Entrance condition: {
"comeInWithGrappleSwing": {
"blocks": [
{
"position": [
13,
5
],
"environment": "water",
"note": "Mt. Everest"
}
]
}
}Requires: "canPreciseGrappleJump" Dev note: This can work from other setup rooms, but it would have no purpose coming from an air room, since you could just do a running jump through the door and airball. |
|

Entrance condition: {
"comeInWithGrappleSwing": {
"blocks": [
{
"position": [
13,
5
],
"environment": "water",
"note": "Mt. Everest"
},
{
"position": [
7,
3
],
"note": "The Precious Room"
},
{
"position": [
7,
2
],
"note": "The Moat"
}
]
}
}Requires: "canPreciseGrappleJump" |
|

Entrance condition: {
"comeInWithGrappleSwing": {
"blocks": [
{
"position": [
-1,
5
],
"environment": "water",
"note": "Mt. Everest"
},
{
"position": [
6,
4
],
"note": "Grapple Tutorial Room 2"
}
]
}
}Requires: "canPreciseGrappleJump" |
From: 2
Left Side - Top Middle Door
To: 1
Left Side - Top Door

Entrance condition: {
"comeInWithGrappleSwing": {
"blocks": [
{
"position": [
-1,
5
],
"environment": "water",
"note": "Mt. Everest"
},
{
"position": [
8,
3
],
"note": "Grapple Beam Room"
},
{
"position": [
7,
3
],
"note": "Colosseum"
}
]
}
}Requires: "canPreciseGrappleJump" |
From: 3
Left Side - Bottom Middle Door
To: 1
Left Side - Top Door

Entrance condition: {
"comeInWithGrappleSwing": {
"blocks": [
{
"position": [
-1,
5
],
"environment": "water",
"note": "Mt. Everest"
},
{
"position": [
8,
3
],
"note": "Grapple Beam Room"
},
{
"position": [
7,
3
],
"note": "Colosseum"
}
]
}
}Requires: "canPreciseGrappleJump" "h_trickyToCarryFlashSuit" |
|
Entrance condition: {
"comeInWithGrappleSwing": {
"blocks": [
{
"position": [
13,
5
],
"environment": "water",
"note": "Mt. Everest"
},
{
"position": [
7,
3
],
"note": "The Precious Room"
},
{
"position": [
7,
2
],
"note": "The Moat"
}
]
}
}Requires: "canPreciseGrappleJump"
{
"noFlashSuit": {}
} |
|

Entrance condition: {
"comeInWithGrappleSwing": {
"blocks": [
{
"position": [
-1,
5
],
"environment": "water",
"note": "Mt. Everest"
},
{
"position": [
8,
3
],
"note": "Grapple Beam Room"
},
{
"position": [
7,
3
],
"note": "Colosseum"
}
]
}
}Requires: "h_heatProof" "canPreciseGrappleJump" Clears obstacles: door_1 |
|
Entrance condition: {
"comeInWithGrappleSwing": {
"blocks": [
{
"position": [
-1,
5
],
"environment": "water",
"note": "Mt. Everest"
},
{
"position": [
8,
3
],
"note": "Grapple Beam Room"
},
{
"position": [
7,
3
],
"note": "Colosseum"
}
]
}
}Requires: "canPreciseGrappleJump" "h_trickyToCarryFlashSuit" |
|
Entrance condition: {
"comeInWithGrappleSwing": {
"blocks": [
{
"position": [
13,
5
],
"environment": "water",
"note": "Mt. Everest"
},
{
"position": [
7,
3
],
"note": "The Precious Room"
},
{
"position": [
7,
2
],
"note": "The Moat"
}
]
}
}Requires: "canPreciseGrappleJump" "h_trickyToCarryFlashSuit" |
From: 1
Bottom Left Door
To: 4
Top Left Door
Entrance condition: {
"comeInWithGrappleSwing": {
"blocks": [
{
"position": [
-1,
5
],
"environment": "water",
"note": "Mt. Everest"
},
{
"position": [
8,
3
],
"note": "Grapple Beam Room"
},
{
"position": [
7,
3
],
"note": "Colosseum"
}
]
}
}Requires: "canPreciseGrappleJump"
{
"or": [
{
"noFlashSuit": {}
},
"HiJump",
{
"and": [
"canTrickyCarryFlashSuit",
"canBeExtremelyPatient"
]
}
]
}Exit condition: {
"leaveWithGrappleJump": {
"position": "right"
}
}Unlocks doors: {"types":["super","powerbomb"],"requires":[]}
{"types":["missiles"],"requires":["canTrickyGrappleJump"]}Dev note: Opening the door while carrying a flash suit is possible without Hi-Jump but very difficult. |
From: 1
Bottom Left Door
To: 5
Platform Junction Near Top Left Door
Entrance condition: {
"comeInWithGrappleSwing": {
"blocks": [
{
"position": [
6,
4
],
"note": "Grapple Tutorial Room 2"
}
]
}
}Requires: "canPreciseGrappleJump" |
|
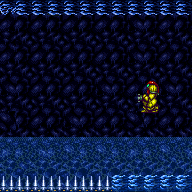
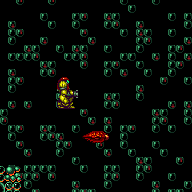
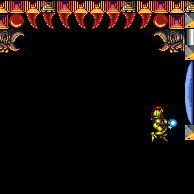
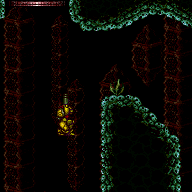
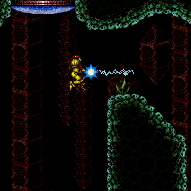
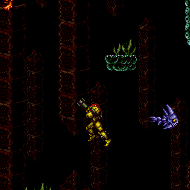
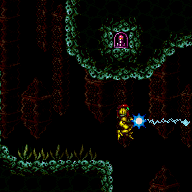
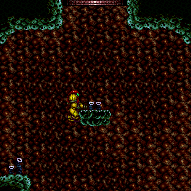
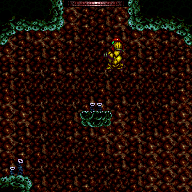
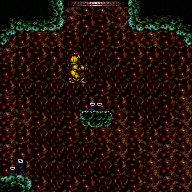
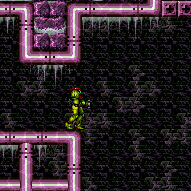
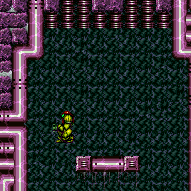
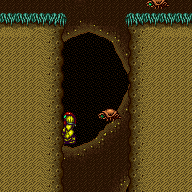
Grapple jump up through the door below. Contact the Skultera while morphing or unmorphing, to avoid knockback. Immediately after the final grapple jump, shoot Grapple to allow Samus to move left, avoiding the overhang and reaching the ledge above. Entrance condition: {
"comeInWithGrappleJump": {
"position": "left"
},
"comesThroughToilet": "no"
}Requires: "HiJump"
"canKago"
"canPreciseGrappleJump"
{
"enemyDamage": {
"enemy": "Skultera",
"type": "contact",
"hits": 1
}
}
"h_trickyToCarryFlashSuit"Dev note: It can be possible to avoid damage from the Skultera but it's very tricky. |
From: 1
Bottom Door
To: 9
Junction Below Speed Blocks
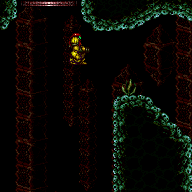
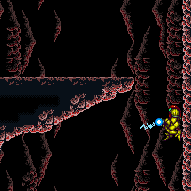
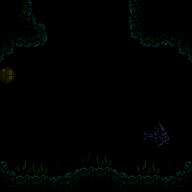
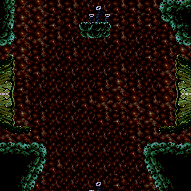
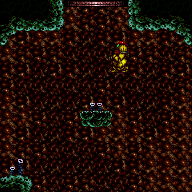
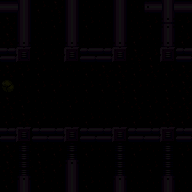
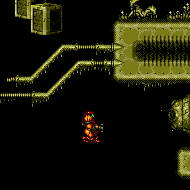
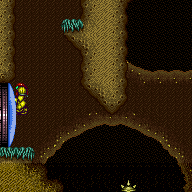
Swing up through the door from a Grapple block in the room below (Mt. Everest). Use arm pumps to move two tiles to the left, to avoid the overhang and floating platform. Entrance condition: {
"comeInWithGrappleSwing": {
"blocks": [
{
"position": [
12,
5
],
"environment": "water",
"note": "Mt. Everest"
}
]
},
"comesThroughToilet": "any"
}Requires: "HiJump" "canPreciseGrappleJump" Dev note: FIXME: This is possible without HiJump, but with much greater difficulty. |
|
Entrance condition: {
"comeInWithGrappleSwing": {
"blocks": [
{
"position": [
7,
3
],
"note": "The Precious Room"
},
{
"position": [
7,
2
],
"note": "The Moat"
}
]
}
}Requires: "canPreciseGrappleJump" |
From: 2
Bottom Right Door
To: 3
Middle Right Door
Entrance condition: {
"comeInWithGrappleSwing": {
"blocks": [
{
"position": [
13,
5
],
"environment": "water",
"note": "Mt. Everest"
}
]
}
}Requires: "canPreciseGrappleJump"
"canKago"
{
"enemyDamage": {
"enemy": "Skultera",
"type": "contact",
"hits": 1
}
} |
From: 2
Bottom Right Door
To: 9
Junction Below Speed Blocks
Arm pump as needed, to avoid bonking a floating platform above. Entrance condition: {
"comeInWithGrappleSwing": {
"blocks": [
{
"position": [
7,
3
],
"note": "The Precious Room"
},
{
"position": [
7,
2
],
"note": "The Moat"
},
{
"position": [
8,
2
],
"note": "Bowling Alley"
},
{
"position": [
7,
3
],
"obstructions": [
[
6,
10
]
],
"note": "Red Brinstar Firefleas Room"
},
{
"position": [
9,
2
],
"note": "Climb Supers Room, Bubble Mountain, Lava Grapple Tunnel"
}
]
}
}Requires: "canPreciseGrappleJump"
{
"or": [
"HiJump",
"canTrickyGrappleJump"
]
}
"h_trickyToCarryFlashSuit" |
From: 2
Bottom Right Door
To: 9
Junction Below Speed Blocks

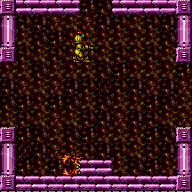
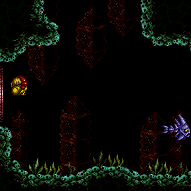
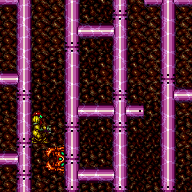
Morph or unmorph while passing through the Skultera, to avoid taking knockback. Arm pump as needed, to move left a tile past the initial ledge, to avoid bonking a floating platform above. Grapple jump quickly to get past the second Skultera, or kago through it as well. Entrance condition: {
"comeInWithGrappleSwing": {
"blocks": [
{
"position": [
13,
5
],
"environment": "water",
"note": "Mt. Everest"
}
]
}
}Requires: "canPreciseGrappleJump"
{
"or": [
"HiJump",
"canTrickyGrappleJump"
]
}
"canKago"
{
"enemyDamage": {
"enemy": "Skultera",
"type": "contact",
"hits": 1
}
}
{
"or": [
{
"enemyDamage": {
"enemy": "Skultera",
"type": "contact",
"hits": 1
}
},
"h_trickyToCarryFlashSuit"
]
} |
From: 1
Left Doorway
To: 4
Top Door
Entrance condition: {
"comeInWithGrappleSwing": {
"blocks": [
{
"position": [
-1,
5
],
"environment": "water",
"note": "Mt. Everest"
},
{
"position": [
8,
3
],
"note": "Grapple Beam Room"
},
{
"position": [
7,
3
],
"note": "Colosseum"
}
]
}
}Requires: {
"or": [
"f_MaridiaTubeBroken",
{
"obstaclesCleared": [
"f_MaridiaTubeBroken"
]
}
]
}
"canPreciseGrappleJump"
"HiJump"
"h_trickyToCarryFlashSuit"Exit condition: {
"leaveWithGrappleJump": {
"position": "any"
}
}Unlocks doors: {"types":["super","powerbomb"],"requires":[]}
{"types":["missiles"],"requires":["never"]} |
|
Entrance condition: {
"comeInWithGrappleSwing": {
"blocks": [
{
"position": [
13,
5
],
"environment": "water",
"note": "Mt. Everest"
},
{
"position": [
7,
3
],
"note": "The Precious Room"
},
{
"position": [
7,
2
],
"note": "The Moat"
},
{
"position": [
8,
2
],
"note": "Bowling Alley"
},
{
"position": [
7,
3
],
"obstructions": [
[
6,
10
]
],
"note": "Red Brinstar Firefleas Room"
}
]
}
}Requires: {
"or": [
"f_MaridiaTubeBroken",
{
"obstaclesCleared": [
"f_MaridiaTubeBroken"
]
}
]
}
"canPreciseGrappleJump"
{
  "or": [
    {
      "noFlashSuit": {}
    },
    "HiJump",
    {
      "and": [
        "canTrickyCarryFlashSuit",
        "canBeExtremelyPatient"
      ]
    }
  ]
}
Exit condition: {
"leaveWithGrappleJump": {
"position": "any"
}
}Unlocks doors: {"types":["super","powerbomb"],"requires":[]}
{"types":["missiles"],"requires":["never"]} |
From: 3
Top Right Doorway
To: 4
Top Door
Entrance condition: {
"comeInWithGrappleSwing": {
"blocks": [
{
"position": [
13,
5
],
"environment": "water",
"note": "Mt. Everest"
},
{
"position": [
7,
3
],
"note": "The Precious Room"
}
]
}
}Requires: {
"or": [
"f_MaridiaTubeBroken",
{
"obstaclesCleared": [
"f_MaridiaTubeBroken"
]
}
]
}
"canPreciseGrappleJump"Exit condition: {
"leaveWithGrappleJump": {
"position": "right"
}
}Unlocks doors: {"types":["super","powerbomb"],"requires":[]}
{"types":["missiles"],"requires":["never"]} |
From: 3
Top Right Doorway
To: 4
Top Door
Entrance condition: {
"comeInWithGrappleSwing": {
"blocks": [
{
"position": [
13,
5
],
"environment": "water",
"note": "Mt. Everest"
},
{
"position": [
7,
3
],
"note": "The Precious Room"
}
]
}
}Requires: {
"or": [
"f_MaridiaTubeBroken",
{
"obstaclesCleared": [
"f_MaridiaTubeBroken"
]
}
]
}
"canPreciseGrappleJump"
"HiJump"
"h_trickyToCarryFlashSuit"Exit condition: {
"leaveWithGrappleJump": {
"position": "any"
}
}Unlocks doors: {"types":["super","powerbomb"],"requires":[]}
{"types":["missiles"],"requires":["never"]} |
From: 3
Top Right Doorway
To: 4
Top Door
Entrance condition: {
"comeInWithGrappleSwing": {
"blocks": [
{
"position": [
7,
2
],
"note": "The Moat"
},
{
"position": [
8,
2
],
"note": "Bowling Alley"
},
{
"position": [
7,
3
],
"obstructions": [
[
6,
10
]
],
"note": "Red Brinstar Firefleas Room"
}
]
}
}Requires: {
"or": [
"f_MaridiaTubeBroken",
{
"obstaclesCleared": [
"f_MaridiaTubeBroken"
]
}
]
}
"canPreciseGrappleJump"
"HiJump"
"h_trickyToCarryFlashSuit"Exit condition: {
"leaveWithGrappleJump": {
"position": "left"
}
}Unlocks doors: {"types":["super","powerbomb"],"requires":[]}
{"types":["missiles"],"requires":["never"]} |
|
Requires: "canPreciseGrappleJump" Exit condition: {
"leaveWithGrappleJump": {
"position": "right"
}
}Dev note: FIXME: It's probably possible to leave in 'left' position, with an exceptionally precise swing and maybe a bit of arm pumping. |
|
Entrance condition: {
"comeInWithGrappleSwing": {
"blocks": [
{
"position": [
-1,
5
],
"environment": "water",
"note": "Mt. Everest"
},
{
"position": [
8,
3
],
"note": "Grapple Beam Room"
},
{
"position": [
7,
3
],
"note": "Colosseum"
}
]
}
}Requires: "canPreciseGrappleJump" |
|

Entrance condition: {
"comeInWithGrappleSwing": {
"blocks": [
{
"position": [
6,
2
],
"note": "Lava Grapple Tunnel"
}
]
}
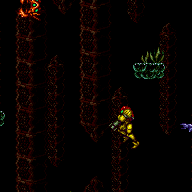
}Requires: "canPreciseGrappleJump" "h_trickyToCarryFlashSuit" Clears obstacles: door_1 |
|
Entrance condition: {
"comeInWithGrappleSwing": {
"blocks": [
{
"position": [
13,
5
],
"environment": "water",
"note": "Mt. Everest"
},
{
"position": [
7,
3
],
"note": "The Precious Room"
},
{
"position": [
7,
2
],
"note": "The Moat"
}
]
}
}Requires: "canPreciseGrappleJump" |
|

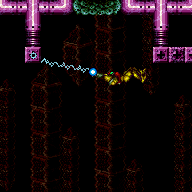
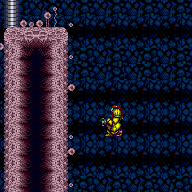
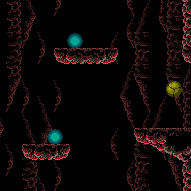
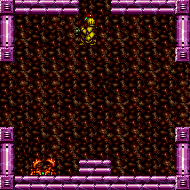
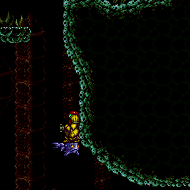
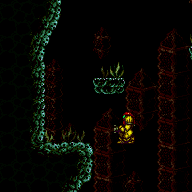
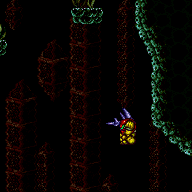
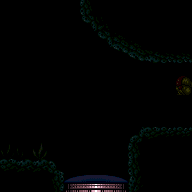
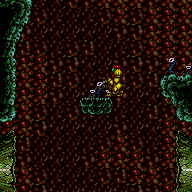
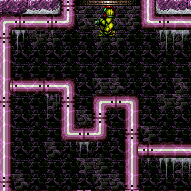
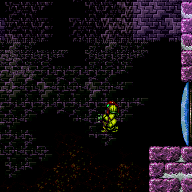
This is for entering from Mt. Everest. Samus must be carefully positioned in order to make it up to the top of the room. One method is to press against the pipes jutting out on either side of the room, turn around while morphed, then arm pump in between grapple jumps in order to move one tile toward the center of the room. Entrance condition: {
"comeInWithGrappleSwing": {
"blocks": [
{
"position": [
-1,
5
],
"environment": "water",
"note": "Mt. Everest"
}
]
}
}Requires: "HiJump" "canPreciseGrappleJump" Dev note: This can also work well enough with other setup rooms such as Colosseum, but given that this strat assumes having HiJump, it would be easier to just cross-room jump in those cases. |
|
Entrance condition: {
"comeInWithGrappleSwing": {
"blocks": [
{
"position": [
-1,
5
],
"environment": "water",
"note": "Mt. Everest"
},
{
"position": [
8,
3
],
"note": "Grapple Beam Room"
},
{
"position": [
7,
3
],
"note": "Colosseum"
},
{
"position": [
6,
4
],
"note": "Grapple Tutorial Room 2"
}
]
}
}Requires: "canPreciseGrappleJump" |
|
Entrance condition: {
"comeInWithGrappleSwing": {
"blocks": [
{
"position": [
7,
3
],
"note": "The Precious Room"
},
{
"position": [
7,
2
],
"note": "The Moat"
}
]
}
}Requires: "canPreciseGrappleJump" |