canSpaceJumpWaterEscape (Expert)

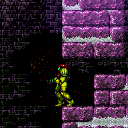
Using HiJump to escape the waterline during a Space Jump Water Bounce.
Dependencies: canSuitlessMaridia, canSpaceJumpWaterBounce
Dev note: Escaping tidal water without HiJump could be added as a more advanced tech.
Strats ()
|
Requires: "SpaceJump"
{
"or": [
"canWallJump",
{
"and": [
"canSpaceJumpWaterEscape",
"HiJump"
]
}
]
}Dev note: Space Jump with HiJump alone is enough if the door can be opened. |
|

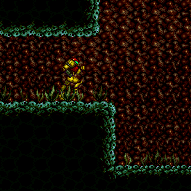
Letting Mama Turtle sleep, climb the right wall using HiJump (with a down-grab) and escape the water with Space Jump . Requires: "HiJump"
"canDownGrab"
{
"or": [
{
"and": [
"canSpaceJumpWaterBounce",
"canWallJump"
]
},
"canSpaceJumpWaterEscape"
]
} |
|
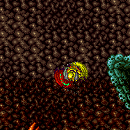

Escape the water using a well-timed Space Jump water bounce followed by a frame-perfect Space jump just above the water, at a specific time when the tide is descending. Requires: {
"notable": "Space Jump Escape"
}
"canSpaceJumpWaterEscape"
"canInsaneJump" |
|
Requires: {
"or": [
{
"and": [
"canSpaceJumpWaterBounce",
"canWallJump"
]
},
{
"and": [
"canSpaceJumpWaterEscape",
"HiJump"
]
}
]
} |
|
Requires: {
"resetRoom": {
"nodes": [
1
]
}
}
{
"or": [
{
"and": [
"Gravity",
{
"or": [
{
"and": [
"HiJump",
"canSpeedyJump",
"canTrickyJump",
{
"cycleFrames": 300
}
]
},
{
"and": [
"HiJump",
"canWallJump",
{
"cycleFrames": 310
}
]
},
{
"and": [
"SpaceJump",
{
"cycleFrames": 360
}
]
},
{
"and": [
"canTrickyWallJump",
{
"cycleFrames": 380
}
]
},
{
"and": [
"canSpringBallJumpMidAir",
{
"or": [
"HiJump",
"canSpringwall",
{
"and": [
"canTrickySpringBallJump",
"canTrickyJump"
]
}
]
},
{
"cycleFrames": 340
},
"h_doubleEquipmentScreenCycleFrames"
]
},
{
"and": [
"canDoubleBombJump",
{
"cycleFrames": 830
}
]
}
]
}
]
},
{
"and": [
"canSuitlessMaridia",
{
"or": [
{
"and": [
"HiJump",
"canTrickyJump",
"canMidairWiggle",
"canTrickyWallJump",
{
"cycleFrames": 360
}
]
},
{
"and": [
"HiJump",
"canSpaceJumpWaterBounce",
"canWallJump",
{
"cycleFrames": 390
}
]
},
{
"and": [
"HiJump",
"canSpaceJumpWaterEscape",
{
"cycleFrames": 430
}
]
},
{
"and": [
{
"notable": "Suitless Bootless Space Jump"
},
"canSpaceJumpWaterBounce",
"canWallJump",
{
"cycleFrames": 440
}
]
},
{
"and": [
"HiJump",
"canTrickySpringBallJump",
{
"or": [
"canTrickyJump",
"canFlatleyJump"
]
},
{
"cycleFrames": 360
},
"h_doubleEquipmentScreenCycleFrames"
]
}
]
}
]
}
]
}Resets obstacles: R-Mode Farm cycle drops: 1 Cacatac |
|
Requires: {
"resetRoom": {
"nodes": [
2
]
}
}
{
"or": [
{
"and": [
"Gravity",
{
"or": [
{
"and": [
"canWallJump",
{
"cycleFrames": 740
}
]
},
{
"and": [
"SpaceJump",
{
"cycleFrames": 790
}
]
},
{
"and": [
"HiJump",
"canTrickyDashJump",
{
"cycleFrames": 795
}
]
},
{
"and": [
"canSpringBallJumpMidAir",
{
"or": [
"HiJump",
"canSpringFling"
]
},
{
"cycleFrames": 920
},
"h_doubleEquipmentScreenCycleFrames"
]
},
{
"and": [
"canDiagonalBombJump",
{
"cycleFrames": 1380
}
]
}
]
}
]
},
{
"and": [
"canSuitlessMaridia",
{
"or": [
{
"and": [
"HiJump",
"canSpaceJumpWaterBounce",
"canWallJump",
{
"cycleFrames": 810
}
]
},
{
"and": [
"HiJump",
"canSpaceJumpWaterEscape",
{
"cycleFrames": 850
}
]
},
{
"and": [
"HiJump",
"h_underwaterMaxHeightSpringBallJump",
"canTrickyJump",
"canStationaryLateralMidAirMorph",
{
"cycleFrames": 1070
},
"h_doubleEquipmentScreenCycleFrames"
]
}
]
}
]
}
]
}Resets obstacles: R-Mode Farm cycle drops: 2 Cacatac |
From: 2
Right Door
To: 4
Top Right Ledge Junction

Use Space Jump to break out of the water. Afterward, it's easiest to use a wall jump to gain height but this is not required. Requires: "HiJump"
{
"or": [
"canSpaceJumpWaterEscape",
{
"and": [
"canSpaceJumpWaterBounce",
"canWallJump"
]
}
]
} |
From: 3
Junction Left of Morph Tunnel
To: 1
Left Door
Requires: "HiJump"
{
"or": [
"canSpaceJumpWaterEscape",
{
"and": [
"canSpaceJumpWaterBounce",
"canWallJump"
]
}
]
} |
From: 5
Bottom Middle Junction
To: 6
Junction Right of Morph Tunnel
Requires: "canSuitlessMaridia"
"HiJump"
{
"spikeHits": 1
}
{
"or": [
"Gravity",
"canWallJump",
"canSpaceJumpWaterEscape",
"canSpringBallJumpMidAir",
{
"and": [
"canJumpIntoIBJ",
"h_useSpringBall"
]
},
{
"spikeHits": 1
}
]
}Dev note: The first spike pit on the right is considered unavoidable, as if the player has Gravity and HiJump, the jump is quite tricky. In that scenario, the player will hit the spikes or need the strat with canDisableEquipment. |
From: 6
Junction Right of Morph Tunnel
To: 5
Bottom Middle Junction
Requires: "canSuitlessMaridia"
{
"or": [
{
"spikeHits": 1
},
"canTrickySpringBallJump",
{
"and": [
"HiJump",
{
"or": [
"canWallJump",
"canDownGrab",
"canSpaceJumpWaterEscape",
"canSpringBallJumpMidAir"
]
}
]
}
]
}
{
"or": [
{
"spikeHits": 1
},
"HiJump"
]
} |
|
Requires: "HiJump" "canSpaceJumpWaterEscape" |
|

Requires: "HiJump"
{
"or": [
{
"and": [
"canSpaceJumpWaterBounce",
"canWallJump"
]
},
"canSpaceJumpWaterEscape"
]
} |
From: 7
Below Morph Tunnel Junction
To: 5
Morph Tunnel Junction

Escape the water with either HiJump or Space Jump, then carefully jump and morph into the tunnel. Requires: "canSuitlessMaridia"
"canMidAirMorph"
{
"or": [
{
"and": [
"HiJump",
"canPreciseWallJump",
"canWallJumpInstantMorph"
]
},
{
"and": [
"HiJump",
"canSpaceJumpWaterEscape"
]
},
{
"and": [
"canPreciseWallJump",
"canSpaceJumpWaterBounce"
]
}
]
} |
|

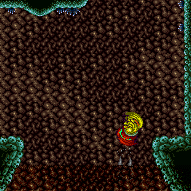
Watch for the water level to start falling to time the jump to escape at its lowest point. Then use SpaceJump to splash on top of the water. Time another jump with the water level or walljump to fully escape the water. Requires: {
"or": [
{
"and": [
"canSpaceJumpWaterBounce",
"canWallJump"
]
},
"canSpaceJumpWaterEscape"
]
}
"HiJump"
{
"or": [
{
"enemyDamage": {
"enemy": "Menu",
"type": "contact",
"hits": 1
}
},
"ScrewAttack",
"canTrickyWallJump",
"canPseudoScrew",
{
"haveBlueSuit": {}
},
"h_pauseAbuseMinimalReserveRefill"
]
} |