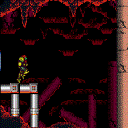
canSuitlessLavaDive (Hard)
Navigating deep lava without lava immunity, or deep acid. This isn't required for entering shallow lava or acid in which Samus can easily jump out of.
Strats ()
|
Samus will be slowed by lava if SpeedBooster is equipped, even with Gravity. Requires: {
"or": [
"h_lavaProof",
"canSuitlessLavaDive"
]
}
"Gravity"
"SpaceJump"
{
"heatFrames": 340
}
{
"lavaFrames": 280
}
{
"or": [
"canDisableEquipment",
{
"and": [
{
"heatFrames": 120
},
{
"lavaFrames": 120
}
]
}
]
}
|
|
From: 2
Right Door
To: 3
Above Lava Junction
Notable: true 
BounceBall into the Lava, Unmorphing with good timing to sink faster and drift effeciently towards the bottom right Namihe. Walljump at about eye height (4 pixel window) to gain enough height to reach the center portion of ceiling. While rising, wiggle to shrink Samus' hitbox. Some walljump positions will not need to wiggle, when walljumping far away from the Namihe. Jumping, from the wall, around the next lowest overhang is very precise and taking any extra time to position will increase the amount of lava damage being taken. It may help to disable HiJump for this part. Then Walljump again to exit the Lava and reach the left ledge. Requires: "canSuitlessLavaDive"
"canUseEnemies"
"HiJump"
"canBounceBall"
"canMidairWiggle"
"canInsaneWalljump"
{
"lavaFrames": 392
}
{
"heatFrames": 515
}
|
|
Notable: true 
Store the shinespark on the last possible pixels of runway. Quickly drop to the nearby namihe and damage boost using its flame. Hold the damage boost until just before being below the above platform and spark upwards Entrance condition: {
"comeInShinecharging": {
"length": 4,
"openEnd": 1
}
}
Requires: "Gravity"
{
"or": [
"h_lavaProof",
"canSuitlessLavaDive"
]
}
"canShinechargeMovementTricky"
"canHorizontalDamageBoost"
{
"shinespark": {
"frames": 33
}
}
{
"heatFrames": 320
}
{
"lavaFrames": 155
}
{
"enemyDamage": {
"enemy": "Namihe",
"type": "fireball",
"hits": 1
}
}
|
|
From: 2
Right Door
To: 4
Lava, Left Wall
Jump into the door frame so that Samus is falling when entering this room. Morph before reaching the lava and Bounce down to the bottom. Entrance condition: {
"comeInJumping": {
"minTiles": 4,
"speedBooster": false
}
}
Requires: {
"or": [
"h_lavaProof",
"canSuitlessLavaDive"
]
}
"canCarefulJump"
"canBounceBall"
{
"heatFrames": 330
}
{
"lavaFrames": 290
}
|
|
From: 2
Right Door
To: 4
Lava, Left Wall
Build up a little run speed and do a small jump into the lava. Morph before reaching the lava, Bounce, and Unmorph shortly after sink slightly before floating down to the stairs. Requires: {
"or": [
"h_lavaProof",
"canSuitlessLavaDive"
]
}
"canTrickyJump"
"canBounceBall"
{
"heatFrames": 435
}
{
"lavaFrames": 305
}
|
|
Requires: {
"or": [
"h_lavaProof",
"canSuitlessLavaDive"
]
}
"Gravity"
{
"heatFrames": 250
}
{
"lavaFrames": 190
}
{
"or": [
"canDisableEquipment",
{
"and": [
{
"heatFrames": 50
},
{
"lavaFrames": 50
}
]
}
]
}
|
|
From: 2
Right Door
To: 5
Lava, Center Namihe
Jump into the door frame so that Samus is falling when entering this room. Morph before reaching the lava, Bounce, and Unmorph shortly after sink slightly before floating down to the stairs. Entrance condition: {
"comeInJumping": {
"minTiles": 4,
"speedBooster": false
}
}
Requires: {
"or": [
"h_lavaProof",
"canSuitlessLavaDive"
]
}
"canCarefulJump"
"canBounceBall"
{
"heatFrames": 230
}
{
"lavaFrames": 190
}
|
|
From: 2
Right Door
To: 5
Lava, Center Namihe
Build up a little run speed and do a small jump into the lava. Morph before reaching the lava, Bounce, and Unmorph shortly after sink slightly before floating down to the stairs. Requires: {
"or": [
"h_lavaProof",
"canSuitlessLavaDive"
]
}
"canTrickyJump"
"canBounceBall"
{
"heatFrames": 330
}
{
"lavaFrames": 200
}
|
|
Requires: {
"or": [
"h_lavaProof",
"canSuitlessLavaDive"
]
}
{
"heatFrames": 330
}
{
"lavaFrames": 270
}
|
|
From: 3
Above Lava Junction
To: 5
Lava, Center Namihe
Requires: {
"or": [
"h_lavaProof",
"canSuitlessLavaDive"
]
}
{
"heatFrames": 130
}
{
"lavaFrames": 80
}
{
"or": [
"Gravity",
{
"and": [
{
"heatFrames": 20
},
{
"lavaFrames": 20
}
]
}
]
}
|
|
From: 4
Lava, Left Wall
To: 3
Above Lava Junction
Notable: true 
Begin on top of the lower left Namihe Jump into a double IBJ with such timing that Samus passes above the fired flame and such a way that there is no horizontal speed. A forward jump with run not held will work. Begin diagonal bomb jumping once past the start of the 2nd spike group from the top. Requires: "h_heatProof"
"Gravity"
{
"or": [
"h_lavaProof",
"canSuitlessLavaDive"
]
}
"h_canJumpIntoIBJ"
"h_canDoubleBombJump"
"h_canDiagonalBombJump"
"h_canStaggeredIBJ"
"canInsaneJump"
{
"heatFrames": 1560
}
{
"lavaFrames": 1520
}
|
|
From: 4
Lava, Left Wall
To: 3
Above Lava Junction
Notable: true 
Enter the Bottom-Left Namihe by Kagoing inside of it. Wait for a second hit to gain I-Frames and then very quickly walljump up the spikes and across to the right side wall. Requires: "canSuitlessLavaDive"
"canInsaneWalljump"
"canInsaneJump"
"canIframeSpikeJump"
"canStaggeredWalljump"
"canFastWalljumpClimb"
"canUseEnemies"
"canKago"
{
"heatFrames": 510
}
{
"lavaFrames": 480
}
{
"enemyDamage": {
"enemy": "Namihe",
"type": "kago",
"hits": 2
}
}
|
|
From: 4
Lava, Left Wall
To: 3
Above Lava Junction
Notable: true 
Double springball jump out of a walljump starting from the top of the left wall Namihe. Requires: "canSuitlessLavaDive"
"canUseEnemies"
"canDoubleSpringBallJumpMidAir"
"canSpringwall"
"canPreciseWalljump"
{
"heatFrames": 270
}
{
"lavaFrames": 240
}
|
|
Walljump off of the lower half of the Upper-Left Namihe to cross to the right side wall. Continue Walljumping up from there, waiting for the above flame to pass if it is in the way. Requires: "HiJump"
"canSuitlessLavaDive"
"canUseEnemies"
"canTrickyJump"
"canStaggeredWalljump"
{
"heatFrames": 270
}
{
"lavaFrames": 240
}
|
|
Lava physics will reduce Samus' horizontal momentum. Requires: {
"or": [
"h_lavaProof",
"canSuitlessLavaDive"
]
}
"canSpringwall"
"canTrickySpringBallJump"
"HiJump"
"canUseEnemies"
{
"heatFrames": 195
}
{
"lavaFrames": 180
}
|
|
Samus will be slowed by lava if SpeedBooster is equipped, even with Gravity. Requires: "Gravity"
{
"or": [
"h_lavaProof",
"canSuitlessLavaDive"
]
}
{
"or": [
{
"and": [
"canDisableEquipment",
{
"heatFrames": 270
},
{
"lavaFrames": 230
}
]
},
{
"and": [
"canDisableEquipment",
"SpaceJump",
"canCarefulJump",
{
"heatFrames": 225
},
{
"lavaFrames": 180
}
]
},
{
"and": [
{
"heatFrames": 330
},
{
"lavaFrames": 300
}
]
}
]
}
|
|
Samus will be slowed by lava if SpeedBooster is equipped, even with Gravity. Requires: {
"or": [
"h_lavaProof",
"canSuitlessLavaDive"
]
}
{
"or": [
{
"and": [
"HiJump",
{
"heatFrames": 270
},
{
"lavaFrames": 270
}
]
},
{
"and": [
{
"heatFrames": 295
},
{
"lavaFrames": 295
}
]
}
]
}
{
"or": [
{
"and": [
"SpaceJump",
"canCarefulJump",
{
"heatFrames": 100
}
]
},
{
"and": [
"canWalljump",
{
"heatFrames": 60
}
]
},
{
"and": [
"canSpringBallJumpMidAir",
{
"heatFrames": 100
}
]
},
{
"and": [
"canBombJumpWaterEscape",
{
"heatFrames": 180
},
{
"lavaFrames": 30
}
]
},
{
"and": [
"HiJump",
{
"heatFrames": 60
},
{
"lavaFrames": 10
}
]
}
]
}
|
|
From: 5
Lava, Center Namihe
To: 3
Above Lava Junction
Align with the above platform and scroll the camera left by walking into the left side of the bottom-most tiles. Freeze both left side Namihes and begin bomb jumping Requires: "Gravity"
{
"or": [
"h_lavaProof",
"canSuitlessLavaDive"
]
}
"h_canJumpIntoIBJ"
"h_canDoubleBombJump"
"Plasma"
"Ice"
"canCameraManip"
{
"heatFrames": 1040
}
{
"lavaFrames": 1020
}
|
|
From: 5
Lava, Center Namihe
To: 3
Above Lava Junction
Double Spring Ball Jump from below the Lowest-Right Namihe. Double Spring Ball Jumps are easier in Lava than in Water. Requires: "canSuitlessLavaDive"
"h_canDoubleSpringBallJumpWithHiJump"
{
"heatFrames": 255
}
{
"lavaFrames": 225
}
|
|
From: 5
Lava, Center Namihe
To: 3
Above Lava Junction
Gravity jump from below the Lowest-Right Namihe. A crouch jump or walljump can help exit the lava in one jump, but are not required. Requires: "canSuitlessLavaDive"
"canGravityJump"
"HiJump"
{
"heatFrames": 155
}
{
"gravitylessLavaFrames": 125
}
{
"lavaFrames": 20
}
|
|
From: 5
Lava, Center Namihe
To: 3
Above Lava Junction
Gravity jump from below the Lowest-Right Namihe. Walljump using the right side wall to reach the top of the lava, avoiding the Namihe fireball. Turning Gravity Suit back on can reduce lava damage, but may make the walljumps more difficult. Requires: "canSuitlessLavaDive"
"canGravityJump"
"canStaggeredWalljump"
{
"heatFrames": 290
}
{
"gravitylessLavaFrames": 230
}
{
"lavaFrames": 20
}
|
|
Notable: true 
Use the bottommost right side namihe to generate a flame and walk with it to the bottommost left namihe head Use a turnaround animation as Samus is hit by the flame to cancel out knockback frames. While invulnerability frames are active, walljump up the spikes either 2 or 3 times and jump accross to catch the middle wall and climb from there. Requires: "canSuitlessLavaDive"
"canIframeSpikeJump"
"canStaggeredWalljump"
"canFastWalljumpClimb"
"canUseEnemies"
"canCameraManip"
{
"heatFrames": 600
}
{
"lavaFrames": 500
}
{
"enemyDamage": {
"enemy": "Namihe",
"type": "fireball",
"hits": 1
}
}
|
|
Spin-jump across both sets of lava, trying to minimize the time spent in lava. To get onto the first pillar, either use a wall jump off the pillar, or use the Tripper briefly as a platform by crouch jumping or down grabbing onto it. Requires: "canSuitlessLavaDive"
{
"heatFrames": 750
}
{
"lavaFrames": 120
}
{
"or": [
"canWalljump",
{
"and": [
{
"or": [
"canCrouchJump",
"canDownGrab"
]
},
{
"heatFrames": 110
},
{
"lavaFrames": 20
}
]
}
]
}
|
|
Use the Tripper to cross the first lava pit while avoiding all damage from the spikes and lava. If you do not have Morph, this is tricky but can be done by carefully timing a jump against the pillar and releasing the d-pad inputs, to land on the Tripper as early as possible. This allows the Tripper to sink low enough that crouching on the Tripper is enough to avoid spike damage. From the Tripper, run and jump directly onto the first pillar past the shutter; it can help to moonwalk back left on the Tripper to maximize run speed for the jump. From the pillar, run and jump directly into the lava rather than waiting for the second Tripper. Perform quick spin jumps to minimize lava damage. Requires: {
"or": [
"canTrickyJump",
"Morph"
]
}
"canSuitlessLavaDive"
{
"heatFrames": 760
}
{
"lavaFrames": 60
}
|
|
Spin-jump across both sets of lava, trying to minimize the time spent in lava. To get onto the first pillar, either use a wall jump off the pillar, or use the Tripper briefly as a platform by crouch jumping or down grabbing onto it. Requires: "canSuitlessLavaDive"
{
"heatFrames": 700
}
{
"lavaFrames": 130
}
{
"or": [
"canWalljump",
{
"and": [
{
"or": [
"canCrouchJump",
"canDownGrab"
]
},
{
"heatFrames": 220
},
{
"lavaFrames": 70
}
]
}
]
}
|
|
Wait for the Tripper to approach the right platform, then run onto and off its left side. Spin jump to the left one time, then jump up onto the right side of the Tripper. Run to the left and jump directly onto the first pillar after the shutter. Spin jump across the remaining lava, trying to minimize the time spent in lava. Requires: "canSuitlessLavaDive"
"canTrickyJump"
{
"heatFrames": 780
}
{
"lavaFrames": 100
}
|
|
Ride the first Tripper, using Morph to avoid spike damage. From the Tripper, run and jump directly onto the first pillar after the shutter. Spin jump across the remaining lava, trying to minimize the time spent in lava. Requires: "canSuitlessLavaDive"
"Morph"
{
"heatFrames": 780
}
{
"lavaFrames": 70
}
|
|
Requires: "canSuitlessLavaDive"
"Morph"
{
"or": [
{
"and": [
"canCarefulJump",
"canMockball",
{
"lavaFrames": 180
}
]
},
{
"lavaFrames": 220
}
]
}
{
"or": [
{
"and": [
"canSpaceJumpWaterBounce",
{
"lavaFrames": 120
}
]
},
{
"lavaFrames": 150
}
]
}
|
|
Requires: "h_canNavigateHeatRooms"
"canSuitlessLavaDive"
"Gravity"
{
"or": [
"HiJump",
"canWalljump",
"canSpringBallJumpMidAir",
"canGravityJump",
{
"and": [
"h_canIBJ",
{
"acidFrames": 1050
},
{
"heatFrames": 1050
}
]
}
]
}
{
"acidFrames": 100
}
{
"heatFrames": 255
}
|
|
From: 1
Top Right Door
To: 3
Acid Chozo Statue (locked)
Try to jump to the far left side raised ledges to reduce the time spent in acid. This could mean turning off HiJump, or airballing to jump farther. Requires: "h_canNavigateHeatRooms"
"canSuitlessLavaDive"
{
"or": [
"HiJump",
"canWalljump",
"canSpringBallJumpMidAir"
]
}
{
"acidFrames": 116
}
{
"heatFrames": 285
}
|
|
From: 1
Top Right Door
To: 3
Acid Chozo Statue (locked)
There is a hole in the left side wall that Samus can fit into by shrinking her hitbox. Once in the wall, stand up if crouched then turnaround into a buffered spinjump to jump out of the acid. Requires: "h_canNavigateHeatRooms"
"canPartialFloorClip"
"canSuitlessLavaDive"
{
"or": [
{
"and": [
"canLateralMidAirMorph",
"canDownBack",
"canTrickyJump",
{
"acidFrames": 108
}
]
},
{
"and": [
"canTrickyJump",
{
"heatFrames": 30
},
{
"acidFrames": 136
}
]
},
{
"and": [
{
"heatFrames": 90
},
{
"acidFrames": 216
}
]
}
]
}
{
"heatFrames": 285
}
|
|
From: 2
Right Door
To: 3
Bottom Platform Junction
Notable: true 
Dive into the acid to the left of the first floating platform to quickly sink to the bottom of the room. It is possible to jump directly over the pirate at the bottom of the ramp directly to the gap between platforms. Falling in this way will land between platforms at the bottom of the room unless Samus slows or catches herself on the way down. Requires: "h_canNavigateHeatRooms"
"canSuitlessLavaDive"
{
"or": [
"SpaceJump",
"canTrickyJump",
{
"and": [
"canLateralMidAirMorph",
"canCarefulJump"
]
},
{
"and": [
"ScrewAttack",
"canCarefulJump"
]
},
{
"and": [
"h_heatProof",
{
"enemyKill": {
"enemies": [
[
"Yellow Space Pirate (standing)"
]
]
}
},
"canCarefulJump"
]
}
]
}
{
"heatFrames": 140
}
{
"or": [
"canResetFallSpeed",
"canPreciseWalljump",
{
"and": [
{
"heatFrames": 60
},
{
"acidFrames": 60
}
]
}
]
}
{
"heatFrames": 330
}
{
"acidFrames": 330
}
|
|
From: 2
Right Door
To: 4
Center Floating Platforms Junction
Notable: true
Jump over the pirate and fall straight down to land on an upper-middle floating platform. Requires: "h_canNavigateHeatRooms"
"canSuitlessLavaDive"
{
"heatFrames": 180
}
{
"acidFrames": 80
}
|
|
From: 2
Right Door
To: 5
Below Left Door Junction
Notable: true 
Enter the room blue with very low run speed (e.g. with a 4-tap). Use a precisely timed jump to bonk the large stalagtite in the ceiling and fall through both pirates, killing them with the blue speed. Enter the acid while aiming down to shrink Samus' hitbox. This strat works with all combinations of movement items and suits. Entrance condition: {
"comeInShinecharging": {
"length": 9,
"gentleDownTiles": 4,
"openEnd": 1
}
}
Requires: "h_canNavigateHeatRooms"
"canInsaneJump"
"canSuitlessLavaDive"
"canSlowShortCharge"
{
"heatFrames": 330
}
{
"acidFrames": 210
}
|
|
From: 2
Right Door
To: 5
Below Left Door Junction
Notable: true
Begin running from the top of the second slope and jump at the bottom of the third slope, bonking the large stalagtite in the ceiling. Kill the first pirate with Screw Attack (or ahead of time with Charge+Plasma), and pass through the second pirate using a charged plasma shot. Enter the acid while aiming down to shrink Samus' hitbox. This strat works with all combinations of movement items and suits. Requires: "h_canNavigateHeatRooms"
"canInsaneJump"
"canSuitlessLavaDive"
"Charge"
"Plasma"
"canHitbox"
{
"or": [
"ScrewAttack",
{
"heatFrames": 210
}
]
}
{
"heatFrames": 330
}
{
"acidFrames": 210
}
|
|
From: 3
Bottom Platform Junction
To: 1
Left Door
Notable: true
There is just enough runway below the left door to build a shinespark. Requires: "h_heatProof"
"Gravity"
"canSuitlessLavaDive"
{
"canShineCharge": {
"usedTiles": 13,
"openEnd": 1
}
}
{
"shinespark": {
"frames": 55
}
}
{
"acidFrames": 600
}
|
|
From: 3
Bottom Platform Junction
To: 1
Left Door
Notable: true
SpaceJump diagonally towards the door through the acid. Requires: "h_canNavigateHeatRooms"
"canSuitlessLavaDive"
"Gravity"
"SpaceJump"
{
"or": [
{
"and": [
{
"heatFrames": 330
},
{
"acidFrames": 330
}
]
},
{
"and": [
"HiJump",
{
"heatFrames": 220
},
{
"acidFrames": 220
}
]
}
]
}
|
|
From: 3
Bottom Platform Junction
To: 5
Below Left Door Junction
Notable: true
Avoid the pirate while moving through the acid to get closer to the wall. Requires: "h_canNavigateHeatRooms"
"canSuitlessLavaDive"
{
"or": [
{
"and": [
"Gravity",
{
"heatFrames": 120
},
{
"acidFrames": 120
}
]
},
{
"and": [
{
"heatFrames": 170
},
{
"acidFrames": 170
}
]
}
]
}
|
|
From: 5
Below Left Door Junction
To: 1
Left Door
Notable: true
Acid allows for more time than water to perform Spring Ball jumps. This gives just barely enough time to fit in three spring ball jumps. Requires: "h_heatProof"
"canSuitlessLavaDive"
"canCrouchJump"
"h_canDoubleSpringBallJumpWithHiJump"
"canTrickyJump"
{
"acidFrames": 330
}
{
"acidFrames": 1000
}
|
|
From: 1
Left Door
To: 2
Right Door
Notable: true 
Cross the Pillar Room with Bombs and minimal damage. Some acid damage is expected, but any mistakes greatly increases the time spent in acid. Entrance condition: {
"comeInRunning": {
"minTiles": 1,
"speedBooster": "any"
}
}
Requires: "h_canUseMorphBombs"
"canWallJumpInstantMorph"
"canInsaneJump"
"canResetFallSpeed"
"canUnmorphBombBoost"
"canSuitlessLavaDive"
{
"heatFrames": 1320
}
{
"acidFrames": 128
}
|
|
From: 1
Left Door
To: 2
Right Door
Notable: true
Cross the Pillar Room with Bombs and minimal damage. Acid damage is expected, but any mistakes greatly increases the time spent in acid. Entrance condition: {
"comeInRunning": {
"minTiles": 1,
"speedBooster": "any"
}
}
Requires: "h_canUseMorphBombs"
"Gravity"
"canResetFallSpeed"
"canJumpIntoIBJ"
"canSuitlessLavaDive"
{
"enemyDamage": {
"enemy": "Puromi",
"type": "contact",
"hits": 2
}
}
{
"heatFrames": 1440
}
{
"acidFrames": 725
}
|
|
From: 1
Left Door
To: 2
Right Door
Notable: true 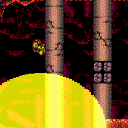
Place the PBs next to the pillars in order to only use 2. Minimize acid by unmorphing high to land back on the jump spot or walljumping before placing the bomb. Requires: "Morph"
"canCarefulJump"
{
"ammo": {
"type": "PowerBomb",
"count": 2
}
}
{
"or": [
{
"and": [
"canCarefulJump",
"canResetFallSpeed",
{
"heatFrames": 660
}
]
},
{
"and": [
"canWalljump",
{
"heatFrames": 660
},
{
"or": [
"canWallJumpInstantMorph",
{
"acidFrames": 30
}
]
}
]
},
{
"and": [
"Gravity",
{
"heatFrames": 660
},
{
"acidFrames": 30
}
]
},
{
"and": [
"canTrickyJump",
"canSuitlessLavaDive",
{
"heatFrames": 720
},
{
"acidFrames": 52
}
]
}
]
}
{
"or": [
"canTrickyJump",
{
"and": [
"Gravity",
{
"heatFrames": 180
},
{
"acidFrames": 56
}
]
},
{
"and": [
"canSuitlessLavaDive",
{
"heatFrames": 240
},
{
"acidFrames": 96
}
]
}
]
}
{
"or": [
"h_heatResistant",
"canPauseAbuse",
{
"resourceCapacity": [
{
"type": "RegularEnergy",
"count": 149
}
]
}
]
}
|
|
The power bombs can be placed pretty far from the next pillar in line. PB1 - Above the mound of dirt on the ground. PB2 - On pillar 2 (not on the Puromi Fire Snake). PB3 - Near pillar 5. Requires: "canCarefulJump"
"Morph"
{
"ammo": {
"type": "PowerBomb",
"count": 3
}
}
{
"or": [
"canTrickyJump",
{
"enemyDamage": {
"enemy": "Puromi",
"type": "contact",
"hits": 1
}
}
]
}
{
"heatFrames": 670
}
{
"or": [
"canTrickyJump",
{
"and": [
"Gravity",
{
"heatFrames": 180
},
{
"acidFrames": 56
}
]
},
{
"and": [
"canSuitlessLavaDive",
{
"heatFrames": 240
},
{
"acidFrames": 96
}
]
}
]
}
{
"or": [
"h_heatResistant",
"canPauseAbuse",
{
"resourceCapacity": [
{
"type": "RegularEnergy",
"count": 149
}
]
}
]
}
|
|
From: 2
Right Door
To: 1
Left Door
Notable: true
Cross the Pillar Room with Bombs and minimal damage. Some acid damage is expected, but any mistakes greatly increases the time spent in acid. Entrance condition: {
"comeInRunning": {
"minTiles": 3,
"speedBooster": "any"
}
}
Requires: "h_canUseMorphBombs"
"canWallJumpInstantMorph"
"canInsaneJump"
"canResetFallSpeed"
"canUnmorphBombBoost"
"canHBJ"
"canSuitlessLavaDive"
{
"heatFrames": 1320
}
{
"acidFrames": 128
}
|
|
From: 2
Right Door
To: 1
Left Door
Notable: true
Cross the Pillar Room with Bombs and minimal damage. Acid damage is expected, but any mistakes greatly increases the time spent in acid. Entrance condition: {
"comeInRunning": {
"minTiles": 3,
"speedBooster": "any"
}
}
Requires: "h_canUseMorphBombs"
"Gravity"
"canResetFallSpeed"
"canJumpIntoIBJ"
"canSuitlessLavaDive"
{
"enemyDamage": {
"enemy": "Puromi",
"type": "contact",
"hits": 2
}
}
{
"heatFrames": 1440
}
{
"acidFrames": 725
}
|
|
From: 2
Right Door
To: 1
Left Door
Notable: true
Place the PBs next to the pillars in order to only use 2. Avoid acid during the first Power Bomb by walljumping before placing the bomb. Avoiding acid damage at the last jump is tricky but possible. Requires: "Morph"
{
"ammo": {
"type": "PowerBomb",
"count": 2
}
}
"canCarefulJump"
{
"or": [
{
"and": [
"canWallJumpInstantMorph",
{
"heatFrames": 690
}
]
},
{
"and": [
"canWalljump",
{
"heatFrames": 660
},
{
"acidFrames": 36
}
]
},
{
"and": [
"canSuitlessLavaDive",
{
"heatFrames": 840
},
{
"acidFrames": 84
}
]
},
{
"and": [
"Gravity",
{
"heatFrames": 660
},
{
"acidFrames": 24
}
]
}
]
}
{
"or": [
"canInsaneJump",
{
"and": [
"canTrickyJump",
"canLateralMidAirMorph",
{
"heatFrames": 10
},
{
"acidFrames": 10
}
]
},
{
"and": [
"canPreciseWalljump",
{
"heatFrames": 50
},
{
"acidFrames": 32
}
]
},
{
"and": [
"Gravity",
{
"heatFrames": 20
},
{
"acidFrames": 20
}
]
},
{
"and": [
"canSuitlessLavaDive",
{
"heatFrames": 50
},
{
"acidFrames": 50
}
]
}
]
}
{
"or": [
"h_heatResistant",
"canPauseAbuse",
{
"resourceCapacity": [
{
"type": "RegularEnergy",
"count": 149
}
]
}
]
}
|
|
Wait for the Puromis to pass so that Samus does not land on them. Requires: "canCarefulJump"
"ScrewAttack"
{
"or": [
{
"and": [
"canSuitlessLavaDive",
{
"heatFrames": 1800
},
{
"acidFrames": 116
}
]
},
{
"and": [
"Gravity",
{
"heatFrames": 1800
},
{
"acidFrames": 48
}
]
}
]
}
|
|
The power bombs can be placed far from the next pillar in line. PB1 - Near the broken pillar. PB2 - On the 2nd full pillar. PB3 - On the 4th full pillar. Wait for the Puromis to avoid damage but wait too long and the acid will cover the door. Requires: "Morph"
"canCarefulJump"
{
"ammo": {
"type": "PowerBomb",
"count": 3
}
}
{
"or": [
{
"and": [
"canSuitlessLavaDive",
{
"heatFrames": 840
},
{
"acidFrames": 206
}
]
},
{
"and": [
"Gravity",
{
"heatFrames": 810
},
{
"acidFrames": 55
}
]
}
]
}
{
"or": [
"h_heatResistant",
"canPauseAbuse",
{
"resourceCapacity": [
{
"type": "RegularEnergy",
"count": 149
}
]
}
]
}
|
|
From: 3
Bottom of Shaft
To: 1
Left Door
Notable: true 
Clear the right side Space Pirates and then race the rising acid by bomb jumping. Requires: "canSuitlessLavaDive"
"h_canJumpIntoIBJ"
"canDoubleBombJump"
{
"or": [
{
"and": [
"Gravity",
{
"acidFrames": 150
}
]
},
{
"acidFrames": 450
}
]
}
|