canStopOnADime (Basic)
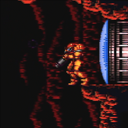
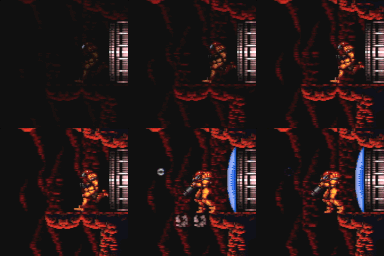
Holding the angle up or angle down buttons when no directional inputs are held will completely stop Samus in place. This is used to enter elevators instantly, but can also be used to avoid being carried into some rooms by momentum.
Strats ()
|
From: 1
Left Door
To: 2
Elevator
Entrance condition: {
"comeInShinecharging": {
"length": 6,
"openEnd": 0
}
}
Requires: "canStopOnADime" "canShinechargeMovementComplex" Exit condition: {
"leaveShinecharged": {
"framesRemaining": 170
}
}
|
|
From: 1
Left Door
To: 2
Elevator
Entrance condition: {
"comeInShinecharging": {
"length": 6,
"openEnd": 0
}
}
Requires: "canStopOnADime" "canShinechargeMovementComplex" Exit condition: {
"leaveShinecharged": {
"framesRemaining": 170
}
}
|
|
From: 3
Bottom Left Door
To: 7
Junction Below Power Bomb Blocks
Avoiding damage from all enemies with just Power Beam is tricky, but doable. Enter the room holding angle to remove momentum and avoid getting hit by the Dessgeega. Requires: "canDodgeWhileShooting" "canTrickyJump" "canPrepareForNextRoom" "canStopOnADime" Clears obstacles: D |
|
From: 3
Middle Right Door
To: 7
Junction At Middle Right Door With Bottom KiHunter Cleared
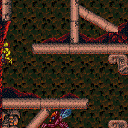
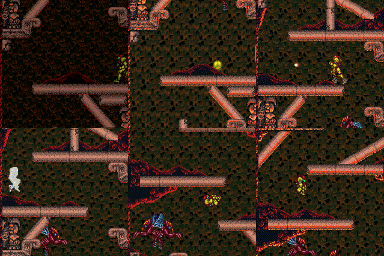
Notable: true Manipulate the Three KiHunters to avoid all of them when entering the room from the Save room door. Stop on a dime on entry for positioning, because it is precise. Wait 1 second then Morph and roll left, past the swooping kihunter. Quickly jump to the higher level and run into the left wall. Wait there for half a second; it helps to jump into the wall. The 2 KiHunters should be grouped above Samus and out of the way. Requires: "h_canNavigateHeatRooms"
"canStopOnADime"
"canCarefulJump"
"Morph"
{
"or": [
"HiJump",
"canWalljump"
]
}
{
"heatFrames": 80
}
|
|
From: 7
Junction At Middle Right Door With Bottom KiHunter Cleared
To: 5
Top Junction Between Doors
Notable: true Manipulate the Three KiHunters to avoid all of them when entering the room from the Save room door. Stop on a dime on entry for positioning, because it is precise. Wait 1 second then Morph and roll left, past the swooping kihunter. Quickly jump to the higher level and run into the left wall. Wait there for half a second; it helps to jump into the wall. The 2 KiHunters should be grouped above Samus and out of the way. Requires: "h_canNavigateHeatRooms"
"canStopOnADime"
"canCarefulJump"
"Morph"
{
"or": [
"HiJump",
"canWalljump"
]
}
{
"heatFrames": 490
}
|


