canSnailClimb (Hard)
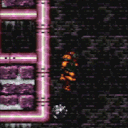
The ability to repeatedly manipulate Yards (snails) and use them as platforms. The snail is damaging when out of its shell so Samus must face the center of the snail to cause it to hide. The snail climb consists of Samus jumping away from the snail as it becomes active, then turning around to return to the snail and resposition for the next jump. Standing on the edge of the snail and turning around underwater does carry the risk of falling off. Spring Ball can bounce on an active snail (only one bounce when underwater without HiJump). Snails can be used as single use platforms without it being considered a snail climb.
Dependencies: canUseEnemies
Strats ()
|
From: 2
Bottom Left Door
To: 1
Middle Left Door
Notable: true 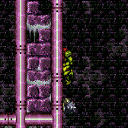
Stop the snail when it is on the lower part of the overhang (hug the snail to gain extra jump height). Climb it by waiting until it is just about to become active to jump. Requires: "h_canNavigateUnderwater"
"canSnailClimb"
{
"or": [
{
"obstaclesCleared": [
"A"
]
},
"h_canUsePowerBombs"
]
}
Clears obstacles: A |
|
From: 2
Bottom Left Door
To: 5
Right Door
Notable: true
Stop the snail when it is on the lower part of the overhang (hug the snail to gain extra jump height). Climb it by waiting until it is just about to become active to jump. Requires: "h_canNavigateUnderwater" "canSnailClimb" |
|
Requires: "canSnailClimb"
"h_canUseSpringBall"
{
"or": [
"Gravity",
{
"and": [
"canSuitlessMaridia",
"HiJump"
]
}
]
}
|
|
From: 2
Bottom Left Door
To: 7
Top Right Left Item
Notable: true 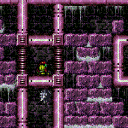
PLMs can be overloaded in direct G-Mode with a single Power Bomb if both items are still there and 2 PBs if only one item is. There is a row of tiles that works, just above and to the left of the right door. The row is one tile higher than the horizontal pipe that is part of the door frame, spanning from the left to one tile away from the right wall. Entrance condition: {
"comeInWithGMode": {
"mode": "direct",
"morphed": true
}
}
Requires: {
"or": [
{
"itemNotCollectedAtNode": 7
},
{
"itemNotCollectedAtNode": 8
}
]
}
"h_canArtificialMorphSpringBall"
"h_canArtificialMorphPowerBomb"
"h_canArtificialMorphPowerBomb"
"h_canNavigateUnderwater"
"canSnailClimb"
{
"or": [
"Gravity",
{
"and": [
"HiJump",
{
"or": [
"canCrouchJump",
"canDownGrab"
]
}
]
}
]
}
|
|
From: 2
Bottom Left Door
To: 7
Top Right Left Item
Notable: true
PLMs can be overloaded in direct G-Mode with a single Power Bomb if both items are still there and 2 PBs if only one item is. There is a row of tiles that works, just above and to the left of the right door. The row is one tile higher than the horizontal pipe that is part of the door frame, spanning from the left to one tile away from the right wall. Entrance condition: {
"comeInWithGMode": {
"mode": "direct",
"morphed": false
}
}
Requires: {
"or": [
{
"itemNotCollectedAtNode": 7
},
{
"itemNotCollectedAtNode": 8
}
]
}
"h_canUsePowerBombs"
"h_canUsePowerBombs"
"h_canNavigateUnderwater"
"canSnailClimb"
{
"or": [
"Gravity",
"h_canMaxHeightSpringBallJump",
{
"and": [
"HiJump",
{
"or": [
"canCrouchJump",
"canDownGrab"
]
}
]
}
]
}
|
|
From: 2
Bottom Left Door
To: 9
Junction Below Top Door
Notable: true
Stop the snail when it is on the lower part of the overhang (hug the snail to gain extra jump height). Climb it by waiting until it is just about to become active to jump. Watch out for snails coming from above, or aggressive snails from below, who will either block or attack Samus. Requires: "h_canNavigateUnderwater" "canSnailClimb" |
|
Watch out for snails coming from above, or aggressive snails from below, who will either block or attack Samus. Requires: "canSnailClimb"
"h_canUseSpringBall"
{
"or": [
"Gravity",
{
"and": [
"canSuitlessMaridia",
"HiJump"
]
}
]
}
|
|
From: 5
Right Door
To: 7
Top Right Left Item
Notable: true
PLMs can be overloaded in direct G-Mode with a single Power Bomb if both items are still there and 2 PBs if only one item is. There is a row of tiles that works, just above and to the left of the right door. The row is one tile higher than the horizontal pipe that is part of the door frame, spanning from the left to one tile away from the right wall. Entrance condition: {
"comeInWithGMode": {
"mode": "direct",
"morphed": true
}
}
Requires: {
"or": [
{
"itemNotCollectedAtNode": 7
},
{
"itemNotCollectedAtNode": 8
}
]
}
"h_canArtificialMorphSpringBall"
"h_canArtificialMorphPowerBomb"
"h_canArtificialMorphPowerBomb"
"h_canNavigateUnderwater"
"canSnailClimb"
{
"or": [
"Gravity",
{
"and": [
"HiJump",
{
"or": [
"canCrouchJump",
"canDownGrab"
]
}
]
}
]
}
|
|
From: 5
Right Door
To: 7
Top Right Left Item
Notable: true
PLMs can be overloaded in direct G-Mode with a single Power Bomb if both items are still there and 2 PBs if only one item is. There is a row of tiles that works, just above and to the left of the right door. The row is one tile higher than the horizontal pipe that is part of the door frame, spanning from the left to one tile away from the right wall. Entrance condition: {
"comeInWithGMode": {
"mode": "direct",
"morphed": false
}
}
Requires: {
"or": [
{
"itemNotCollectedAtNode": 7
},
{
"itemNotCollectedAtNode": 8
}
]
}
"h_canUsePowerBombs"
"h_canUsePowerBombs"
"h_canNavigateUnderwater"
"canSnailClimb"
{
  "or": [
    "Gravity",
    "h_canMaxHeightSpringBallJump",
    {
      "and": [
        "HiJump",
        {
          "or": [
            "canCrouchJump",
            "canDownGrab"
          ]
        }
      ]
    }
  ]
}
|
|
From: 6
Top Door
To: 7
Top Right Left Item
Notable: true
PLMs can be overloaded in direct G-Mode with a single Power Bomb if both items are still there and 2 PBs if only one item is. There is a row of tiles that works, just above and to the left of the right door. The row is one tile higher than the horizontal pipe that is part of the door frame, spanning from the left to one tile away from the right wall. Entrance condition: {
"comeInWithGMode": {
"mode": "direct",
"morphed": true
},
"comesThroughToilet": "no"
}
Requires: {
"or": [
{
"itemNotCollectedAtNode": 7
},
{
"itemNotCollectedAtNode": 8
}
]
}
"h_canArtificialMorphSpringBall"
"h_canArtificialMorphPowerBomb"
"h_canArtificialMorphPowerBomb"
"h_canNavigateUnderwater"
"canSnailClimb"
{
"or": [
"Gravity",
{
"and": [
"HiJump",
{
"or": [
"canCrouchJump",
"canDownGrab"
]
}
]
}
]
}
|
|
From: 6
Top Door
To: 7
Top Right Left Item
Notable: true
PLMs can be overloaded in direct G-Mode with a single Power Bomb if both items are still there and 2 PBs if only one item is. There is a row of tiles that works, just above and to the left of the right door. The row is one tile higher than the horizontal pipe that is part of the door frame, spanning from the left to one tile away from the right wall. Entrance condition: {
"comeInWithGMode": {
"mode": "direct",
"morphed": false
},
"comesThroughToilet": "no"
}
Requires: {
"or": [
{
"itemNotCollectedAtNode": 7
},
{
"itemNotCollectedAtNode": 8
}
]
}
"h_canUsePowerBombs"
"h_canUsePowerBombs"
"h_canNavigateUnderwater"
"canSnailClimb"
{
"or": [
"Gravity",
"h_canMaxHeightSpringBallJump",
{
"and": [
"HiJump",
{
"or": [
"canCrouchJump",
"canDownGrab"
]
}
]
}
]
}
|
|
From: 10
G-Mode Morph Junction (By Bottom Left Door)
To: 11
G-Mode Overloaded PLMs Junction (By Bottom Left Door)
Bomb the Speed blocks by the right door. Requires: "h_canUseMorphBombs"
{
"or": [
"canSnailClimb",
"Gravity",
"HiJump"
]
}
|
|
From: 10
G-Mode Morph Junction (By Bottom Left Door)
To: 11
G-Mode Overloaded PLMs Junction (By Bottom Left Door)
Requires: "h_canArtificialMorphBombs" "HiJump" "h_canArtificialMorphSpringBall" "canSnailClimb" |
|
From: 10
G-Mode Morph Junction (By Bottom Left Door)
To: 11
G-Mode Overloaded PLMs Junction (By Bottom Left Door)
It is barely possible to start a snail climb with just Spring Ball. Get a snail positioned such that it is on the bottom of an overhang above, and sticking out a bit to be usable as a platform. Use Spring Ball to jump and press against the snail for the maximum possible duration, in order to gain enough height to get onto it. Requires: "h_canArtificialMorphBombs" "h_canArtificialMorphSpringBall" "canSnailClimb" "canTrickyJump" |
|
From: 11
G-Mode Overloaded PLMs Junction (By Bottom Left Door)
To: 1
Middle Left Door
After PLMs are overloaded, climb to the top left door and fall through the Bomb Blocks. Requires: {
"or": [
"canSnailClimb",
{
"and": [
"Gravity",
{
"or": [
"SpaceJump",
"canConsecutiveWalljump"
]
}
]
}
]
}
|
|
From: 11
G-Mode Overloaded PLMs Junction (By Bottom Left Door)
To: 7
Top Right Left Item
After PLMs are overloaded, use a snail to help climb to the top right items. Requires: "canSnailClimb"
{
"or": [
"Gravity",
"h_canMaxHeightSpringBallJump",
{
"and": [
"HiJump",
{
"or": [
"canCrouchJump",
"canDownGrab"
]
}
]
}
]
}
|