canOffScreenSuperShot (Hard)
The ability to shoot a Super at a precise location to hit an offscreen inanimate target, e.g. a Super block.
Strats ()
|
From: 13
Central Junction
To: 7
Right Side - Bottom Middle Door (Behind the Super Block)
Notable: true 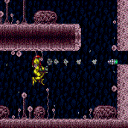
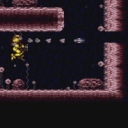
Break the bomb blocks then shoot a super into the morph tunnel to break the super block off screen. Requires pixel precision, although there are several pixels that work. The camera must be fully scrolled to the right, which may require going far left and back. Requires: "canOffScreenSuperShot" "h_canBombThings" "canCameraManip" Clears obstacles: F |
|
From: 13
Central Junction
To: 7
Right Side - Bottom Middle Door (Behind the Super Block)
Notable: true 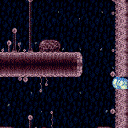
Break the bomb blocks by jumping into them with speed. These is more easily done at low run speed. Requires: "canSpeedball"
"canLateralMidAirMorph"
"canSlowShortCharge"
"canTrickyJump"
{
"canShineCharge": {
"usedTiles": 20,
"openEnd": 2
}
}
"canOffScreenSuperShot"
Clears obstacles: F |
|
From: 13
Central Junction
To: 7
Right Side - Bottom Middle Door (Behind the Super Block)
Notable: true
Stop with Temporary Blue in front of the bomb blocks then jump and bounce into the morph tunnel to clear them. Requires: "canTrickyJump"
"canTemporaryBlue"
"canLateralMidAirMorph"
{
"canShineCharge": {
"usedTiles": 22,
"openEnd": 2
}
}
"canOffScreenSuperShot"
Clears obstacles: F |
|
From: 1
Left Door
To: 1
Left Door
Notable: true 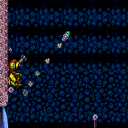
A consistent setup is to align with the wall below the door frame facing right. Jump and turn around to land on the door frame. Then jump and turn around again to return to being aligned with the wall but at the right height for shooting the Super. This strat involves shooting a Super diagonally from the correct height while flush against the left wall. Its acceleration will cause it to clip into the blue gate off-screen. Requires: {
"obstaclesCleared": [
"A"
]
}
{
"doorUnlockedAtNode": 1
}
"canTrickyJump"
"canOffScreenSuperShot"
Clears obstacles: B Unlocks doors: {"types":["ammo"],"requires":[]}
|
|
From: 1
Left Door
To: 1
Left Door
Notable: true
Jump straight up and shoot with the correct timing. This strat involves shooting a Super diagonally from the correct height while flush against the left wall. Its acceleration will cause it to clip into the blue gate off-screen. Requires: {
"obstaclesCleared": [
"A"
]
}
{
"or": [
"canTrickyJump",
"h_canBackIntoCorner"
]
}
"HiJump"
"canOffScreenSuperShot"
Clears obstacles: B |
|
From: 1
Left Door
To: 1
Left Door
Notable: true
Use damage from the small sidehopper to align against the left wall. Jump straight up and shoot with the correct timing. This strat involves shooting a Super diagonally from the correct height while flush against the left wall. Its acceleration will cause it to clip into the blue gate off-screen. Requires: {
"enemyDamage": {
"enemy": "Sm. Sidehopper",
"type": "contact",
"hits": 1
}
}
{
"enemyDamage": {
"enemy": "Sidehopper",
"type": "contact",
"hits": 1
}
}
"canNeutralDamageBoost"
"HiJump"
"canOffScreenSuperShot"
Clears obstacles: B |
|
From: 1
Left Door
To: 1
Left Door
Notable: true
Use a stationary spinjump, or spinjump against the wall and turn around without moving; and shoot with the same correct timing. This strat involves shooting a Super diagonally from the correct height while flush against the left wall. Its acceleration will cause it to clip into the blue gate off-screen. Requires: {
"obstaclesCleared": [
"A"
]
}
{
"or": [
"canTrickyJump",
"h_canBackIntoCorner"
]
}
"canStationarySpinJump"
"SpaceJump"
"canOffScreenSuperShot"
Clears obstacles: B |
|
From: 1
Left Door
To: 1
Left Door
Notable: true
Build run speed and jump into the left wall, turning around without changing Samus' pixel position. This strat involves shooting a Super diagonally from the correct height while flush against the left wall. Its acceleration will cause it to clip into the blue gate off-screen. Requires: {
"obstaclesCleared": [
"A"
]
}
"canTrickyDashJump"
"canOffScreenSuperShot"
Clears obstacles: B |
|
From: 4
Frozen Hopper Junction
To: 4
Frozen Hopper Junction
Notable: true
This strat involves shooting a Super diagonally from the correct height while flush against the left wall. Its acceleration will cause it to clip into the blue gate off-screen. Jump straight up and shoot with the correct timing. Taking damage can be used to align against the wall. Requires: {
"obstaclesNotCleared": [
"A"
]
}
{
"or": [
"h_canBackIntoCorner",
{
"enemyDamage": {
"enemy": "Sm. Sidehopper",
"type": "contact",
"hits": 1
}
},
"canTrickyJump"
]
}
"HiJump"
"canOffScreenSuperShot"
Clears obstacles: B |
|
From: 4
Frozen Hopper Junction
To: 4
Frozen Hopper Junction
Notable: true
Freeze a small hopper to the side and kill the remaining Side Hoppers. Stand against the left wall (damage knockback will align Samus with the wall) and shoot up to freeze the hopper. Jump up to land on it, aligned with the wall. Alternatively, Jump and shoot down to freeze the hopper as a way to avoid damage. Fire a Super just above the door shell to hit the Gate. This strat involves shooting a Super diagonally from the correct height while flush against the left wall. Its acceleration will cause it to clip into the blue gate off-screen. Requires: {
"obstaclesNotCleared": [
"A"
]
}
"canTrickyUseFrozenEnemies"
"h_canBackIntoCorner"
"canOffScreenSuperShot"
{
"enemyDamage": {
"enemy": "Sm. Sidehopper",
"type": "contact",
"hits": 1
}
}
Clears obstacles: B |