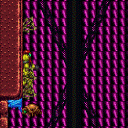
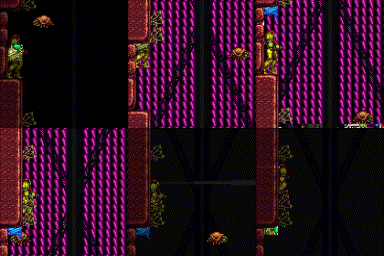
canEnterRMode (Extreme)
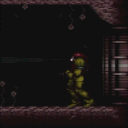
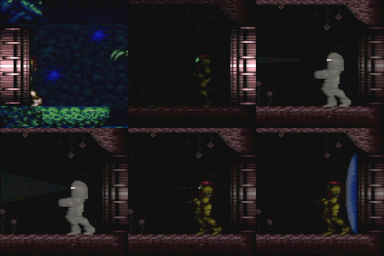
Ability to enter R-mode. Have some energy in reserves (set to Auto), take damage while going through a door, use X-Ray while entering the next room, and release X-Ray after reserves have finished filling.
Dependencies: canUseEnemies
Strats ()
|
From: 1
Left Door
To: 1
Left Door
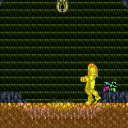
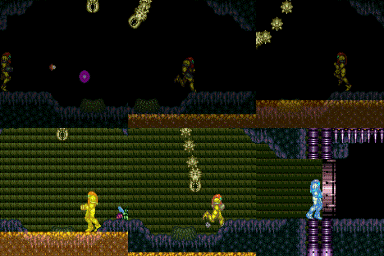
Notable: true Use R-Mode to get a blue suit to cross the room and get the item, or to leave the right shinecharged. In R-Mode, fill your Reserves at the farm. Damage down again so that Samus is within 1 Zebbo hit from triggering Reserves. Gain a shinecharge in-room without gaining more energy. It is possible to time the despawn of a drop with the acid if no ammo is owned. Shinespark vertically, such that a Zebbo can hit Samus in the wind-up to cause a reserve trigger, giving a blue suit. It is then fine to farm the Zebbos again. Entrance condition: {
"comeInWithRMode": {}
}
Requires: "canBePatient"
{
"or": [
{
"canShineCharge": {
"usedTiles": 14,
"openEnd": 0,
"steepUpTiles": 1,
"steepDownTiles": 1
}
},
{
"and": [
{
"canShineCharge": {
"usedTiles": 15,
"openEnd": 0,
"steepUpTiles": 1,
"steepDownTiles": 1
}
},
{
"doorUnlockedAtNode": 1
}
]
},
{
"and": [
{
"canShineCharge": {
"usedTiles": 18,
"openEnd": 1,
"steepUpTiles": 1,
"steepDownTiles": 1
}
},
"h_canDestroyBombWalls"
]
},
{
"and": [
{
"canShineCharge": {
"usedTiles": 19,
"openEnd": 1,
"steepUpTiles": 1,
"steepDownTiles": 1
}
},
"h_canDestroyBombWalls",
{
"doorUnlockedAtNode": 1
}
]
}
]
}
Clears obstacles: B, D |
|
From: 1
Top Left Door
To: 2
Middle Left Door (Behind Power Bomb Blocks)
Notable: true Gain R-mode while entering the room. Use the respawning bugs to refill reserve energy. Get grabbed by the Beetom and carry it to the 4-tile high gap one screen above the bottom-left door. Position Samus one pixel to the right of being against the wall. Jump and aim down, reaching the ceiling at the same time that reserves are triggered. This will force Samus to stand up, briefly clipping into the wall above. Immediately freeze the Beetom inside the wall, by buffering a shot during the reserve trigger. Use a Ripper to get knocked back onto the frozen Beetom. This will clip Samus one pixel left into the wall, making it possible to X-ray climb. X-ray climb up 2 screens. Entrance condition: {
"comeInWithRMode": {}
}
Requires: {
"enemyDamage": {
"enemy": "Beetom",
"type": "contact",
"hits": 1
}
}
{
"enemyDamage": {
"enemy": "Ripper",
"type": "contact",
"hits": 1
}
}
"canWallIceClip"
"canXRayClimb"
|
|
From: 3
Bottom Left Door
To: 2
Middle Left Door (Behind Power Bomb Blocks)
Notable: true Gain R-mode while entering the room. Use the respawning bugs to refill reserve energy. Get grabbed by the Beetom and carry it to the 4-tile high gap one screen above the bottom-left door. Position Samus one pixel to the right of being against the wall. Jump and aim down, reaching the ceiling at the same time that reserves are triggered. This will force Samus to stand up, briefly clipping into the wall above. Immediately freeze the Beetom inside the wall, by buffering a shot during the reserve trigger. Use a Ripper to get knocked back onto the frozen Beetom. This will clip Samus one pixel left into the wall, making it possible to X-ray climb. X-ray climb up 2 screens. Entrance condition: {
"comeInWithRMode": {}
}
Requires: {
"or": [
"canWalljump",
"HiJump",
"h_canFly",
"canSpringBallJumpMidAir"
]
}
{
  "enemyDamage": {
    "enemy": "Beetom",
    "type": "contact",
    "hits": 1
  }
}
{
  "enemyDamage": {
    "enemy": "Ripper",
    "type": "contact",
    "hits": 1
  }
}
"canWallIceClip"
"canXRayClimb"
|
|
From: 4
Bottom Right Door
To: 2
Middle Left Door (Behind Power Bomb Blocks)
Notable: true Gain R-mode while entering the room. Use the respawning bugs to refill reserve energy. Get grabbed by the Beetom and carry it to the 4-tile high gap one screen above the bottom-left door. Position Samus one pixel to the right of being against the wall. Jump and aim down, reaching the ceiling at the same time that reserves are triggered. This will force Samus to stand up, briefly clipping into the wall above. Immediately freeze the Beetom inside the wall, by buffering a shot during the reserve trigger. Use a Ripper to get knocked back onto the frozen Beetom. This will clip Samus one pixel left into the wall, making it possible to X-ray climb. X-ray climb up 2 screens. Entrance condition: {
"comeInWithRMode": {}
}
Requires: {
"or": [
"canWalljump",
"HiJump",
"h_canFly",
"canSpringBallJumpMidAir"
]
}
{
  "enemyDamage": {
    "enemy": "Beetom",
    "type": "contact",
    "hits": 1
  }
}
{
  "enemyDamage": {
    "enemy": "Ripper",
    "type": "contact",
    "hits": 1
  }
}
"canWallIceClip"
"canXRayClimb"
|
|
From: 5
Top Right Door
To: 2
Middle Left Door (Behind Power Bomb Blocks)
Notable: true Gain R-mode while entering the room. Use the respawning bugs to refill reserve energy. Get grabbed by the Beetom and carry it to the 4-tile high gap one screen above the bottom-left door. Position Samus one pixel to the right of being against the wall. Jump and aim down, reaching the ceiling at the same time that reserves are triggered. This will force Samus to stand up, briefly clipping into the wall above. Immediately freeze the Beetom inside the wall, by buffering a shot during the reserve trigger. Use a Ripper to get knocked back onto the frozen Beetom. This will clip Samus one pixel left into the wall, making it possible to X-ray climb. X-ray climb up 2 screens. Entrance condition: {
"comeInWithRMode": {}
}
Requires: {
"enemyDamage": {
"enemy": "Beetom",
"type": "contact",
"hits": 1
}
}
{
"enemyDamage": {
"enemy": "Ripper",
"type": "contact",
"hits": 1
}
}
"canWallIceClip"
"canXRayClimb"
|
|
Entrance condition: {
"comeInWithRMode": {}
}
Clears obstacles: A |
|
From: 7
Bottom Door
To: 3
Bottom Left Door
In R-Mode, kill the Coverns until there is Energy in Samus's Reserves. Get into the Morph tunnel and go to the far left. Wait for Coverns to damage Samus down until Reserves trigger, forcing a stand up and enabling her to shoot the shot blocks and escape. Entrance condition: {
"comeInWithRMode": {},
"comesThroughToilet": "any"
}
Requires: "Morph"
{
"not": "f_DefeatedPhantoon"
}
"canRiskPermanentLossOfAccess"
{
"or": [
"canBePatient",
"Plasma"
]
}
Clears obstacles: B |
