canCrazyCrabClimb (Extreme)
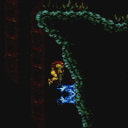
Repeatedly freezing a crab to climb up an uneven wall, using no other support. These climbs often require high precision when jumping around ledges: too many pixels in any direction and Samus may fall off or clip through the crab. This includes only tricky versions of crab climbs and may include manipulating global and non-global crabs, multiple at a time, and freezing crabs in mid-air.
Dependencies: canUseEnemies, canUseFrozenEnemies, canTrickyUseFrozenEnemies
Strats ()
|
From: 3
Middle Right Door
To: 9
Junction Below Speed Blocks
Notable: true 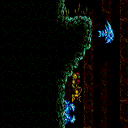
Use the slow global crab and Skulteras to get up. The last part, just below the item is the hardest. Get onto the global crab on the right wall. Either freeze the Skultera close to the wall and wall jump between them. or, a harder option without wall jumps is to refreeze the crab again, higher on the wall, while being careful not to clip through it. Freeze the Skultera at the left, near its minimum and jump to it, then the solid ground. Note that the fish will be pushed down slightly over time because of the sloped tiles, but it will be at its minimum by the time the global crab has arrived. Requires: "canSuitlessMaridia"
"canCrazyCrabClimb"
"canBeVeryPatient"
{
"or": [
"canSunkenTileWideWallClimb",
"canTrickyJump"
]
}
|
|
From: 3
Middle Right Door
To: 9
Junction Below Speed Blocks
Notable: true 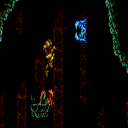
Use the slow global crab and Skulteras to get up. The last part, just below the item is the hardest. Wait for the global crab to be on vertical portion the ledge jutting out on the right or left - any other locations and it will fall on a platform and get stuck. Shoot a super and freeze it mid air. Using the frozen crab on the platform, the mid air crab, and the fish, jump up to the solid ground. Freeze the Skultera at the left, near its minimum and jump to it, then the solid ground. Note that the fish will be pushed down slightly over time because of the sloped tiles, but it will be at its minimum by the time the global crab has arrived. Requires: "canSuitlessMaridia"
"canCrazyCrabClimb"
"canBeVeryPatient"
{
"ammo": {
"type": "Super",
"count": 1
}
}
|
|
From: 8
Bottom Junction
To: 3
Middle Right Door
Notable: true
Wait a long time for the slow global crab. Freeze it when it comes around on the left, one tile above the bottom slope. Freeze the fish, get on the frozen crab, and wall jump between the fish and the wall and the wall. Wall jump towards the fish to gain height faster. Requires: "canSuitlessMaridia"
"canCrazyCrabClimb"
"canSunkenTileWideWallClimb"
"canBeVeryPatient"
"canMidairWiggle"
{
"obstaclesNotCleared": [
"A"
]
}
|
|
From: 9
Junction Below Speed Blocks
To: 4
Top Right Door
Notable: true
Be sure not to lure the first crab on the right wall until the slow global crab is near. Freeze the crab coming down as a platform to stand on to jump onto the frozen global crab on the right. Near the end, use the global crab to get onto the top left corner of the room, then jump towards the walkway leading to the door. Requires: "canBeExtremelyPatient"
"canSuitlessMaridia"
"canCrazyCrabClimb"
"canTrickyJump"
{
"obstaclesNotCleared": [
"A"
]
}
|
|
From: 9
Junction Below Speed Blocks
To: 4
Top Right Door
Notable: true
After the global crab passes and starts climbing up, use a super and freeze it mid air to get to the left platform. Jump and a quick crab will start moving down the right wall. Quickly shoot it and freeze it to get over to the right. Wait a long while for the global crab to return. Let it pass, then use a super to freeze it mid air and get to the next platform. Follow the global crab the rest of the way up to the door while using it and the fish as platforms on the way. For a faster but tighter strat, knock off the first downward moving crab with a super and follow it up while freezing it and performing precise platforming. Requires: "canBeVeryPatient"
"canSuitlessMaridia"
"canCrazyCrabClimb"
{
"ammo": {
"type": "Super",
"count": 2
}
}
{
"obstaclesNotCleared": [
"A"
]
}
|
|
From: 9
Junction Below Speed Blocks
To: 4
Top Right Door
Using the slow global crab to ascend the top section of Main Street requires the speed blocks to not be broken. If they are broken, the local fast crab can be used instead by letting it fall and climb the left wall. The trickiest part is getting to the second ledge. Freeze the crab when it is overhead and spring ball jump up onto it. Follow the crab up while using it as a platform multiple times. Requires: "canSuitlessMaridia"
"canSpringBallJumpMidAir"
"canTrickyUseFrozenEnemies"
"canTrickyJump"
{
"or": [
{
"obstaclesNotCleared": [
"A"
]
},
"canCrazyCrabClimb"
]
}
|
|
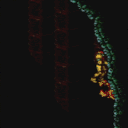
Near the bottom left door, there are three pathways upwards: one directly above the door and two to the right. Between the right pathways, is a crab moving to the right. Shooting a super against the wall will make it fall off and move left. Climb the crab up the left wall. Watch out for the crab above that is heading into the morph tunnel. Jump to the right platform before the upward crab goes into the tunnel. Lure the crab out of the hole by running to the right of the hill then back left or use moonwalk to scroll the camera. Near the end is particularly tricky. When the crab is on the underside of the metal blocks, freeze it and use it as a stepping platform. To do this, crouch jump and while moving upwards, hold left against the crab to get extra vertical movement. Down grabbing at the top is helpful. Requires: "canSuitlessMaridia"
"canCrazyCrabClimb"
"canTrickyJump"
"h_canCrouchJumpDownGrab"
"canCameraManip"
{
"ammo": {
"type": "Super",
"count": 1
}
}
|
|
From: 7
Lower Hills Junction
To: 10
Upper Right Ledge Junction
Notable: true 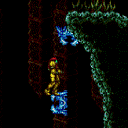
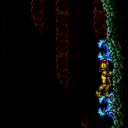
Climbing the right side of Mt. Everest with only two supers and ice. (As used in 14% Icebooster) Requires luring 2 crabs. Use a super to knock off and freeze a crab midair. Be sure to lure a crab to the next section to crab climb further. If Samus has 2 supers, it is easier to bring 3 crabs; the third is from the morph tunnel to the left. Lure 2 crabs to the next section for a slightly easier crab climb. Note: The hardest part of this climb is the pixel precision when jumping around a ledge. Too many pixels: left is a fall, right you clip through the crab, low you miss the jump and fall, high is a bonk or crab clip. Requires: "canSuitlessMaridia"
"canCrazyCrabClimb"
"canTrickyJump"
"canBeVeryPatient"
{
"ammo": {
"type": "Super",
"count": 1
}
}
Clears obstacles: A, B |
|
From: 7
Lower Hills Junction
To: 10
Upper Right Ledge Junction
Notable: true 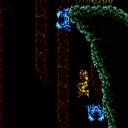
Use the crab near the bottom right door. Before the final jump, freeze the crab high enough on the right wall that it can be lured up to the flat platform. Perform the final jump as it is unfreezing so it starts moving upward. Then go to the lower ground a bit to the right, jump and aim down to lower the camera to lure the crab. Note: The hardest part of this climb is the pixel precision when jumping around a ledge. Too many pixels: left is a fall, right you clip through the crab, low you miss the jump and fall, high is a bonk or crab clip. Requires: "canSuitlessMaridia" "canCrazyCrabClimb" "HiJump" "canTrickyJump" "canCameraManip" Clears obstacles: A, B |
|
From: 7
Lower Hills Junction
To: 10
Upper Right Ledge Junction
Notable: true
Use the crab near the bottom right door. Only one spring ball jump is needed, it is to get up onto the flat platform. After the spring ball jump, if the crab did not follow, go to the lower ground a bit to the right, jump and aim down to lower the camera to lure the crab. Note: The hardest part of this climb is the pixel precision when jumping around a ledge. Too many pixels: left is a fall, right you clip through the crab, low you miss the jump and fall, high is a bonk or crab clip. Requires: "canSuitlessMaridia" "canCrazyCrabClimb" "canTrickySpringBallJump" "canTrickyJump" "canCameraManip" Clears obstacles: A, B |
|
From: 7
Lower Hills Junction
To: 10
Upper Right Ledge Junction
Notable: true 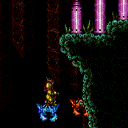
Climbing the right side of Mt. Everest with only two supers and ice. (As used in 14% Icebooster) Requires luring 3 crabs; the third crab is from the morph tunnel to the left. Use a super to knock off and freeze a crab midair. Be sure two crabs make it to the next section in order to crab climb further. Note: The hardest part of this climb is the pixel precision when jumping around a ledge. Too many pixels: left is a fall, right you clip through the crab, low you miss the jump and fall, high is a bonk or crab clip. Requires: "canSuitlessMaridia"
"canCrazyCrabClimb"
"canTrickyJump"
"canBeVeryPatient"
{
"ammo": {
"type": "Super",
"count": 1
}
}
Clears obstacles: A, B |
|
From: 7
Lower Hills Junction
To: 10
Upper Right Ledge Junction
Climbing the right side of Mt. Everest with two supers, ice, and HiJump. Requires luring 3 crabs; the third crab is from the morph tunnel to the left. Use a super to knock off and freeze a crab midair. Stand on it and let the other crab climb, then jump up and follow it. Be sure two crabs make it to the next section in order to crab climb further. Requires: "canSuitlessMaridia"
"canCrazyCrabClimb"
"HiJump"
{
"ammo": {
"type": "Super",
"count": 1
}
}
Clears obstacles: A, B |
|
From: 7
Lower Hills Junction
To: 10
Upper Right Ledge Junction
Climbing the right side of Mt. Everest with two supers, ice, and Spring Ball. Requires luring 3 crabs; the third crab is from the morph tunnel to the left. Use a super to knock off and freeze a crab midair. Stand on it and let the other crab climb, then jump up and follow it. Be sure two crabs make it to the next section in order to crab climb further. Requires: "canSuitlessMaridia"
"canCrazyCrabClimb"
"canTrickySpringBallJump"
{
"ammo": {
"type": "Super",
"count": 1
}
}
Clears obstacles: A, B |
|
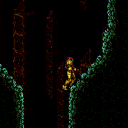
From: 10
Upper Right Ledge Junction
To: 4
Top Right Door
Notable: true
Requires having already lured a crab to this location, likely from above the bottom right door. Freeze the crab very high before going to the ledge on the right, delay jumping so it thaws and moves up a bit while on screen, jump aim down to lower the camera and lure it more. Alternatively, using moonwalk and a flatley jump at the top can prevent needing the crab again. Note: The hardest part of this climb is the pixel precision when jumping around a ledge. Too many pixels: left is a fall, right you clip through the crab, low you miss the jump and fall, high is a bonk or crab clip. Requires: "canSuitlessMaridia"
"canCrazyCrabClimb"
"HiJump"
"canTrickyJump"
"canCameraManip"
{
"obstaclesCleared": [
"B"
]
}
|
|
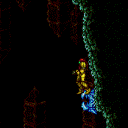
From: 10
Upper Right Ledge Junction
To: 4
Top Right Door
Notable: true
Requires having already lured a crab to this location, likely from above the bottom right door. Freeze the crab high before going to the ledge on the right, delay spring ball jumping so it thaws and moves up while on screen, jump aim down to lower the camera and lure it more. Freeze the crab again to use as a platform, approximately knee high. Jump on it and then jump to the platform above. Note: The hardest part of this climb is the pixel precision when jumping around a ledge. Too many pixels: left is a fall, right you clip through the crab, low you miss the jump and fall, high is a bonk or crab clip. Requires: "canSuitlessMaridia"
"canCrazyCrabClimb"
"canTrickySpringBallJump"
"canTrickyJump"
"canCameraManip"
{
"obstaclesCleared": [
"B"
]
}
|
|
From: 10
Upper Right Ledge Junction
To: 4
Top Right Door
Notable: true
Climbing the right side of Mt. Everest with only two supers and ice. (As used in 14% Icebooster) Requires originally luring 3 crabs. Two crabs and one super are needed from this location. Use a super to knock off and freeze a crab midair. Once close to the upper platform, freeze the crab at knee height to stand on it to jump up. Note: The hardest part of this climb is the pixel precision when jumping around a ledge. Too many pixels: left is a fall, right you clip through the crab, low you miss the jump and fall, high is a bonk or crab clip. Requires: "canSuitlessMaridia"
"canCrazyCrabClimb"
"canTrickyJump"
"canBeVeryPatient"
{
"ammo": {
"type": "Super",
"count": 1
}
}
{
"obstaclesCleared": [
"A"
]
}
|
|
From: 10
Upper Right Ledge Junction
To: 4
Top Right Door
Climbing the right side of Mt. Everest with only two supers, ice, and Spring Ball. Requires originally luring 3 crabs. Two crabs and one super are needed from this location. Use a super to knock off and freeze a crab midair. Jump on it and freeze the second as a platform to jump up to the door. Requires: "canSuitlessMaridia"
"canTrickySpringBallJump"
"canCrazyCrabClimb"
{
"ammo": {
"type": "Super",
"count": 1
}
}
{
"obstaclesCleared": [
"A"
]
}
|
|
From: 10
Upper Right Ledge Junction
To: 4
Top Right Door
Notable: true
Climbing the right side of Mt. Everest with only one super and ice. (A trickier version than that used in 14% Icebooster) Requires having already lured a crab to this location, likely from above the bottom right door. Once close to the upper platform, freeze the crab at knee height to stand on it to jump up. Note: The hardest part of this climb is the pixel precision when jumping around a ledge. Too many pixels: left is a fall, right you clip through the crab, low you miss the jump and fall, high is a bonk or crab clip. Requires: "canSuitlessMaridia"
"canCrazyCrabClimb"
"canTrickyJump"
{
"obstaclesCleared": [
"B"
]
}
|