canShinesparkDeepStuck (Extreme)
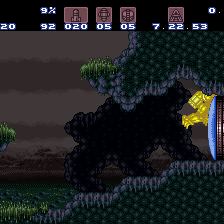
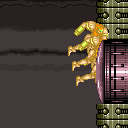
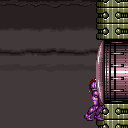
Activating a shinespark to get deep stuck in a door. This is done by spin jumping, facing away from the door, and pressing angle up to activate a shinespark on the same frame as getting a wall jump check. While going through the transition, hold jump and angle up.
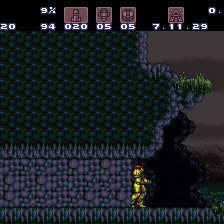
If enough shinecharge frames are available, the recommended method is to moonwalk back into the doorway and perform a stationary spin jump: with this method, the deep stuck will always succeed as long as the forward press and angle-up press happen on the same frame. If instead approaching the door with momentum, backward must be pressed before Samus is in wall-jump check range, but close enough that Samus will reach wall-jump check range during the turnaround deceleration; angle-up must then be pressed on the frame that the wall-jump check triggers. This will need to happen after a delay of at least 1 frame after the backward press, but possibly more at high speeds. Note that if backward is pressed while already in wall-jump check range, there is no timing for the angle-up press that will work: if angle-up is pressed on the same frame as the wall-jump check, Samus will be facing the wrong direction when the spark activates, and if not, then the spark will not activate at all. With a walking spin-jump toward the door (i.e. no dash speed), the angle-up press will usually need to be delayed by exactly 1 frame after the backward press, and the backward press will usually also be frame-perfect, right at the edge of the wall-jump check range. At higher speeds, there will be a larger frame window for the backward press as the turnaround deceleration will last longer, but the angle-up press is still frame-perfect, and its required timing (relative to the backward press) will vary based on Samus' X position when the backward press happens.
Dependencies: canShinechargeMovement, canMidairShinespark, canShinespark
Strats ()
From: 4
Bottom Right Door
To: 3
Top Right Door
Climb up 3 screens. Entrance condition: {
"comeInShinecharged": {}
}Requires: {
"shineChargeFrames": 1
}
{
"shinespark": {
"frames": 1,
"excessFrames": 1
}
}
"canShinesparkDeepStuck"
"canXRayClimb"
"canBePatient" |
From: 4
Lower Section - Top Right Door
To: 8
Bridge Right Door (Leads to Bottom Right Door)
Climb up 1 screen. Entrance condition: {
"comeInShinecharged": {}
}Requires: {
"shineChargeFrames": 1
}
{
"notable": "Get Inside the Bridge"
}
"canSkipDoorLock"
{
"shinespark": {
"frames": 1,
"excessFrames": 1
}
}
"canShinesparkDeepStuck"
"canXRayClimb" |
From: 4
Lower Section - Top Right Door
To: 12
Top Junction
Climb up 2 screens. Entrance condition: {
"comeInShinecharged": {}
}Requires: {
"shineChargeFrames": 1
}
{
"shinespark": {
"frames": 1,
"excessFrames": 1
}
}
"canShinesparkDeepStuck"
"canLongXRayClimb" |
From: 5
Lower Section - Bottom Right Door
To: 3
Upper Right Section - Bottom Right Door
Climb up 3 screens. Entrance condition: {
"comeInShinecharged": {}
}Requires: {
"shineChargeFrames": 1
}
{
"shinespark": {
"frames": 1,
"excessFrames": 1
}
}
"canShinesparkDeepStuck"
"canLongXRayClimb"
"canBePatient" |
From: 6
Middle Right Door (By Zeb Farm)
To: 12
Top Junction

Climb up 1 screen. Entrance condition: {
"comeInShinecharged": {}
}Requires: {
"shineChargeFrames": 1
}
{
"shinespark": {
"frames": 1,
"excessFrames": 1
}
}
"canShinesparkDeepStuck"
"canXRayClimb" |
From: 2
Bottom Left Door
To: 1
Top Left Door
Climb up 1 screen. Entrance condition: {
"comeInShinecharged": {}
}Requires: {
"shineChargeFrames": 1
}
{
"shinespark": {
"frames": 1,
"excessFrames": 1
}
}
"canShinesparkDeepStuck"
"canXRayClimb"
"canBePatient"
{
"heatFrames": 1600
} |
From: 3
Bottom Right Door
To: 4
Top Right Door
Climb up 1 screen. Entrance condition: {
"comeInShinecharged": {}
}Requires: {
"shineChargeFrames": 1
}
{
"shinespark": {
"frames": 1,
"excessFrames": 1
}
}
"canShinesparkDeepStuck"
"canXRayClimb" |
From: 2
Bottom Left Door
To: 1
Top Left Door
Climb up 1 screen. Entrance condition: {
"comeInShinecharged": {}
}Requires: {
"shineChargeFrames": 1
}
"canShinesparkDeepStuck"
{
"shinespark": {
"frames": 1,
"excessFrames": 1
}
}
"canXRayClimb"
{
"heatFrames": 1600
} |
From: 3
Bottom Right Door
To: 1
Top Left Door

Climb up 1 screen. Entrance condition: {
"comeInShinecharged": {}
}Requires: {
"shineChargeFrames": 1
}
{
"shinespark": {
"frames": 1,
"excessFrames": 1
}
}
"canShinesparkDeepStuck"
"canXRayClimb"
{
"heatFrames": 1650
} |
From: 2
Bottom Right Door
To: 3
Top Right Doorway

Climb up 1 screen. Entrance condition: {
"comeInShinecharged": {}
}Requires: {
"shineChargeFrames": 1
}
{
"shinespark": {
"frames": 1,
"excessFrames": 1
}
}
"canShinesparkDeepStuck"
"canXRayClimb" |
From: 1
Bottom Left Door
To: 2
Top Right Door

Climb up 2.5 screens. Stop when about half of Samus (or less) is visible at the top of the screen. Turn-around a couple times to move to the right, to get close to falling out. Then perform a buffered spin-jump while turning around to the right, to make it onto the platform. The Choot will be safely off-camera and will not hit Samus while passing through it. Entrance condition: {
"comeInShinecharged": {}
}Requires: {
"shineChargeFrames": 1
}
"canShinesparkDeepStuck"
{
"shinespark": {
"frames": 1,
"excessFrames": 1
}
}
"canLongXRayClimb"
"canBePatient"
"canOffScreenMovement" |
From: 2
Bottom Right Door
To: 3
Middle Right Door

Climb up 2 screens. Entrance condition: {
"comeInShinecharged": {}
}Requires: {
"shineChargeFrames": 1
}
{
"shinespark": {
"frames": 1,
"excessFrames": 1
}
}
"canShinesparkDeepStuck"
"canLongXRayClimb" |