canFarmWhileShooting (Expert)
The ability to actively kill enemies to spawn drops and collect them while racing a timer. There is a low chance that the required drop(s) will not spawn. This does not apply to easy farm bugs, like Gamets.
Dependencies: canDodgeWhileShooting
Strats ()
|


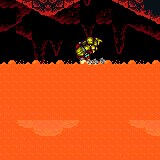
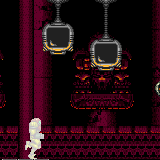
Manipulate the Pirates to the right wall while climbing the room. Kill all the Pirates while moonfalling down the right side. Then quickly gain a shinecharge, crouch, and perform a diagonal shinespark to the top, collecting the drops along the way. Requires: {
"notable": "Behemoth Shinespark"
}
"h_ZebesIsAwake"
"canTrickyDodgeEnemies"
"canFarmWhileShooting"
"Morph"
"canMoonfall"
{
"or": [
"Plasma",
"ScrewAttack",
"canInsaneJump"
]
}
{
"resourceMissingAtMost": [
{
"type": "Missile",
"count": 0
}
]
}
{
"canShineCharge": {
"usedTiles": 28,
"openEnd": 0
}
}
{
"shinespark": {
"frames": 50,
"excessFrames": 3
}
}
{
"obstaclesCleared": [
"A"
]
}
{
"or": [
"h_ClimbWithoutLava",
{
"obstaclesNotCleared": [
"B"
]
}
]
} |
|
Requires: "canFarmWhileShooting"
{
"cycleFrames": 160
}Farm cycle drops: 2 Geega Dev note: We use `cycleFrames` here rather than `simpleCycleFrames` because it is non-trivial to avoid Geega damage while farming. |
|


Cross the room while killing Sovas and a Geruta and then jumping through their drops. Killing a Geruta with a PowerBomb will leave 2 drops. Requires: "canDash"
"canFarmWhileShooting"
"canTrickyJump"
{
"or": [
"h_usePowerBomb",
"Spazer",
"Plasma",
"Wave"
]
}
{
"resourceMissingAtMost": [
{
"type": "Missile",
"count": 0
},
{
"type": "Super",
"count": 0
}
]
}
{
"heatFramesWithEnergyDrops": {
"frames": 240,
"drops": [
{
"enemy": "Geruta",
"count": 1
},
{
"enemy": "Sova",
"count": 1
}
]
}
}
{
"heatFrames": 160
}Dev note: The PowerBomb farm treats a Geruta drop as similar to a Sova drop. |
|


Cross the room while killing Sovas and a Geruta and then jumping through their drops. Killing a Geruta with a PowerBomb will leave 2 drops and it may be better to detour to the second Geruta for more drops. Requires: "canDash"
"canFarmWhileShooting"
"canTrickyJump"
{
"or": [
{
"and": [
"h_usePowerBomb",
{
"heatFrames": 60
}
]
},
"Spazer",
"Plasma",
"Wave"
]
}
{
"resourceMissingAtMost": [
{
"type": "Missile",
"count": 0
},
{
"type": "Super",
"count": 0
}
]
}
{
"heatFramesWithEnergyDrops": {
"frames": 315,
"drops": [
{
"enemy": "Geruta",
"count": 1
},
{
"enemy": "Sova",
"count": 1
}
]
}
}
{
"heatFrames": 85
}Dev note: This is an approximation. PBs can collect 4 geruta drops with a detour. Beams may prefer 2 Sovas. |
|
Place a Power Bomb near below the Sova to kill both Gerutas, resulting in 4 drops. Requires: "canDash"
"canFarmWhileShooting"
"canTrickyJump"
"h_usePowerBomb"
{
"resourceMissingAtMost": [
{
"type": "Missile",
"count": 0
},
{
"type": "Super",
"count": 0
}
]
}
{
"heatFramesWithEnergyDrops": {
"frames": 270,
"drops": [
{
"enemy": "Geruta",
"count": 4
}
]
}
}
{
"or": [
"canInsaneJump",
{
"heatFrames": 30
}
]
} |
|


The Magdollite flames can be killed for drops. The left Multiviola will be in the way and should be killed too. Requires: "canDash"
"canFarmWhileShooting"
{
"heatFramesWithEnergyDrops": {
"frames": 240,
"drops": [
{
"enemy": "Multiviola",
"count": 1
},
{
"enemy": "Magdollite",
"count": 3
}
]
}
}
{
"heatFramesWithEnergyDrops": {
"frames": 180,
"drops": [
{
"enemy": "Magdollite",
"count": 5
}
]
}
}
{
"heatFrames": 110
} |
|
Requires: {
"haveBlueSuit": {}
}
"canFarmWhileShooting"
{
"heatFramesWithEnergyDrops": {
"frames": 225,
"drops": [
{
"enemy": "Magdollite",
"count": 3
}
]
}
}
{
"heatFramesWithEnergyDrops": {
"frames": 215,
"drops": [
{
"enemy": "Magdollite",
"count": 5
},
{
"enemy": "Multiviola",
"count": 1
}
]
}
}
{
"heatFrames": 215
} |
|

It is possible to kill a Multiviola by the door and pause abuse to grab its Energy drop on G-mode exit. While luring the right Multiviola around the room, it is important to prevnt the Magdollites from spawning too many fireballs, otherwise the Multiviola won't give any drops. Either kill the middle Magdollite with a Super and stay away from the others when possible, or use Ice keep them frozen. Be careful not to touch any invisible flames that the Magdollites do spawn. It is also possible to do this with nothing; stand on the right platform while the Magdollite shoots to the right, then go to left edge of the runway to the right, pause abuse and exit G-mode while crouching and shooting upwards to kill and collect the flame drops. Entrance condition: {
"comeInWithGMode": {
"mode": "any",
"morphed": false
}
}Requires: "h_heatedGModePauseAbuse"
{
"or": [
"canTrickyUseFrozenEnemies",
{
"ammo": {
"type": "Super",
"count": 1
}
},
{
"and": [
"canFarmWhileShooting",
"canInsaneJump"
]
}
]
} |
|
The Magdollite flames can be killed for drops. Requires: "canDash"
"canFarmWhileShooting"
{
"heatFramesWithEnergyDrops": {
"frames": 150,
"drops": [
{
"enemy": "Magdollite",
"count": 5
}
]
}
}
{
"heatFramesWithEnergyDrops": {
"frames": 280,
"drops": [
{
"enemy": "Magdollite",
"count": 3
}
]
}
}
{
"heatFrames": 80
} |
|
The Magdollite flames and Multiviolas can be killed for drops. Requires: {
"haveBlueSuit": {}
}
"canFarmWhileShooting"
{
"heatFramesWithEnergyDrops": {
"frames": 190,
"drops": [
{
"enemy": "Magdollite",
"count": 6
}
]
}
}
{
"heatFramesWithEnergyDrops": {
"frames": 300,
"drops": [
{
"enemy": "Magdollite",
"count": 3
},
{
"enemy": "Multiviola",
"count": 2
}
]
}
}
{
"heatFrames": 240
} |
From: 1
Right Door
To: 1
Right Door
Very quickly cross the room, collecting both items without falling into the lava. A Power Bomb in the middle of the room sets up the Sova drops and adds lag which makes the block item easier to collect with a Flatley jump. Farming the left sova and middle dragon increases the chances of getting enough health drops, but it may still not be possible with poor drop luck. Pause abuse can be useful for reaching the right side drops if the left side's luck was bad. Entrance condition: {
"comeInRunning": {
"speedBooster": "any",
"minTiles": 2
}
}Requires: "canDash"
{
"or": [
"Wave",
"Plasma",
"Spazer",
"canBeVeryPatient"
]
}
{
"enemyKill": {
"enemies": [
[
"Sova",
"Sova",
"Sova",
"Dragon",
"Dragon"
]
],
"explicitWeapons": [
"PowerBomb"
]
}
}
"canMockball"
"canPreciseWallJump"
"canInsaneJump"
"canPauseAbuse"
"canFarmWhileShooting"
"canBePatient"
{
"resourceMissingAtMost": [
{
"type": "Missile",
"count": 0
},
{
"type": "Super",
"count": 0
}
]
}
{
"heatFrames": 392
}
{
"resourceAtMost": [
{
"type": "RegularEnergy",
"count": 1
}
]
}Collects items: 2, 3 Dev note: Not notable because it is safer to collect the items in separate trips. The first OR block is for farming the left sova for more consistency, or resetting to retry the strat multiple times. canBePatient indicates a chance of failure even if everything is performed correctly. |
|
Return while collecting Sova drops. Requires: "canDash"
"canFarmWhileShooting"
"canTrickyJump"
{
"or": [
"Wave",
"Plasma",
"Spazer"
]
}
{
"resourceMissingAtMost": [
{
"type": "Missile",
"count": 0
},
{
"type": "Super",
"count": 0
}
]
}
{
"heatFramesWithEnergyDrops": {
"frames": 130,
"drops": [
{
"enemy": "Sova",
"count": 3
}
]
}
}
{
"heatFrames": 80
} |
From: 4
Junction Above Hidden Platform Item
To: 1
Right Door


Return while collecting Sova drops. Requires: "canDash"
"canFarmWhileShooting"
{
"or": [
"Wave",
"Plasma",
"Spazer"
]
}
{
"resourceMissingAtMost": [
{
"type": "Missile",
"count": 0
},
{
"type": "Super",
"count": 0
}
]
}
{
"heatFramesWithEnergyDrops": {
"frames": 120,
"drops": [
{
"enemy": "Sova",
"count": 2
}
]
}
}
{
"heatFrames": 40
} |
|
Requires: "canDash"
"h_heatProof"
{
"resetRoom": {
"nodes": [
2
]
}
}
{
"cycleFrames": 720
}
{
"or": [
"SpaceJump",
{
"cycleFrames": 30
}
]
}
{
"or": [
"Wave",
"Spazer",
"Plasma",
{
"and": [
"canFarmWhileShooting",
{
"cycleFrames": 30
}
]
}
]
}
{
"or": [
"canTrickyJump",
{
"cycleFrames": 60
}
]
}Farm cycle drops: 4 Sova Dev note: Add canTrickyJump for catching the Sovas on their first cycles. |
From: 1
Left Shaft - Top Left Door
To: 2
Left Shaft - Bottom Right Door


It is possible to kill a Multiviola by the door and pause abuse to grab its Energy drop on G-mode exit. It is important avoid touching the invisible fireballs the Alcoons place, and to prevent them from shooting too many fireballs, as they will eventually prevent drops from appearing. The Alcoons are global, so it is best to kill those at the top of the room and either kill or avoid those lower, depending on if Samus has a way to kill them quickly. Entrance condition: {
"comeInWithGMode": {
"mode": "any",
"morphed": false
}
}Requires: {
"or": [
"h_heatedGModeOpenDifferentDoor",
{
"and": [
"h_heatedGModePauseAbuse",
"canFarmWhileShooting",
"canTrickyDodgeEnemies"
]
}
]
} |
From: 2
Left Shaft - Bottom Right Door
To: 1
Left Shaft - Top Left Door
It is possible to kill a Multiviola by the door and pause abuse to grab its Energy drop on G-mode exit. It is important avoid touching the invisible fireballs the Alcoons place, and to prevent them from shooting too many fireballs, as they will eventually prevent drops from appearing. One easy way to do this without any beam upgrades or ammo is to kill them before they jump. This can be done from below by jumping and shooting horizontally near the floor surface. Stay near the far wall when shooting to prevent getting too close and triggering their jump. Entrance condition: {
"comeInWithGMode": {
"mode": "any",
"morphed": false
}
}Requires: {
"or": [
"h_crouchJumpDownGrab",
"HiJump",
"canWallJump",
"SpaceJump",
"canSpringBallJumpMidAir"
]
}
{
  "or": [
    "h_heatedGModeOpenDifferentDoor",
    {
      "and": [
        "h_heatedGModePauseAbuse",
        "canFarmWhileShooting",
        "canTrickyDodgeEnemies"
      ]
    }
  ]
}Dev note: Frozen Alcoon platforms and Artificial morph IBJ are not included, as Samus can crouch jump and down grab; they can be considered if G-mode + flash suits are added, though they are still likely not useful. Those are also likely not compatible with preventing the Alcoons from overloading drops. |
From: 3
Left Shaft - Middle Right Door
To: 1
Left Shaft - Top Left Door

It is possible to kill a Multiviola by the door and pause abuse to grab its Energy drop on G-mode exit. It is important avoid touching the invisible fireballs the Alcoons place, and to prevent them from shooting too many fireballs, as they will eventually prevent drops from appearing. One easy way to do this without any beam upgrades or ammo is to kill them before they jump. This can be done from below by jumping and shooting horizontally near the floor surface. Stay near the far wall when shooting to prevent getting too close and triggering their jump. Entrance condition: {
"comeInWithGMode": {
"mode": "any",
"morphed": false
}
}Requires: {
"or": [
"h_crouchJumpDownGrab",
"HiJump",
"canWallJump",
"SpaceJump",
"canSpringBallJumpMidAir"
]
}
{
"or": [
"h_heatedGModeOpenDifferentDoor",
{
"and": [
"h_heatedGModePauseAbuse",
"canFarmWhileShooting",
"canTrickyDodgeEnemies"
]
}
]
}Dev note: Frozen Alcoon platforms and Artificial morph IBJ are not included, as Samus can crouch jump and down grab; they can be considered if G-mode + flash suits are added, though they are still likely not useful. Those are also likely not compatible with preventing the Alcoons from overloading drops. |
From: 4
Left Shaft - Top Right Door
To: 1
Left Shaft - Top Left Door
It is possible to kill a Multiviola by the door and pause abuse to grab its Energy drop on G-mode exit. It is important avoid touching the invisible fireballs the Alcoons place, and to prevent them from shooting too many fireballs, as they will eventually prevent drops from appearing. One easy way to do this without any beam upgrades or ammo is to kill them before they jump. This can be done from below by jumping and shooting horizontally near the floor surface. Stay near the far wall when shooting to prevent getting too close and triggering their jump. Entrance condition: {
"comeInWithGMode": {
"mode": "any",
"morphed": false
}
}Requires: {
"or": [
"h_crouchJumpDownGrab",
"HiJump",
"canWallJump",
"SpaceJump",
"canSpringBallJumpMidAir"
]
}
{
"or": [
"h_heatedGModeOpenDifferentDoor",
{
"and": [
"h_heatedGModePauseAbuse",
"canFarmWhileShooting",
"canTrickyDodgeEnemies"
]
}
]
}Dev note: Frozen Alcoon platforms and Artificial morph IBJ are not included, as Samus can crouch jump and down grab; they can be considered if G-mode + flash suits are added, though they are still likely not useful. Those are also likely not compatible with preventing the Alcoons from overloading drops. |
From: 4
Left Shaft - Top Right Door
To: 4
Left Shaft - Top Right Door
Requires: "h_heatProof"
{
"resetRoom": {
"nodes": [
4
]
}
}
{
"or": [
{
"and": [
"canDash",
{
"or": [
"Plasma",
"ScrewAttack",
{
"and": [
"Wave",
{
"cycleFrames": 20
}
]
},
{
"and": [
"Spazer",
{
"cycleFrames": 90
}
]
},
{
"and": [
"canDodgeWhileShooting",
{
"cycleFrames": 260
},
{
"or": [
"canFarmWhileShooting",
{
"cycleFrames": 90
}
]
}
]
}
]
}
]
},
{
"and": [
{
"haveBlueSuit": {}
},
{
"cycleFrames": 90
}
]
}
]
}
{
"or": [
"canWallJump",
"HiJump",
"h_crouchJumpDownGrab",
"SpaceJump"
]
}
{
"cycleFrames": 450
}Resets obstacles: R-Mode Farm cycle drops: 1 Multiviola, 2 Alcoon |
From: 5
Bottom Floating Platform Junction
To: 4
Top Floating Platform Junction
Bring up the Gamets to the platform above, in order to delay farming them. If not enough big energy drops spawn, go back down, farm up, and try again. Requires: "canFarmWhileShooting"
"canBePatient"
{
"or": [
"canWallJump",
{
"and": [
"HiJump",
"canCameraManip",
"canInsaneJump"
]
},
"SpaceJump",
"h_crouchJumpDownGrab",
"canTrickySpringBallJump",
{
"and": [
"h_useMorphBombs",
{
"tech": "canUnmorphBombBoost"
}
]
}
]
}
{
"heatFrames": 35
} |
From: 1
Top Left Door
To: 2
Bottom Left Door
Requires: "canSuitlessLavaDive"
"canFarmWhileShooting"
{
"enemyKill": {
"enemies": [
[
"Fune",
"Fune"
]
],
"explicitWeapons": [
"PowerBomb"
]
}
}
{
"or": [
{
"and": [
"canTrickyJump",
{
"disableEquipment": "SpeedBooster"
},
"canMockball",
{
"lavaFramesWithEnergyDrops": {
"frames": 120,
"drops": [
{
"enemy": "Fune",
"count": 1
}
]
}
}
]
},
{
"lavaFramesWithEnergyDrops": {
"frames": 165,
"drops": [
{
"enemy": "Fune",
"count": 1
}
]
}
}
]
}
{
"lavaFrames": 35
}
{
"or": [
{
"and": [
"canSpaceJumpWaterBounce",
{
"or": [
{
"and": [
"canPreciseSpaceJump",
{
"lavaFrames": 35
}
]
},
{
"lavaFrames": 60
}
]
}
]
},
{
"lavaFrames": 150
}
]
}Exit condition: {
"leaveNormally": {}
}Unlocks doors: {"types":["missiles"],"requires":[{"lavaFrames":80}]}
{"types":["super"],"requires":[]}
{"types":["powerbomb"],"requires":[{"lavaFrames":150}]}Dev note: FIXME: a Gravity version of this could be added. |
|
Requires: {
"resetRoom": {
"nodes": [
2
]
}
}
"h_heatProof"
"h_lavaProof"
"Gravity"
{
"cycleFrames": 500
}
{
"or": [
{
"and": [
"canDash",
{
"or": [
"ScrewAttack",
{
"and": [
"Plasma",
{
"cycleFrames": 60
}
]
},
{
"and": [
"h_useMorphBombs",
"canFarmWhileShooting",
{
"cycleFrames": 1700
}
]
}
]
}
]
},
{
"and": [
{
"haveBlueSuit": {}
},
{
"cycleFrames": 690
}
]
}
]
}Resets obstacles: A Farm cycle drops: 5 Dragon |
|
Requires: {
"resetRoom": {
"nodes": [
2
]
}
}
"Morph"
{
"or": [
"h_useMorphBombs",
{
"haveBlueSuit": {}
}
]
}
{
"or": [
{
"and": [
"canFarmWhileShooting",
{
"or": [
"ScrewAttack",
{
"and": [
"canMidAirMorph",
{
"cycleFrames": 60
}
]
}
]
},
{
"cycleFrames": 490
}
]
},
{
"cycleFrames": 610
}
]
}Clears obstacles: A, B Resets obstacles: C, D Farm cycle drops: 1 Sova |
|
It is possible to kill the Sovas and pick up their drops during a pause abuse. Entrance condition: {
"comeInWithGMode": {
"mode": "any",
"morphed": false
}
}Requires: "h_heatedGModePauseAbuse" "canFarmWhileShooting" Dev note: The Sovas will not give drops if there are too many fireballs, but this shouldn't be a problem when leaving through the bottom door. |
|
It is possible to kill the Sovas and pick up their drops during a pause abuse, but they will only give drops if there are not too many Fune fireballs. With a ledge grab onto the top platform, it is possible to get all the Funes off camera. Alternatively, it is possible to kill or repeatedly freeze them. Entrance condition: {
"comeInWithGMode": {
"mode": "any",
"morphed": false
}
}Requires: "canBePatient"
"h_heatedGModePauseAbuse"
"canFarmWhileShooting"
{
"or": [
"canTrickyJump",
"canTrickyUseFrozenEnemies",
{
"ammo": {
"type": "Super",
"count": 1
}
},
"h_usePowerBomb"
]
}Dev note: The single tile ledge at this door doesn't seem to make it any slower to exit. The Power Bomb kill could be done with artificial morph, but it's not worth modeling. |
|


Either use a Power Bomb or Wave + Plasma to kill all the Sovas off-camera, or if heat protection is available, wait for all the Sovas to come out of the tunnel. Requires: {
"or": [
{
"and": [
"HiJump",
{
"or": [
"canTrivialMidAirMorph",
"h_useSpringBall"
]
}
]
},
{
"and": [
"SpaceJump",
"canTrivialMidAirMorph",
{
"heatFrames": 40
}
]
},
{
"and": [
"canWallJump",
"canTrivialMidAirMorph"
]
},
"canSpringBallJumpMidAir",
{
"and": [
"canIBJ",
{
"heatFrames": 900
}
]
},
{
"and": [
"canJumpIntoIBJ",
{
"heatFrames": 520
}
]
},
{
"and": [
"canJumpIntoIBJ",
"canDoubleBombJump",
{
"heatFrames": 400
}
]
}
]
}
{
"or": [
"h_heatProof",
{
"and": [
"canDash",
{
"or": [
"h_usePowerBomb",
{
"and": [
"Wave",
"Plasma",
"canTrickyJump",
{
"heatFrames": 80
}
]
}
]
}
]
},
{
"and": [
{
"haveBlueSuit": {}
},
{
"heatFrames": 40
}
]
}
]
}
{
"or": [
{
"heatFrames": 180
},
{
"and": [
"canFarmWhileShooting",
{
"heatFramesWithEnergyDrops": {
"frames": 115,
"drops": [
{
"enemy": "Sova",
"count": 3
}
]
}
},
{
"heatFrames": 65
}
]
}
]
} |
|
Freeze a Sova once it enters one of the slots on the wall and then use it as a platform. Requires: "canMidAirMorph"
"canTrickyUseFrozenEnemies"
{
"or": [
{
"heatFrames": 780
},
{
"and": [
"canFarmWhileShooting",
{
"heatFramesWithEnergyDrops": {
"frames": 680,
"drops": [
{
"enemy": "Sova",
"count": 3
}
]
}
},
{
"heatFrames": 100
}
]
}
]
}
{
"or": [
"canDash",
{
"heatFrames": 20
}
]
} |
From: 4
Junction Below Morph Tunnel
To: 2
Middle Right Door
Smoothly jump into the morph tunnel while shooting the first Sova. Unmorph at the end of the tunnel to clear more Sovas as needed. Requires: "canMidAirMorph"
"canTrickyDodgeEnemies"
{
"or": [
"canPreciseWallJump",
"HiJump"
]
}
{
"enemyKill": {
"enemies": [
[
"Sova"
]
],
"explicitWeapons": [
"Wave",
"Spazer",
"Plasma"
]
}
}
"canFarmWhileShooting"
{
"heatFramesWithEnergyDrops": {
"frames": 100,
"drops": [
{
"enemy": "Sova",
"count": 3
}
]
}
}
"canDash"
{
"heatFrames": 120
} |
|
Requires: {
"haveBlueSuit": {}
}
"Morph"
{
"or": [
{
"heatFrames": 200
},
{
"and": [
"canFarmWhileShooting",
{
"heatFramesWithEnergyDrops": {
"frames": 175,
"drops": [
{
"enemy": "Sova",
"count": 3
}
]
}
},
{
"heatFrames": 85
}
]
}
]
} |
From: 5
Junction Above Morph Tunnel
To: 2
Middle Right Door


Requires: "h_usePowerBomb"
"canFarmWhileShooting"
{
"heatFramesWithEnergyDrops": {
"frames": 150,
"drops": [
{
"enemy": "Sova",
"count": 3
}
]
}
}
{
"heatFrames": 65
}
{
"or": [
"canDash",
{
"heatFrames": 20
}
]
} |
|
Requires: {
"resetRoom": {
"nodes": [
1,
2
]
}
}
"h_heatProof"
"h_lavaProof"
"h_useMorphBombs"
"canBePatient"
"canDodgeWhileShooting"
{
"or": [
"Ice",
"canFarmWhileShooting",
{
"cycleFrames": 2700
}
]
}
{
"cycleFrames": 4500
}Farm cycle drops: 3 Boyon |
|
Requires: {
"or": [
{
"resetRoom": {
"nodes": [
2
]
}
},
{
"and": [
{
"resetRoom": {
"nodes": [
1
]
}
},
"canMidAirMorph",
{
"cycleFrames": 330
}
]
}
]
}
"h_heatProof"
{
"or": [
"h_lavaProof",
{
"and": [
"canFarmWhileShooting",
"canPreciseWallJump",
{
"cycleFrames": 15
}
]
},
{
"and": [
"SpaceJump",
{
"cycleFrames": 10
}
]
}
]
}
{
"noBlueSuit": {}
}
"ScrewAttack"
{
"cycleFrames": 125
}Farm cycle drops: 1 Ripper 2 (red) |
|
Requires: {
"or": [
{
"and": [
{
"simpleCycleFrames": 140
},
{
"cycleFrames": 20
}
]
},
{
"and": [
"canFarmWhileShooting",
"canUseGrapple",
{
"simpleCycleFrames": 100
},
{
"cycleFrames": 35
}
]
}
]
}Farm cycle drops: 5 Gamet |
From: 2
Top Door
To: 4
Central Junction
Farm for reserves and to clear enough runway to shinecharge. Interrupt from Crocomire's swipe or fireballs, or kill Crocomire and use the acid. Entrance condition: {
"comeInWithRMode": {},
"comesThroughToilet": "no"
}Requires: {
"not": "f_DefeatedCrocomire"
}
"canRiskPermanentLossOfAccess"
"canDodgeWhileShooting"
"canBePatient"
{
"or": [
{
"ammo": {
"type": "Missile",
"count": 30
}
},
{
"and": [
"canFarmWhileShooting",
{
"ammo": {
"type": "Missile",
"count": 2
}
},
{
"resourceCapacity": [
{
"type": "Missile",
"count": 10
}
]
}
]
},
{
"and": [
"Charge",
{
"disableEquipment": "Plasma"
}
]
}
]
}
{
"refill": [
"Energy"
]
}
"h_shinechargeMaxRunway"
{
"autoReserveTrigger": {
"maxReserveEnergy": 95
}
}
"canRModeSparkInterrupt"Clears obstacles: f_DefeatedCrocomire, door_2 Sets flags: f_DefeatedCrocomire |
|


The hitbox on Croc's mouth may cause direct hits to miss, so jumping and shooting Supers horizontally is recommended. While Crocomire's farmables may drop Supers, the rate is too low to rely on. If you run out, Croc will most likely push you into the spikes. It takes 8 Supers to kill croc if you don't let it move forward. Requires: {
"ammo": {
"type": "Super",
"count": 8
}
}
{
"or": [
"canDodgeWhileShooting",
{
"ammo": {
"type": "Super",
"count": 4
}
}
]
}
{
"or": [
"canFarmWhileShooting",
{
"ammo": {
"type": "Super",
"count": 4
}
}
]
}Clears obstacles: f_DefeatedCrocomire Sets flags: f_DefeatedCrocomire Dev note: canFarmWhileShooting represents accurate shooting, not the ability to farm drops. |
From: 4
Central Junction
To: 4
Central Junction

This can be a very long fight if Crocomire is stingy with the farming phases. Farming requires careful dodging in order to minimize energy drops. Delay grabbing all of the drops until necessary to reduce the chance of running out of ammo. Requires: {
"notable": "Crocomire with 5 Missiles"
}
"canFarmWhileShooting"
"canBePatient"
{
"or": [
{
"ammo": {
"type": "Missile",
"count": 2
}
},
{
"ammo": {
"type": "Super",
"count": 2
}
}
]
}
{
"resourceCapacity": [
{
"type": "Missile",
"count": 5
}
]
}
"h_complexToCarryFlashSuit"Clears obstacles: f_DefeatedCrocomire Sets flags: f_DefeatedCrocomire Dev note: This strat is notable, not because it's harder than its required tech, but because its tedious, RNG heavy, and players might not want to encounter it. Crocomire does not have a farming phase until he has been hit twice. It is possible to get to the farming phase with 1 PB, but sometimes Croc will just rush Samus into the spikes without ever having farm phases, so it is ignored here. |
|
Shoot the Mellas when they first begin to come on screen, and they will not move. Requires: {
"or": [
{
"and": [
{
"resetRoom": {
"nodes": [
1
]
}
},
{
"cycleFrames": 1020
},
"Morph",
{
"or": [
"SpaceJump",
{
"and": [
"HiJump",
"canSpeedyJump",
"canWallJump",
{
"cycleFrames": 120
}
]
},
{
"and": [
"HiJump",
"canSpringBallJumpMidAir",
"h_doubleEquipmentScreenCycleFrames",
{
"cycleFrames": 540
}
]
},
{
"and": [
"canJumpIntoIBJ",
{
"cycleFrames": 1400
}
]
}
]
}
]
},
{
"and": [
{
"resetRoom": {
"nodes": [
2
]
}
},
{
"cycleFrames": 240
}
]
}
]
}
{
"or": [
{
"and": [
"canDash",
{
"or": [
"Grapple",
"Wave",
"Spazer",
"Plasma",
{
"and": [
"ScrewAttack",
{
"cycleFrames": 60
}
]
},
{
"and": [
"canDodgeWhileShooting",
{
"cycleFrames": 300
}
]
},
{
"and": [
"canFarmWhileShooting",
{
"cycleFrames": 120
}
]
}
]
}
]
},
{
"and": [
{
"haveBlueSuit": {}
},
{
"cycleFrames": 60
}
]
}
]
}Resets obstacles: A, B, E Farm cycle drops: 5 Mella |
From: 2
Bottom Right Door
To: 5
Bottom Junction Right of Morph Tunnel
Requires: "canDash"
"canFarmWhileShooting"
{
"heatFramesWithEnergyDrops": {
"frames": 170,
"drops": [
{
"enemy": "Magdollite",
"count": 3
}
]
}
}
{
"heatFrames": 130
} |
From: 5
Bottom Junction Right of Morph Tunnel
To: 2
Bottom Right Door
Requires: "canDash"
"canFarmWhileShooting"
{
"heatFramesWithEnergyDrops": {
"frames": 240,
"drops": [
{
"enemy": "Magdollite",
"count": 3
}
]
}
}
{
"heatFrames": 40
}
{
"or": [
"canInsaneJump",
{
"heatFrames": 110
}
]
} |
|


If Supers are not full, time the collection of energy to force further Energy drops. Entrance condition: {
"comeInNormally": {}
}Requires: {
"noBlueSuit": {}
}
"ScrewAttack"
"canFarmWhileShooting"
{
"or": [
{
"and": [
"canPauseAbuse",
"canInsaneJump",
{
"heatFrames": 60
}
]
},
{
"heatFrames": 120
}
]
}
{
"or": [
{
"and": [
{
"resourceMissingAtMost": [
{
"type": "Super",
"count": 0
}
]
},
{
"partialRefill": {
"type": "Energy",
"limit": 100
}
}
]
},
{
"partialRefill": {
"type": "Energy",
"limit": 70
}
}
]
}
{
"heatFrames": 60
} |
|
Requires: {
"noBlueSuit": {}
}
"ScrewAttack"
{
"resetRoom": {
"nodes": [
1
]
}
}
{
"heatFrames": 215
}
{
"cycleFrames": 215
}
{
"or": [
"canInsaneJump",
{
"and": [
"canFarmWhileShooting",
{
"heatFrames": 45
},
{
"cycleFrames": 45
}
]
},
{
"and": [
{
"heatFrames": 360
},
{
"cycleFrames": 360
}
]
}
]
}Resets obstacles: A, B, C Farm cycle drops: 5 Ripper 2 (red) |
From: 1
Left Door
To: 3
Junction Left of Green Gate


Requires: "canDash"
"canFarmWhileShooting"
{
"resourceMissingAtMost": [
{
"type": "Super",
"count": 0
}
]
}
{
"enemyDamage": {
"enemy": "Ripper 2 (red)",
"type": "contact",
"hits": 1
}
}
"canHorizontalDamageBoost"
"h_usePowerBomb"
{
"heatFramesWithEnergyDrops": {
"frames": 400,
"drops": [
{
"enemy": "Ripper 2 (red)",
"count": 5
}
]
}
}
{
"heatFrames": 85
}Clears obstacles: B |
From: 1
Left Door
To: 3
Junction Left of Green Gate
Requires: "canDash"
"canFarmWhileShooting"
{
"resourceAtMost": [
{
"type": "Energy",
"count": 99
}
]
}
{
"enemyDamage": {
"enemy": "Ripper 2 (red)",
"type": "contact",
"hits": 1
}
}
"canHorizontalDamageBoost"
"h_usePowerBomb"
{
"heatFramesWithEnergyDrops": {
"frames": 390,
"drops": [
{
"enemy": "Ripper 2 (red)",
"count": 5
}
]
}
}
{
"heatFrames": 25
}Clears obstacles: B |
From: 1
Left Door
To: 3
Junction Left of Green Gate


Requires: "canDash"
"canFarmWhileShooting"
{
"resourceMissingAtMost": [
{
"type": "Super",
"count": 0
}
]
}
{
"enemyDamage": {
"enemy": "Ripper 2 (red)",
"type": "contact",
"hits": 1
}
}
"canHorizontalDamageBoost"
"ScrewAttack"
{
"heatFramesWithEnergyDrops": {
"frames": 300,
"drops": [
{
"enemy": "Ripper 2 (red)",
"count": 5
}
]
}
}
{
"ammo": {
"type": "Super",
"count": 1
}
}
{
"heatFrames": 100
}Clears obstacles: A, B Dev note: FIXME: A variation of this may be possible with a blue suit. |
From: 1
Left Door
To: 3
Junction Left of Green Gate

Requires: "canDash"
"canFarmWhileShooting"
{
"resourceMissingAtMost": [
{
"type": "Super",
"count": 0
}
]
}
{
"enemyKill": {
"enemies": [
[
"Ripper 2 (red)",
"Ripper 2 (red)"
]
],
"explicitWeapons": [
"PowerBomb",
"ScrewAttack"
]
}
}
{
"heatFramesWithEnergyDrops": {
"frames": 280,
"drops": [
{
"enemy": "Ripper 2 (red)",
"count": 5
}
]
}
}
{
"heatFrames": 170
}Clears obstacles: B |
From: 5
Below Left Door Junction
To: 5
Below Left Door Junction
Requires: "h_heatProof"
{
"resetRoom": {
"nodes": [
1
]
}
}
{
"obstaclesCleared": [
"A"
]
}
"canTrickyJump"
{
"cycleFrames": 145
}
{
"or": [
"ScrewAttack",
{
"and": [
"Charge",
"Plasma",
"Wave",
{
"cycleFrames": 60
},
"canFarmWhileShooting"
]
}
]
}
{
"or": [
"canMoonfall",
{
"cycleFrames": 60
}
]
}
{
"or": [
{
"and": [
"canConsecutiveWallJump",
{
"cycleFrames": 280
}
]
},
{
"and": [
"canConsecutiveWallJump",
"HiJump",
{
"cycleFrames": 220
}
]
},
{
"and": [
"SpaceJump",
{
"cycleFrames": 580
}
]
},
{
"and": [
"SpaceJump",
"HiJump",
{
"cycleFrames": 370
}
]
}
]
}Clears obstacles: A Resets obstacles: R-Mode Farm cycle drops: 1 Yellow Space Pirate (standing) |
|
If using Charge, shoot at the standing Pirate and then crouch to avoid any lazers. Requires: "h_heatProof"
{
"resetRoom": {
"nodes": [
1
]
}
}
{
"or": [
{
"and": [
"canDodgeWhileShooting",
"Charge",
"Plasma",
{
"cycleFrames": 215
}
]
},
{
"and": [
"canFarmWhileShooting",
"Charge",
"Wave",
"Spazer",
"Ice",
{
"cycleFrames": 630
}
]
},
{
"and": [
"ScrewAttack",
{
"cycleFrames": 135
}
]
}
]
}Resets obstacles: A Farm cycle drops: 1 Yellow Space Pirate (standing), 1 Yellow Space Pirate (wall) Dev note: FIXME: There are slower ways to farm these. |
|
Requires: "h_heatProof"
{
"resetRoom": {
"nodes": [
4
]
}
}
{
"or": [
{
"and": [
"canDodgeWhileShooting",
"Charge",
"Plasma",
{
"cycleFrames": 240
}
]
},
{
"and": [
"canFarmWhileShooting",
"Charge",
"Wave",
"Spazer",
"Ice",
{
"cycleFrames": 705
}
]
},
{
"and": [
"ScrewAttack",
{
"cycleFrames": 185
}
]
},
{
"and": [
{
"haveBlueSuit": {}
},
{
"cycleFrames": 215
}
]
}
]
}Resets obstacles: A Farm cycle drops: 1 Yellow Space Pirate (wall) Dev note: FIXME: There are more ways to farm the Pirates. |
From: 3
Left Farm Junction
To: 3
Left Farm Junction
Requires: "h_heatProof"
{
"or": [
{
"and": [
"Grapple",
{
"simpleCycleFrames": 110
},
{
"cycleFrames": 30
}
]
},
{
"and": [
{
"or": [
"Plasma",
"Wave",
"Spazer"
]
},
{
"simpleCycleFrames": 150
},
{
"cycleFrames": 35
}
]
},
{
"and": [
"ScrewAttack",
"canDodgeWhileShooting",
{
"simpleCycleFrames": 155
},
{
"cycleFrames": 35
}
]
},
{
"and": [
"canFarmWhileShooting",
{
"simpleCycleFrames": 120
},
{
"cycleFrames": 60
}
]
},
{
"and": [
"canDodgeWhileShooting",
{
"simpleCycleFrames": 240
},
{
"cycleFrames": 60
}
]
}
]
}Farm cycle drops: 2 Zebbo |
|
Requires: "Grapple"
"canFarmWhileShooting"
"canPauseAbuse"
{
"simpleHeatFrames": 110
}
{
"heatFrames": 30
}
{
"simpleCycleFrames": 110
}
{
"cycleFrames": 30
}Farm cycle drops: 2 Zebbo |
From: 3
Left Farm Junction
To: 3
Left Farm Junction
Requires: "Grapple"
"canFarmWhileShooting"
{
"heatFramesWithEnergyDrops": {
"frames": 370,
"drops": [
{
"enemy": "Zebbo",
"count": 3
}
]
}
}
{
"partialRefill": {
"type": "PowerBomb",
"limit": 3
}
}
{
"heatFrames": 200
} |
From: 4
Right Farm Junction
To: 4
Right Farm Junction

Requires: "Grapple"
"canFarmWhileShooting"
{
"heatFramesWithEnergyDrops": {
"frames": 400,
"drops": [
{
"enemy": "Zebbo",
"count": 4
}
]
}
}
{
"partialRefill": {
"type": "PowerBomb",
"limit": 4
}
}
{
"heatFrames": 200
} |
From: 2
Bottom Left Door
To: 2
Bottom Left Door
Requires: {
"or": [
{
"and": [
"canTrickyDodgeEnemies",
{
"resetRoom": {
"nodes": [
1
]
}
},
{
"cycleFrames": 2900
}
]
},
{
"and": [
{
"resetRoom": {
"nodes": [
2
]
}
},
{
"cycleFrames": 1560
}
]
},
{
"and": [
"canTrickyDodgeEnemies",
{
"resetRoom": {
"nodes": [
3
]
}
},
{
"cycleFrames": 2780
}
]
}
]
}
"Morph"
{
"or": [
{
"ammo": {
"type": "PowerBomb",
"count": 1
}
},
"SpringBall",
{
"and": [
"Bombs",
{
"cycleFrames": 60
},
{
"or": [
"canTrickyJump",
{
"and": [
"Ice",
"canDodgeWhileShooting"
]
}
]
}
]
}
]
}
{
"or": [
"SpaceJump",
{
"and": [
"canDash",
"canFarmWhileShooting",
"canHorizontalDamageBoost",
{
"enemyDamage": {
"enemy": "Fireflea",
"type": "contact",
"hits": 2
}
},
{
"or": [
"canPreciseWallJump",
{
"and": [
"HiJump",
"canSpeedyJump"
]
},
{
"and": [
"canJumpIntoIBJ",
{
"cycleFrames": 1000
}
]
}
]
}
]
}
]
}
{
"or": [
"SpaceJump",
"canPreciseWallJump",
{
"and": [
"HiJump",
"canSpeedyJump"
]
}
]
}
{
"or": [
"canDash",
{
"cycleFrames": 500
}
]
}Resets obstacles: A Farm cycle drops: 5 Fireflea |
From: 1
Left Door
To: 3
Metal Pirates Junction
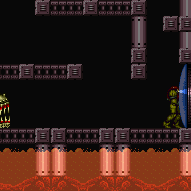
Use the Echoes created by shinesparking to defeat the Metal Pirates. This involves Shineparking into a precise point while also turning the Pirates vulnerable as the echoes reach them. Requires: {
"notable": "Speed Echoes Kill"
}
{
"obstaclesNotCleared": [
"A"
]
}
"canUseSpeedEchoes"
"canHitbox"
{
"canShineCharge": {
"usedTiles": 38,
"openEnd": 2
}
}
{
"or": [
{
"canShineCharge": {
"usedTiles": 23,
"openEnd": 2
}
},
{
"heatFrames": 60
}
]
}
{
"or": [
{
"and": [
"HiJump",
{
"shinespark": {
"frames": 1
}
},
{
"shinespark": {
"frames": 1
}
}
]
},
{
"and": [
"canTrickyJump",
{
"shinespark": {
"frames": 9
}
},
{
"shinespark": {
"frames": 9
}
}
]
}
]
}
{
"or": [
{
"heatFramesWithEnergyDrops": {
"frames": 630,
"drops": [
{
"enemy": "Space Pirate (fighting)",
"count": 12
}
]
}
},
{
"and": [
"canFarmWhileShooting",
{
"heatFramesWithEnergyDrops": {
"frames": 360,
"drops": [
{
"enemy": "Space Pirate (fighting)",
"count": 6
}
]
}
},
{
"heatFramesWithEnergyDrops": {
"frames": 270,
"drops": [
{
"enemy": "Space Pirate (fighting)",
"count": 6
}
]
}
}
]
}
]
}
{
"partialRefill": {
"type": "Energy",
"limit": 99
}
}
{
"partialRefill": {
"type": "Super",
"limit": 1
}
}Clears obstacles: A Dev note: FIXME: It's possible to activate a spark on the ground at 27 energy and collect drops in time. The canFarmWhileShooting presumes spawning the drops on the ground where they can be collected while charging the next shinespark. |
From: 2
Right Door
To: 3
Metal Pirates Junction
Use the Echoes created by shinesparking to defeat the Metal Pirates. This involves Shineparking into a precise point while also turning the Pirates vulnerable as the echoes reach them. Requires: {
"notable": "Speed Echoes Kill"
}
{
"obstaclesNotCleared": [
"A"
]
}
"canUseSpeedEchoes"
"canHitbox"
{
"canShineCharge": {
"usedTiles": 38,
"openEnd": 2
}
}
{
"or": [
{
"canShineCharge": {
"usedTiles": 23,
"openEnd": 2
}
},
{
"heatFrames": 60
}
]
}
{
"or": [
{
"and": [
"HiJump",
{
"shinespark": {
"frames": 1
}
},
{
"shinespark": {
"frames": 1
}
}
]
},
{
"and": [
"canTrickyJump",
{
"shinespark": {
"frames": 9
}
},
{
"shinespark": {
"frames": 9
}
}
]
}
]
}
{
"or": [
{
"heatFramesWithEnergyDrops": {
"frames": 630,
"drops": [
{
"enemy": "Space Pirate (fighting)",
"count": 12
}
]
}
},
{
"and": [
"canFarmWhileShooting",
{
"heatFramesWithEnergyDrops": {
"frames": 360,
"drops": [
{
"enemy": "Space Pirate (fighting)",
"count": 6
}
]
}
},
{
"heatFramesWithEnergyDrops": {
"frames": 270,
"drops": [
{
"enemy": "Space Pirate (fighting)",
"count": 6
}
]
}
}
]
}
]
}
{
"partialRefill": {
"type": "Energy",
"limit": 99
}
}
{
"partialRefill": {
"type": "Super",
"limit": 1
}
}Clears obstacles: A Dev note: FIXME: It's possible to activate a spark on the ground at 27 energy and collect drops in time. The canFarmWhileShooting presumes spawning the drops on the ground where they can be collected while charging the next shinespark. |
From: 3
Metal Pirates Junction
To: 3
Metal Pirates Junction
Use the Echoes created by shinesparking to defeat the Metal Pirates. This involves shineparking into a precise point while also turning the Pirates vulnerable as the echoes reach them. Requires: {
"notable": "Speed Echoes Kill"
}
"h_heatProof"
{
"resetRoom": {
"nodes": [
1,
2
]
}
}
"canFarmWhileShooting"
"canUseSpeedEchoes"
"canHitbox"
{
"canShineCharge": {
"usedTiles": 38,
"openEnd": 2
}
}
{
"shinespark": {
"frames": 9
}
}
{
"cycleFrames": 730
}Clears obstacles: A Farm cycle drops: 2 Space Pirate (fighting) |
From: 3
Metal Pirates Junction
To: 3
Metal Pirates Junction
If energy would fall into Health Bomb range, immediately collect some health drops so that the second wave of drops (from a single pirate) will be able to spawn Supers. Requires: "canFarmWhileShooting"
{
"or": [
{
"and": [
{
"resourceAvailable": [
{
"type": "Energy",
"count": 73
}
]
},
{
"ammo": {
"type": "Super",
"count": 4
}
}
]
},
{
"ammo": {
"type": "Super",
"count": 5
}
}
]
}
{
"heatFramesWithEnergyDrops": {
"frames": 225,
"drops": [
{
"enemy": "Space Pirate (fighting)",
"count": 6
}
]
}
}
{
"heatFramesWithEnergyDrops": {
"frames": 225,
"drops": [
{
"enemy": "Space Pirate (fighting)",
"count": 6
}
]
}
}
{
"partialRefill": {
"type": "Energy",
"limit": 119
}
}Clears obstacles: A Dev note: Collecting Super drops is shown by spending fewer to kill the pirates. |
|
Requires: "canDash"
"canFarmWhileShooting"
{
"or": [
{
"and": [
{
"heatFramesWithEnergyDrops": {
"frames": 120,
"drops": [
{
"enemy": "Zebbo",
"count": 1
}
]
}
},
{
"heatFramesWithEnergyDrops": {
"frames": 130,
"drops": [
{
"enemy": "Zebbo",
"count": 1
}
]
}
},
{
"heatFramesWithEnergyDrops": {
"frames": 140,
"drops": [
{
"enemy": "Zebbo",
"count": 1
}
]
}
},
{
"heatFrames": 100
}
]
},
{
"and": [
{
"or": [
"Spazer",
"Wave",
"Plasma"
]
},
{
"heatFramesWithEnergyDrops": {
"frames": 100,
"drops": [
{
"enemy": "Zebbo",
"count": 1
}
]
}
},
{
"heatFramesWithEnergyDrops": {
"frames": 100,
"drops": [
{
"enemy": "Zebbo",
"count": 1
}
]
}
},
{
"heatFramesWithEnergyDrops": {
"frames": 130,
"drops": [
{
"enemy": "Zebbo",
"count": 1
}
]
}
},
{
"heatFrames": 100
}
]
}
]
} |
|
Requires: {
"haveBlueSuit": {}
}
"canFarmWhileShooting"
{
"heatFramesWithEnergyDrops": {
"frames": 90,
"drops": [
{
"enemy": "Holtz",
"count": 1
}
]
}
}
{
"heatFramesWithEnergyDrops": {
"frames": 70,
"drops": [
{
"enemy": "Zebbo",
"count": 1
}
]
}
}
{
"heatFramesWithEnergyDrops": {
"frames": 60,
"drops": [
{
"enemy": "Holtz",
"count": 1
}
]
}
}
{
"heatFramesWithEnergyDrops": {
"frames": 130,
"drops": [
{
"enemy": "Zebbo",
"count": 1
}
]
}
}
{
"heatFramesWithEnergyDrops": {
"frames": 40,
"drops": [
{
"enemy": "Holtz",
"count": 1
}
]
}
}
{
"heatFramesWithEnergyDrops": {
"frames": 130,
"drops": [
{
"enemy": "Zebbo",
"count": 1
},
{
"enemy": "Holtz",
"count": 1
}
]
}
}
{
"heatFramesWithEnergyDrops": {
"frames": 50,
"drops": [
{
"enemy": "Holtz",
"count": 1
}
]
}
}
{
"heatFrames": 70
} |
|
Requires: "canDash"
"ScrewAttack"
"canFarmWhileShooting"
{
"heatFramesWithEnergyDrops": {
"frames": 80,
"drops": [
{
"enemy": "Holtz",
"count": 1
}
]
}
}
{
"heatFramesWithEnergyDrops": {
"frames": 45,
"drops": [
{
"enemy": "Zebbo",
"count": 1
}
]
}
}
{
"heatFramesWithEnergyDrops": {
"frames": 60,
"drops": [
{
"enemy": "Holtz",
"count": 1
}
]
}
}
{
"heatFramesWithEnergyDrops": {
"frames": 100,
"drops": [
{
"enemy": "Zebbo",
"count": 1
}
]
}
}
{
"heatFramesWithEnergyDrops": {
"frames": 60,
"drops": [
{
"enemy": "Holtz",
"count": 1
}
]
}
}
{
"heatFramesWithEnergyDrops": {
"frames": 100,
"drops": [
{
"enemy": "Zebbo",
"count": 1
},
{
"enemy": "Holtz",
"count": 1
}
]
}
}
{
"heatFramesWithEnergyDrops": {
"frames": 45,
"drops": [
{
"enemy": "Holtz",
"count": 1
}
]
}
}
{
"heatFrames": 60
} |
|

Requires: "canDash"
"canFarmWhileShooting"
{
"heatFramesWithEnergyDrops": {
"frames": 100,
"drops": [
{
"enemy": "Zebbo",
"count": 1
}
]
}
}
{
"heatFramesWithEnergyDrops": {
"frames": 125,
"drops": [
{
"enemy": "Zebbo",
"count": 1
}
]
}
}
{
"heatFramesWithEnergyDrops": {
"frames": 125,
"drops": [
{
"enemy": "Zebbo",
"count": 1
}
]
}
}
{
"heatFrames": 130
} |
|
Requires: {
"haveBlueSuit": {}
}
"canFarmWhileShooting"
{
"heatFramesWithEnergyDrops": {
"frames": 120,
"drops": [
{
"enemy": "Holtz",
"count": 1
}
]
}
}
{
"heatFramesWithEnergyDrops": {
"frames": 60,
"drops": [
{
"enemy": "Zebbo",
"count": 1
}
]
}
}
{
"heatFramesWithEnergyDrops": {
"frames": 150,
"drops": [
{
"enemy": "Zebbo",
"count": 1
}
]
}
}
{
"heatFramesWithEnergyDrops": {
"frames": 230,
"drops": [
{
"enemy": "Zebbo",
"count": 1
},
{
"enemy": "Holtz",
"count": 2
}
]
}
}
{
"heatFrames": 75
} |
|
Requires: "canDash"
"ScrewAttack"
"canFarmWhileShooting"
{
"heatFramesWithEnergyDrops": {
"frames": 80,
"drops": [
{
"enemy": "Holtz",
"count": 1
}
]
}
}
{
"heatFramesWithEnergyDrops": {
"frames": 20,
"drops": [
{
"enemy": "Zebbo",
"count": 1
}
]
}
}
{
"heatFramesWithEnergyDrops": {
"frames": 150,
"drops": [
{
"enemy": "Zebbo",
"count": 1
}
]
}
}
{
"heatFramesWithEnergyDrops": {
"frames": 200,
"drops": [
{
"enemy": "Zebbo",
"count": 1
},
{
"enemy": "Holtz",
"count": 2
}
]
}
}
{
"heatFrames": 60
} |
|
Requires: {
"not": "f_DefeatedPhantoon"
}
"canRiskPermanentLossOfAccess"
{
"or": [
"ScrewAttack",
{
"haveBlueSuit": {}
},
{
"and": [
"Plasma",
{
"cycleFrames": 60
}
]
},
{
"and": [
"Wave",
{
"cycleFrames": 120
}
]
},
{
"and": [
"Spazer",
{
"cycleFrames": 150
}
]
},
{
"and": [
"Ice",
"canDodgeWhileShooting",
{
"cycleFrames": 240
}
]
},
{
"and": [
"canPseudoScrew",
"canFarmWhileShooting",
{
"cycleFrames": 120
}
]
},
{
"cycleFrames": 540
}
]
}
{
"cycleFrames": 480
}Farm cycle drops: 1 Covern |
|
Requires: {
"not": "f_DefeatedPhantoon"
}
{
"resetRoom": {
"nodes": [
1
]
}
}
{
"or": [
{
"and": [
"Plasma",
{
"cycleFrames": 930
}
]
},
{
"and": [
{
"or": [
"canDodgeWhileShooting",
"canRiskPermanentLossOfAccess"
]
},
"Wave",
{
"cycleFrames": 1010
}
]
},
{
"and": [
{
"or": [
"canDodgeWhileShooting",
"canRiskPermanentLossOfAccess"
]
},
"Spazer",
{
"cycleFrames": 1140
}
]
},
{
"and": [
{
"or": [
"canFarmWhileShooting",
"canRiskPermanentLossOfAccess"
]
},
"Ice",
{
"cycleFrames": 1300
}
]
},
{
"and": [
"canFarmWhileShooting",
{
"cycleFrames": 1980
}
]
}
]
}
{
"or": [
"canDash",
{
"cycleFrames": 380
}
]
}Resets obstacles: A Farm cycle drops: 3 Trapped Atomic |
|
Requires: {
"not": "f_DefeatedPhantoon"
}
{
"resetRoom": {
"nodes": [
2
]
}
}
{
"or": [
{
"and": [
{
"or": [
"canDodgeWhileShooting",
"canRiskPermanentLossOfAccess"
]
},
"Plasma",
{
"cycleFrames": 930
}
]
},
{
"and": [
{
"or": [
"canTrickyDodgeEnemies",
"canRiskPermanentLossOfAccess"
]
},
"Wave",
{
"cycleFrames": 1010
}
]
},
{
"and": [
{
"or": [
"canTrickyDodgeEnemies",
"canRiskPermanentLossOfAccess"
]
},
"Spazer",
{
"cycleFrames": 1140
}
]
},
{
"and": [
{
"or": [
"canTrickyDodgeEnemies",
"canRiskPermanentLossOfAccess"
]
},
"Ice",
{
"cycleFrames": 1300
}
]
},
{
"and": [
{
"or": [
"canInsaneJump",
"canRiskPermanentLossOfAccess"
]
},
"canFarmWhileShooting",
{
"cycleFrames": 1980
}
]
}
]
}
{
"or": [
"canDash",
{
"cycleFrames": 200
}
]
}Resets obstacles: A Farm cycle drops: 3 Trapped Atomic |
|
Requires: "f_DefeatedPhantoon"
{
"or": [
"ScrewAttack",
"canPseudoScrew",
{
"haveBlueSuit": {}
},
"Plasma",
"Grapple",
{
"and": [
"h_useMorphBombs",
"canFarmWhileShooting",
{
"cycleFrames": 200
}
]
}
]
}
{
"resetRoom": {
"nodes": [
1
]
}
}
{
"cycleFrames": 150
}Farm cycle drops: 1 Bull |
From: 1
Left Door
To: 1
Left Door
There are additional requirements for killing the Bull enemy who appears when Phantoon is defeated. Requires: {
"not": "f_DefeatedPhantoon"
}
{
"resetRoom": {
"nodes": [
1
]
}
}
{
"or": [
"ScrewAttack",
{
"haveBlueSuit": {}
},
{
"and": [
"Plasma",
{
"cycleFrames": 60
}
]
},
{
"and": [
"Grapple",
{
"or": [
"Wave",
"Spazer"
]
},
{
"cycleFrames": 150
}
]
},
{
"and": [
"canPseudoScrew",
{
"or": [
"canFarmWhileShooting",
{
"cycleFrames": 300
}
]
},
{
"cycleFrames": 120
}
]
}
]
}
{
"cycleFrames": 480
}Resets obstacles: R-Mode Farm cycle drops: 2 Custom Covern (Bull) Dev note: This is Covern farm with a reduced drop chance so as to be applicable while powered off without breaking the powered on state. The weaponry must be able to kill a Bull and follow the dissappearing cycle of a Covern. Resetting the room is slower than waiting for the Covern to respawn, so it is counted as 2 drops. These Coverns have no Super or Missile drop chance. |
|
Requires: {
"not": "f_DefeatedPhantoon"
}
"canRiskPermanentLossOfAccess"
{
"or": [
"ScrewAttack",
{
"haveBlueSuit": {}
},
{
"and": [
"Plasma",
{
"cycleFrames": 60
}
]
},
{
"and": [
"Wave",
{
"cycleFrames": 120
}
]
},
{
"and": [
"Spazer",
{
"cycleFrames": 150
}
]
},
{
"and": [
"Ice",
"canDodgeWhileShooting",
{
"cycleFrames": 240
}
]
},
{
"and": [
"canPseudoScrew",
"canFarmWhileShooting",
{
"cycleFrames": 120
}
]
},
{
"cycleFrames": 540
}
]
}
{
"cycleFrames": 480
}Farm cycle drops: 1 Covern |
From: 1
Right Door
To: 1
Right Door
Requires: "f_DefeatedPhantoon"
{
"resetRoom": {
"nodes": [
1
]
}
}
"canDash"
"Gravity"
"SpaceJump"
{
"or": [
"ScrewAttack",
{
"and": [
"canDodgeWhileShooting",
{
"or": [
"Plasma",
{
"and": [
"Spazer",
"canFarmWhileShooting",
{
"cycleFrames": 200
}
]
},
{
"and": [
"Wave",
{
"cycleFrames": 130
}
]
},
{
"cycleFrames": 1000
}
]
}
]
}
]
}
{
"cycleFrames": 230
}Resets obstacles: A Farm cycle drops: 1 Skultera |
|
Requires: {
"not": "f_DefeatedPhantoon"
}
"canRiskPermanentLossOfAccess"
{
"or": [
"ScrewAttack",
{
"haveBlueSuit": {}
},
{
"and": [
"Plasma",
{
"cycleFrames": 60
}
]
},
{
"and": [
"Wave",
{
"cycleFrames": 120
}
]
},
{
"and": [
"Spazer",
{
"cycleFrames": 150
}
]
},
{
"and": [
"Ice",
"canDodgeWhileShooting",
{
"cycleFrames": 240
}
]
},
{
"and": [
"canPseudoScrew",
"canFarmWhileShooting",
{
"cycleFrames": 120
}
]
},
{
"cycleFrames": 540
}
]
}
{
"cycleFrames": 480
}Farm cycle drops: 1 Covern |
|
To shoot the Atomics with Ice or Plasma, crouch near the edge of the glass and shoot forward; angled shots downwards also work but from a tile further back. Requires: {
"not": "f_DefeatedPhantoon"
}
"canRiskPermanentLossOfAccess"
{
"or": [
{
"and": [
"Plasma",
"canDodgeWhileShooting",
{
"cycleFrames": 360
}
]
},
{
"and": [
"Wave",
{
"cycleFrames": 330
}
]
},
{
"and": [
"Spazer",
{
"cycleFrames": 450
}
]
},
{
"and": [
"h_useMorphBombs",
{
"cycleFrames": 840
}
]
},
{
"and": [
"Ice",
"canFarmWhileShooting",
{
"cycleFrames": 840
}
]
}
]
}
{
"resetRoom": {
"nodes": [
7
]
}
}Resets obstacles: A, B, C, R-Mode Farm cycle drops: 2 Trapped Atomic Dev note: Killing the Coverns with any of these options can be done on a single cycle. Screw Attack can kill the Coverns quickly, but can't kill the Atomics. Bombs can kill the Atimics easily, but not the Coverns. FIXME: Should this require another tech? canRiskPermanentLossOfAccess is a pretty high-level requirement. |
|
Requires: {
"not": "f_DefeatedPhantoon"
}
"canRiskPermanentLossOfAccess"
{
"or": [
"ScrewAttack",
{
"haveBlueSuit": {}
},
{
"and": [
"Plasma",
{
"cycleFrames": 60
}
]
},
{
"and": [
"Wave",
{
"cycleFrames": 120
}
]
},
{
"and": [
"Spazer",
{
"cycleFrames": 150
}
]
},
{
"and": [
"Ice",
"canDodgeWhileShooting",
{
"cycleFrames": 240
}
]
},
{
"and": [
"canPseudoScrew",
"canFarmWhileShooting",
{
"cycleFrames": 120
}
]
},
{
"cycleFrames": 540
}
]
}
{
"cycleFrames": 480
}Farm cycle drops: 1 Covern |
|
Requires: "h_navigateUnderwater"
{
"or": [
{
"resetRoom": {
"nodes": [
1
]
}
},
{
"and": [
{
"resetRoom": {
"nodes": [
4
]
}
},
{
"cycleFrames": 50
}
]
}
]
}
{
"or": [
{
"and": [
"canUseGrapple",
{
"cycleFrames": 120
}
]
},
{
"and": [
"Gravity",
"ScrewAttack",
{
"cycleFrames": 225
}
]
},
{
"and": [
"Plasma",
{
"cycleFrames": 260
}
]
},
{
"and": [
"Wave",
{
"cycleFrames": 300
}
]
},
{
"and": [
{
"haveBlueSuit": {}
},
{
"cycleFrames": 300
}
]
},
{
"and": [
"Spazer",
{
"cycleFrames": 330
}
]
},
{
"and": [
"Gravity",
"canPseudoScrew",
{
"cycleFrames": 400
}
]
},
{
"and": [
"Ice",
{
"cycleFrames": 600
}
]
},
{
"and": [
"canFarmWhileShooting",
{
"cycleFrames": 880
}
]
},
{
"cycleFrames": 1500
}
]
}Farm cycle drops: 3 Sciser Dev note: One more Sciser could be farmed, but in most scenarios it seems not worth it. Gravity can also slightly speed up some other variants but not enough to be worth modeling. |
|
Requires: {
"resetRoom": {
"nodes": [
3
]
}
}
{
"or": [
"Gravity",
{
"cycleFrames": 300
}
]
}
{
"or": [
{
"and": [
"canDash",
{
"or": [
{
"and": [
"Gravity",
"ScrewAttack",
{
"cycleFrames": 280
}
]
},
{
"and": [
"Gravity",
"canPseudoScrew",
{
"cycleFrames": 280
}
]
},
{
"and": [
"Plasma",
{
"cycleFrames": 285
}
]
},
{
"and": [
"Wave",
{
"cycleFrames": 320
}
]
},
{
"and": [
"Spazer",
{
"cycleFrames": 335
}
]
},
{
"and": [
"Ice",
{
"cycleFrames": 400
}
]
},
{
"and": [
"canFarmWhileShooting",
{
"cycleFrames": 430
}
]
},
{
"cycleFrames": 550
}
]
}
]
},
{
"and": [
{
"haveBlueSuit": {}
},
{
"cycleFrames": 420
}
]
}
]
}Resets obstacles: A, B, C, R-Mode Farm cycle drops: 1 Sciser |
From: 3
Middle Right Door
To: 3
Middle Right Door
Requires: {
"resetRoom": {
"nodes": [
3
]
}
}
{
"or": [
{
"and": [
"Gravity",
"canDash",
{
"or": [
"HiJump",
"canWallJump",
"SpaceJump"
]
},
{
"or": [
{
"and": [
"Plasma",
{
"cycleFrames": 590
}
]
},
{
"and": [
"ScrewAttack",
{
"cycleFrames": 590
}
]
},
{
"and": [
"Wave",
{
"cycleFrames": 615
}
]
},
{
"and": [
"Spazer",
{
"cycleFrames": 640
}
]
},
{
"and": [
"Ice",
{
"cycleFrames": 690
}
]
},
{
"cycleFrames": 920
}
]
}
]
},
{
"and": [
"canCameraManip",
"canFarmWhileShooting",
{
"or": [
{
"and": [
"Gravity",
"canDash",
{
"cycleFrames": 770
}
]
},
{
"cycleFrames": 1155
}
]
}
]
}
]
}Resets obstacles: A, B, C, R-Mode Farm cycle drops: 1 Skultera |
|
Requires: "Morph"
{
"resetRoom": {
"nodes": [
5
]
}
}
{
"or": [
{
"and": [
"Gravity",
{
"or": [
{
"and": [
"Grapple",
{
"cycleFrames": 350
}
]
},
{
"and": [
"ScrewAttack",
{
"cycleFrames": 450
}
]
},
{
"and": [
"canPseudoScrew",
{
"cycleFrames": 450
}
]
},
{
"and": [
{
"haveBlueSuit": {}
},
{
"cycleFrames": 450
}
]
},
{
"and": [
"Plasma",
{
"cycleFrames": 480
}
]
},
{
"and": [
"Wave",
{
"cycleFrames": 480
}
]
},
{
"and": [
"Spazer",
{
"cycleFrames": 480
}
]
},
{
"and": [
"Charge",
"canDodgeWhileShooting",
{
"cycleFrames": 480
}
]
},
{
"and": [
"Ice",
{
"cycleFrames": 500
}
]
},
{
"and": [
"canFarmWhileShooting",
{
"cycleFrames": 510
}
]
},
{
"cycleFrames": 1620
}
]
}
]
},
{
"and": [
"Gravity",
"h_useSpringBall",
{
"or": [
{
"and": [
"ScrewAttack",
{
"cycleFrames": 350
}
]
},
{
"and": [
"Plasma",
{
"cycleFrames": 350
}
]
},
{
"and": [
{
"haveBlueSuit": {}
},
{
"cycleFrames": 350
}
]
},
{
"and": [
"Wave",
{
"cycleFrames": 370
}
]
},
{
"and": [
"Spazer",
{
"cycleFrames": 390
}
]
},
{
"and": [
"Ice",
{
"cycleFrames": 430
}
]
}
]
}
]
},
{
"and": [
"Grapple",
{
"cycleFrames": 520
}
]
},
{
"and": [
{
"haveBlueSuit": {}
},
{
"cycleFrames": 600
}
]
},
{
"and": [
"Plasma",
{
"cycleFrames": 690
}
]
},
{
"and": [
"Wave",
{
"cycleFrames": 690
}
]
},
{
"and": [
"Spazer",
{
"cycleFrames": 690
}
]
},
{
"and": [
"Ice",
{
"cycleFrames": 710
}
]
},
{
"and": [
"canFarmWhileShooting",
{
"cycleFrames": 720
}
]
},
{
"cycleFrames": 1770
}
]
}Resets obstacles: A, B, C, R-Mode Farm cycle drops: 1 Sciser |
|
Requires: {
"or": [
{
"resetRoom": {
"nodes": [
1
]
}
},
{
"and": [
{
"resetRoom": {
"nodes": [
2
]
}
},
{
"or": [
{
"and": [
"Gravity",
{
"cycleFrames": 40
}
]
},
{
"cycleFrames": 100
}
]
}
]
}
]
}
{
"or": [
{
"and": [
"Plasma",
{
"cycleFrames": 160
}
]
},
{
"and": [
"Wave",
{
"cycleFrames": 220
}
]
},
{
"and": [
"ScrewAttack",
{
"cycleFrames": 250
}
]
},
{
"and": [
{
"haveBlueSuit": {}
},
{
"cycleFrames": 250
}
]
},
{
"and": [
"Spazer",
{
"cycleFrames": 250
}
]
},
{
"and": [
"Ice",
{
"cycleFrames": 315
}
]
},
{
"and": [
"canFarmWhileShooting",
{
"cycleFrames": 480
}
]
},
{
"cycleFrames": 600
}
]
}
{
"or": [
"Gravity",
{
"and": [
"Grapple",
{
"cycleFrames": 150
}
]
},
{
"and": [
"HiJump",
{
"cycleFrames": 135
}
]
},
{
"and": [
"canTrickySpringBallJump",
{
"cycleFrames": 315
},
"h_doubleEquipmentScreenCycleFrames"
]
}
]
}Resets obstacles: A, B, C, R-Mode Farm cycle drops: 1 Skultera |
From: 6
Left Morph Passage Doorway
To: 6
Left Morph Passage Doorway
Requires: "h_EverestMorphTunnelExpanded"
"canDodgeWhileShooting"
{
"resetRoom": {
"nodes": [
6
]
}
}
{
"or": [
{
"and": [
"Grapple",
{
"cycleFrames": 180
}
]
},
{
"and": [
"Gravity",
{
"or": [
"ScrewAttack",
{
"haveBlueSuit": {}
},
"canPseudoScrew",
"Ice",
"Wave",
"Spazer",
"Plasma"
]
},
{
"cycleFrames": 220
}
]
},
{
"and": [
{
"or": [
"Ice",
"Wave",
"Spazer",
"Plasma",
{
"haveBlueSuit": {}
},
"canFarmWhileShooting"
]
},
{
"cycleFrames": 290
}
]
}
]
}Resets obstacles: A, B Farm cycle drops: 1 Sciser |
From: 4
Platform Below Top Door
To: 4
Platform Below Top Door


Requires: {
"resetRoom": {
"nodes": [
3
]
}
}
"canTrickyJump"
{
"or": [
{
"and": [
"Gravity",
{
"or": [
"ScrewAttack",
{
"haveBlueSuit": {}
}
]
},
{
"cycleFrames": 120
}
]
},
{
"and": [
"Plasma",
{
"cycleFrames": 150
}
]
},
{
"and": [
"canFarmWhileShooting",
"Wave",
"Spazer",
{
"cycleFrames": 160
}
]
},
{
"and": [
"Grapple",
{
"cycleFrames": 160
}
]
}
]
}
{
"or": [
{
"and": [
"Grapple",
"canPrepareForNextRoom",
{
"or": [
"canResetFallSpeed",
"canPreciseWallJump"
]
},
"canFarmWhileShooting",
"h_underwaterCrouchJump"
]
},
"HiJump",
"Gravity",
{
"and": [
"canSpringBallJumpMidAir",
"h_doubleEquipmentScreenCycleFrames",
{
"cycleFrames": 55
}
]
}
]
}Resets obstacles: R-Mode Farm cycle drops: 1 Sciser Dev note: FIXME: for the Grapple case, a water entry above can work as an alternative to wall jump or unmorph. |
|
Requires: {
"resetRoom": {
"nodes": [
1
]
}
}
{
"or": [
{
"and": [
"Grapple",
{
"cycleFrames": 180
}
]
},
{
"and": [
{
"or": [
"Plasma",
"Wave",
"Spazer",
"ScrewAttack",
{
"haveBlueSuit": {}
}
]
},
{
"cycleFrames": 210
}
]
},
{
"and": [
"canFarmWhileShooting",
{
"cycleFrames": 330
}
]
},
{
"cycleFrames": 400
}
]
}Farm cycle drops: 2 Puyo |
|
Requires: {
"or": [
{
"resetRoom": {
"nodes": [
1
]
}
},
{
"and": [
{
"resetRoom": {
"nodes": [
2
]
}
},
{
"cycleFrames": 120
}
]
}
]
}
{
"or": [
"canWallJump",
{
"and": [
"SpaceJump",
{
"cycleFrames": 300
}
]
},
{
"and": [
"canTrickySpringBallJump",
{
"cycleFrames": 320
},
"h_doubleEquipmentScreenCycleFrames",
"h_doubleEquipmentScreenCycleFrames",
"h_doubleEquipmentScreenCycleFrames"
]
}
]
}
"canDodgeWhileShooting"
{
"or": [
{
"and": [
"Plasma",
{
"cycleFrames": 820
}
]
},
{
"and": [
"Grapple",
{
"cycleFrames": 900
}
]
},
{
"and": [
"ScrewAttack",
{
"cycleFrames": 1000
}
]
},
{
"and": [
{
"haveBlueSuit": {}
},
{
"cycleFrames": 1000
}
]
},
{
"and": [
"Wave",
{
"cycleFrames": 1080
}
]
},
{
"and": [
"Spazer",
{
"cycleFrames": 1140
}
]
},
{
"cycleFrames": 2040
}
]
}
{
"or": [
"canFarmWhileShooting",
{
"cycleFrames": 500
}
]
}Farm cycle drops: 4 Puyo, 3 Choot |
|
Requires: {
"resetRoom": {
"nodes": [
2
]
}
}
{
"or": [
"canDash",
{
"cycleFrames": 20
}
]
}
{
"or": [
{
"and": [
"Grapple",
{
"cycleFrames": 100
}
]
},
{
"and": [
"Plasma",
{
"cycleFrames": 160
}
]
},
{
"and": [
"Wave",
{
"cycleFrames": 170
}
]
},
{
"and": [
"Spazer",
{
"cycleFrames": 200
}
]
},
{
"and": [
"ScrewAttack",
{
"cycleFrames": 200
}
]
},
{
"and": [
{
"haveBlueSuit": {}
},
{
"cycleFrames": 200
}
]
},
{
"and": [
"canPseudoScrew",
{
"cycleFrames": 220
}
]
},
{
"and": [
"canFarmWhileShooting",
{
"cycleFrames": 250
}
]
},
{
"cycleFrames": 300
}
]
}Farm cycle drops: 1 Choot |
|
A Menu can be activated by jumping on the doorway platform to scroll the camera down. A second Menu can be activated with a tricky jump onto the ledge on the right, without needing to fall down to the bottom part of the room. Requires: {
"resetRoom": {
"nodes": [
1
]
}
}
"canCameraManip"
"canDodgeWhileShooting"
"canTrickyJump"
{
"or": [
{
"and": [
"Grapple",
{
"cycleFrames": 220
}
]
},
{
"and": [
"Plasma",
{
"cycleFrames": 280
}
]
},
{
"and": [
"Wave",
{
"cycleFrames": 290
}
]
},
{
"and": [
{
"or": [
"ScrewAttack",
{
"haveBlueSuit": {}
}
]
},
{
"cycleFrames": 290
}
]
},
{
"and": [
"Spazer",
{
"cycleFrames": 330
}
]
},
{
"and": [
"canPseudoScrew",
{
"cycleFrames": 435
}
]
},
{
"and": [
"canTrickyJump",
{
"cycleFrames": 500
}
]
}
]
}
{
"or": [
"canFarmWhileShooting",
{
"cycleFrames": 400
}
]
}Resets obstacles: A Farm cycle drops: 2 Menu Dev note: FIXME: By dropping down, it would be possible to farm 4 or 5 Menus and also Owtches. |
From: 3
Junction Left of Morph Tunnel
To: 1
Left Door


Requires: {
"or": [
"canIBJ",
"canWallJump",
"canSpringBallJumpMidAir"
]
}
{
"or": [
{
"enemyKill": {
"enemies": [
[
"Menu",
"Menu",
"Menu"
]
],
"explicitWeapons": [
"PowerBomb",
"ScrewAttack",
"Plasma",
"Missile",
"Super",
"Grapple"
]
}
},
{
"haveBlueSuit": {}
},
{
"and": [
{
"enemyKill": {
"enemies": [
[
"Menu",
"Menu",
"Menu"
]
]
}
},
{
"or": [
"canFarmWhileShooting",
{
"and": [
"canDodgeWhileShooting",
{
"or": [
"Wave",
"Spazer",
{
"enemyDamage": {
"enemy": "Menu",
"type": "contact",
"hits": 1
}
},
"h_pauseAbuseMinimalReserveRefill"
]
}
]
},
{
"enemyDamage": {
"enemy": "Menu",
"type": "contact",
"hits": 3
}
}
]
}
]
}
]
}Dev note: The Menus are relatively hard to dodge, and would end up with the same requirements as killing them with the Power Beam. |
|
Requires: {
"or": [
{
"resetRoom": {
"nodes": [
3
]
}
},
{
"and": [
{
"resetRoom": {
"nodes": [
2
]
}
},
{
"or": [
{
"and": [
"Gravity",
{
"cycleFrames": 835
}
]
},
{
"and": [
"canSuitlessMaridia",
"HiJump",
{
"cycleFrames": 1540
}
]
}
]
}
]
},
{
"and": [
{
"resetRoom": {
"nodes": [
4
]
}
},
{
"or": [
{
"and": [
"HiJump",
"SpaceJump",
{
"cycleFrames": 230
}
]
},
{
"and": [
"canTrickyWallJump",
"canConsecutiveWallJump",
{
"cycleFrames": 310
}
]
},
{
"and": [
"SpaceJump",
{
"cycleFrames": 400
}
]
}
]
}
]
}
]
}
{
"or": [
{
"and": [
"Plasma",
{
"cycleFrames": 320
}
]
},
{
"and": [
"Wave",
{
"cycleFrames": 340
}
]
},
{
"and": [
"Grapple",
{
"cycleFrames": 360
}
]
},
{
"and": [
"Spazer",
"canFarmWhileShooting",
{
"cycleFrames": 390
}
]
},
{
"and": [
"canDash",
"ScrewAttack",
"canDodgeWhileShooting",
{
"cycleFrames": 500
}
]
},
{
"cycleFrames": 640
}
]
}Resets obstacles: R-Mode Farm cycle drops: 2 Choot |
|
Fire angle-down shots to kill the first Evir from safely on the ledge, then collect the drop using Grapple. Crouching can help in reaching the Evir's drop if it is low. Requires: {
"resetRoom": {
"nodes": [
1
]
}
}
"canSuitlessMaridia"
"Grapple"
"canDodgeWhileShooting"
{
"or": [
{
"and": [
"Plasma",
{
"cycleFrames": 180
}
]
},
{
"and": [
"Wave",
{
"cycleFrames": 240
}
]
},
{
"and": [
"Spazer",
"canFarmWhileShooting",
{
"cycleFrames": 280
}
]
}
]
}Resets obstacles: A Farm cycle drops: 1 Evir |
|
If Screw Attack or Plasma are available (or Gravity and a blue suit), farm the two Evirs closest to the door. With Wave or Spazer, it won't be possible to kill the second Evir in time, in which case the room can be crossed to reach a third one. Requires: {
"resetRoom": {
"nodes": [
1
]
}
}
"canPlayInSand"
"canDodgeWhileShooting"
{
"or": [
{
"and": [
"Gravity",
"ScrewAttack",
{
"cycleFrames": 320
}
]
},
{
"and": [
"Gravity",
{
"haveBlueSuit": {}
},
{
"notable": "Blue Suit Sand Walk"
},
{
"cycleFrames": 290
}
]
},
{
"and": [
"Plasma",
{
"cycleFrames": 330
},
{
"or": [
"Gravity",
{
"and": [
"canSuitlessMaridia",
"HiJump",
{
"cycleFrames": 50
}
]
},
{
"and": [
{
"haveBlueSuit": {}
},
{
"notable": "Blue Suit Sand Walk"
},
{
"cycleFrames": 270
}
]
}
]
}
]
},
{
"and": [
{
"or": [
"Wave",
"Spazer"
]
},
"canFarmWhileShooting",
{
"cycleFrames": 975
},
{
"or": [
"Gravity",
{
"and": [
"canSuitlessMaridia",
"HiJump",
{
"cycleFrames": 90
}
]
}
]
}
]
}
]
}Resets obstacles: A Farm cycle drops: 2 Evir Dev note: Farming a third Evir is possible but would rarely be worthwhile. |
|
The Evirs must be killed quickly before they descend too far. It can help to fire at the Evirs from a safe distance so they will not be triggered to attack Samus. Requires: {
"resetRoom": {
"nodes": [
2
]
}
}
"Gravity"
"canDodgeWhileShooting"
"canPlayInSand"
{
"or": [
{
"and": [
"Plasma",
"Wave"
]
},
"canTrickyJump"
]
}
{
"or": [
{
"and": [
"Plasma",
{
"cycleFrames": 900
}
]
},
{
"and": [
{
"haveBlueSuit": {}
},
{
"cycleFrames": 900
}
]
},
{
"and": [
"Wave",
{
"disableEquipment": "Ice"
},
{
"cycleFrames": 1320
}
]
},
{
"and": [
"ScrewAttack",
"canFarmWhileShooting",
{
"cycleFrames": 980
}
]
},
{
"and": [
"Spazer",
{
"disableEquipment": "Ice"
},
"canFarmWhileShooting",
{
"cycleFrames": 1360
}
]
}
]
}
{
"or": [
"canWallJump",
"HiJump",
{
"and": [
"canGravityJump",
"canTrickyJump",
"h_doubleEquipmentScreenCycleFrames"
]
}
]
}
{
"or": [
{
"noBlueSuit": {}
},
{
"notable": "Blue Suit Sand Walk"
}
]
}Resets obstacles: A Farm cycle drops: 3 Evir Dev note: Technically it could make sense to clear obstacle A, but with Gravity it is irrelevant. FIXME: HiJump + Spring fling can be an alternative to Gravity. |
|
If Plasma is available, quickly fire two shots when entering to kill the Evir; it can help to crouch for the second shot. If only Wave is available, quickly fire three shots, then jump out exactly one tile away from the ledge and fire three more shots angled-down to kill the Evir. In any case, use Grapple to collect the drop from the pillar without needing to drop down. Requires: {
"resetRoom": {
"nodes": [
2
]
}
}
"canDodgeWhileShooting"
"canSuitlessMaridia"
"HiJump"
"Grapple"
{
"or": [
{
"and": [
"Plasma",
{
"cycleFrames": 240
}
]
},
{
"and": [
"Wave",
{
"disableEquipment": "Ice"
},
"canFarmWhileShooting",
{
"cycleFrames": 420
}
]
}
]
}
{
"or": [
{
"noBlueSuit": {}
},
{
"notable": "Blue Suit Sand Walk"
}
]
}Resets obstacles: A Farm cycle drops: 1 Evir Dev note: If Gravity is available, then other farm strats can be used instead. |
|
The Evirs must be killed quickly before they descend too far. It can help to fire at the Evirs from a safe distance so they will not be triggered to attack Samus. Requires: "canPlayInSand"
{
"or": [
"canFarmWhileShooting",
{
"and": [
"Plasma",
"Wave"
]
}
]
}
{
"or": [
{
"resetRoom": {
"nodes": [
2
]
}
},
{
"and": [
{
"resetRoom": {
"nodes": [
1
]
}
},
"Gravity",
{
"cycleFrames": 300
}
]
}
]
}
{
"or": [
"Gravity",
{
"and": [
"canSuitlessMaridia",
"HiJump",
{
"cycleFrames": 100
}
]
}
]
}
{
"or": [
{
"and": [
"Plasma",
{
"cycleFrames": 880
}
]
},
{
"and": [
"ScrewAttack",
{
"cycleFrames": 880
}
]
},
{
"and": [
"Wave",
{
"disableEquipment": "Ice"
},
{
"cycleFrames": 1200
}
]
}
]
}
{
"noBlueSuit": {}
}Farm cycle drops: 3 Evir Dev note: FIXME: Slower methods are possible for resetting at the left door. FIXME: This can be possible with a blue suit. |
From: 2
Right Door
To: 2
Right Door


Jump out 1 tile from the ledge and fire angle-down shots at the closest Evir, to quickly kill it before it descends too far. Use Grapple to collect the drop. If only Wave is used, the drop will spawn low, and in this case use Grapple while falling right of the pillar in order to reach the drop. If Plasma is available, then killing the second Evir (instead of the first) is also an option. Requires: {
"resetRoom": {
"nodes": [
2
]
}
}
"canSuitlessMaridia"
"canPlayInSand"
"canFarmWhileShooting"
"Grapple"
{
"or": [
{
"and": [
"Plasma",
{
"cycleFrames": 340
}
]
},
{
"and": [
"Wave",
{
"disableEquipment": "Ice"
},
"canInsaneJump",
"canBeVeryPatient",
{
"cycleFrames": 680
}
]
}
]
}Farm cycle drops: 1 Evir |