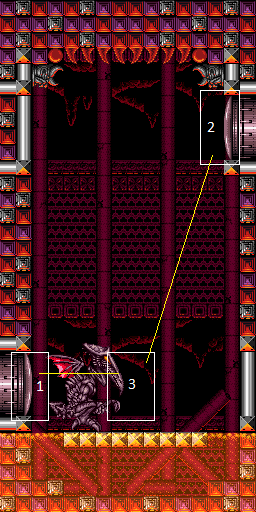
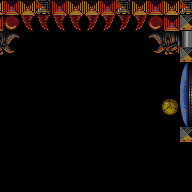
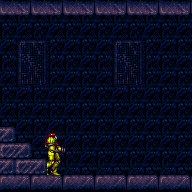
Ridley's Room: Side Platform Cross Room Speedy Jump
Room ID: 142

|
Entrance condition: {
"comeInWithSidePlatform": {
"platforms": [
{
"minHeight": 1,
"maxHeight": 1,
"minTiles": 17,
"speedBooster": true,
"obstructions": [
[
1,
0
]
],
"requires": [
{
"or": [
{
"and": [
"HiJump",
{
"heatFrames": 90
}
]
},
{
"and": [
"canTrickyDashJump",
"canTrickySpringBallJump",
{
"heatFrames": 115
}
]
}
]
}
],
"note": [
"This applies to Warehouse Entrance."
],
"detailNote": [
"For the spring ball jump, retain forward momentum until the pause hits,",
"in order for the mid-air jump to also get the 'tricky dash' boost in height."
]
},
{
"minHeight": 2,
"maxHeight": 2,
"minTiles": 11.4375,
"speedBooster": true,
"obstructions": [
[
1,
0
]
],
"requires": [
"canTrickyDashJump",
"canTrickySpringBallJump",
{
"heatFrames": 100
}
],
"note": [
"This applies to Ridley Tank Room, Halfie Climb Room, and Dust Torizo Room."
],
"detailNote": [
"Retain forward momentum until the pause hits,",
"in order for the mid-air jump to also get the 'tricky dash' boost in height."
]
},
{
"minHeight": 2,
"maxHeight": 2,
"minTiles": 12.4375,
"speedBooster": true,
"obstructions": [
[
1,
0
]
],
"requires": [
"HiJump",
{
"heatFrames": 95
}
],
"note": [
"This applies to Dust Torizo Room and Halfie Climb Room."
]
},
{
"minHeight": 3,
"maxHeight": 3,
"minTiles": 10.4375,
"speedBooster": true,
"obstructions": [
[
1,
0
]
],
"requires": [
"canTrickyDashJump",
"canTrickySpringBallJump",
{
"heatFrames": 120
}
],
"note": [
"This applies to Big Boy Room and Mickey Mouse Room."
],
"detailNote": [
"For the spring ball jump, retain forward momentum until the pause hits,",
"in order for the mid-air jump to also get the 'tricky dash' boost in height."
]
},
{
"minHeight": 2,
"maxHeight": 2,
"minTiles": 45,
"speedBooster": true,
"obstructions": [
[
2,
0
]
],
"requires": [
"canInsaneJump",
{
"heatFrames": 85
}
],
"note": [
"This applies to Waterway Energy Tank Room."
]
},
{
"minHeight": 2,
"maxHeight": 2,
"minTiles": 45,
"speedBooster": true,
"obstructions": [
[
3,
0
]
],
"requires": [
"canInsaneJump",
"canMomentumConservingMorph",
{
"or": [
{
"and": [
"HiJump",
"canInsaneMidAirMorph",
{
"heatFrames": 80
}
]
},
{
"and": [
"canTrickySpringBallJump",
{
"heatFrames": 100
}
]
}
]
}
],
"note": [
"This applies to Statues Hallway."
]
},
{
"minHeight": 3,
"maxHeight": 3,
"minTiles": 37.4375,
"speedBooster": true,
"obstructions": [
[
3,
0
]
],
"requires": [
"canInsaneJump",
"canMomentumConservingMorph",
{
"or": [
{
"and": [
"HiJump",
{
"heatFrames": 85
}
]
},
{
"and": [
"canTrickySpringBallJump",
{
"heatFrames": 100
}
]
}
]
}
],
"note": [
"This applies to Flyway."
]
},
{
"minHeight": 2,
"maxHeight": 2,
"minTiles": 45,
"speedBooster": true,
"obstructions": [
[
4,
0
]
],
"requires": [
"canInsaneJump",
"canMomentumConservingMorph",
"canInsaneMidAirMorph",
"canTrickySpringBallJump",
{
"heatFrames": 100
}
],
"note": [
"This applies to Baby Kraid Room."
]
},
{
"minHeight": 3,
"maxHeight": 3,
"minTiles": 39.4375,
"speedBooster": true,
"obstructions": [
[
3,
2
]
],
"requires": [
"canTrickyJump",
{
"or": [
{
"and": [
"HiJump",
{
"heatFrames": 75
}
]
},
{
"and": [
"canTrickySpringBallJump",
{
"heatFrames": 115
}
]
}
]
}
],
"note": [
"This applies to Metal Pirates Room."
]
}
]
}
}Requires: "canSpeedyJump" Clears obstacles: door_1 Dev note: FIXME: Many of the spring ball jump variants can be done more easily with a spring ball bounce, which should be added as a separate strat. |

