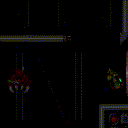
canMetroidAvoid (Very Hard)
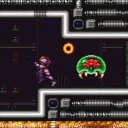
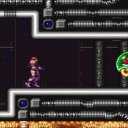
Being proficient at avoiding metroids, and knowing where they are in the room. Metroids will charge towards Samus but keep their momentum if they miss. Shooting a metroid will stop it in place and knock it back slightly. Rinkas exist in all metroid rooms, so this tech also includes the ability to avoid Rinkas while in a Metroid room.
Strats ()
|
From: 1
Left Door (locked)
To: 1
Left Door (locked)
Kill the Metroids while artificially morphed with just Spring Ball to avoid them. A Metroid (or a Rinka) must be completely on screen while a Power Bomb explodes in order for it to lure the other Metroids. Because of this, with extra ammo, it is possible to kill one or two of them before luring the rest. In general, this seems to be easiest by minimizing Samus's horizontal movement as much as possible and getting the Metroids in sync with each other while circling around her. While moving horizontally, their movement is less predictable and harder to sync. Note that it is necessary to exit G-Mode before exiting the room in order for the Metroids to remain killed. Entrance condition: {
"comeInWithGMode": {
"mode": "any",
"morphed": true
}
}
Requires: "canMetroidAvoid"
"h_canArtificialMorphSpringBall"
{
"ammo": {
"type": "PowerBomb",
"count": 4
}
}
Clears obstacles: A |
|
Requires: {
"or": [
"canMetroidAvoid",
"Ice",
"f_KilledMetroidRoom1"
]
}
"canShinechargeMovement"
{
"canShineCharge": {
"usedTiles": 31,
"openEnd": 1
}
}
Exit condition: {
"leaveShinecharged": {
"framesRemaining": 140
}
}
|
|
From: 1
Left Door (locked)
To: 1
Left Door (locked)
Group all of the Metroids by hitting the first Rinka with a Power Bomb. Once grouped, use two more Power Bombs to finish them off. Requires: {
"enemyKill": {
"enemies": [
[
"Metroid",
"Metroid",
"Metroid",
"Metroid"
]
],
"explicitWeapons": [
"PowerBomb"
]
}
}
"canMetroidAvoid"
"canHitbox"
{
"or": [
{
"ammo": {
"type": "PowerBomb",
"count": 1
}
},
"canInsaneJump",
{
"metroidFrames": 100
}
]
}
Clears obstacles: A |
|
Kill the Metroids while artificially morphed with just Spring Ball to avoid them. A Metroid (or a Rinka) must be completely on screen while a Power Bomb explodes in order for it to lure the other Metroids. Because of this, with extra ammo, it is possible to kill one of them before luring the rest. In general, this seems to be easiest by minimizing Samus's horizontal movement as much as possible and getting the Metroids in sync with each other while circling around her. While moving horizontally, their movement is less predictable and harder to sync. Note that it is necessary to exit G-Mode before exiting the room in order for the Metroids to remain killed. Entrance condition: {
"comeInWithGMode": {
"mode": "any",
"morphed": true
}
}
Requires: "canMetroidAvoid"
"h_canArtificialMorphSpringBall"
{
"ammo": {
"type": "PowerBomb",
"count": 4
}
}
Clears obstacles: A |
|
Wait for the Rinka to spawn, then jump, so the trajectory is as high as possible. Space jump makes this a bit easier. If the Metroids are alive, lure them off screen to the left. Requires: {
"or": [
"canTrickyJump",
"SpaceJump"
]
}
{
"or": [
"canMetroidAvoid",
"canUseFrozenEnemies",
"ScrewAttack",
"f_KilledMetroidRoom1"
]
}
Exit condition: {
"leaveWithGModeSetup": {}
}
|
|
Requires: {
"or": [
"canMetroidAvoid",
"Ice",
"f_KilledMetroidRoom1"
]
}
"canShinechargeMovement"
{
"canShineCharge": {
"usedTiles": 23,
"openEnd": 1
}
}
Exit condition: {
"leaveShinecharged": {
"framesRemaining": 140
}
}
|
|
From: 2
Right Door
To: 2
Right Door
Notable: true Group all of the Metroids by hitting the first Rinka with a Power Bomb. Once grouped, use two more Power Bombs to finish them off. Requires: {
"enemyKill": {
"enemies": [
[
"Metroid",
"Metroid",
"Metroid",
"Metroid"
]
],
"explicitWeapons": [
"PowerBomb"
]
}
}
"canMetroidAvoid"
Clears obstacles: A |
|
From: 3
Junction (Get Past Metroids, Left to Right)
To: 2
Right Door
SpinJump often to reduce the amount of time spent in the acid. Requires: {
"acidFrames": 65
}
{
"or": [
{
"obstaclesCleared": [
"A"
]
},
{
"and": [
"canMetroidAvoid",
"canInsaneJump"
]
},
"ScrewAttack",
{
"and": [
"canPseudoScrew",
"canTrickyJump"
]
},
{
"metroidFrames": 150
}
]
}
{
"or": [
"canTrickyJump",
{
"enemyDamage": {
"enemy": "Rinka",
"type": "contact",
"hits": 1
}
}
]
}
|
|
From: 3
Junction (Get Past Metroids, Left to Right)
To: 2
Right Door
Bomb Jump between the two floating platforms. Requires: {
"or": [
{
"obstaclesCleared": [
"A"
]
},
{
"and": [
"canCameraManip",
"canMetroidAvoid"
]
}
]
}
{
"or": [
{
"and": [
"h_canHBJ",
"canResetFallSpeed"
]
},
{
"and": [
{
"obstaclesCleared": [
"A"
]
},
"h_canDiagonalBombJump"
]
},
"h_canCeilingBombJump"
]
}
|
|
From: 3
Junction (Get Past Metroids, Left to Right)
To: 2
Right Door
Requires: {
"or": [
{
"and": [
{
"or": [
"canWalljump",
"HiJump"
]
},
{
"acidFrames": 20
}
]
},
{
"and": [
"Gravity",
{
"acidFrames": 10
}
]
}
]
}
{
"or": [
{
"obstaclesCleared": [
"A"
]
},
"Ice",
"ScrewAttack",
{
"and": [
"canPseudoScrew",
"canDodgeWhileShooting"
]
},
"canMetroidAvoid",
{
"metroidFrames": 150
}
]
}
|
|
From: 3
Junction (Get Past Metroids, Left to Right)
To: 2
Right Door
Notable: true Aim the leftmost Rinka to travel horizontally across the top of the room and use it to damage boost between the two floating platforms. Killing the Rinka will normalize it's respawn timer, which may help in setting up the correct angle. Let the Rinka stay far enough ahead of Samus that she can jump the full distance to the first platform without hitting it. And then once it has reached the right edge of the platform, use it to damage boost. Requires: {
"enemyDamage": {
"enemy": "Rinka",
"type": "contact",
"hits": 1
}
}
"canTrickyJump"
"canHorizontalDamageBoost"
"canCameraManip"
{
"or": [
{
"obstaclesCleared": [
"A"
]
},
"canMetroidAvoid"
]
}
|
|
From: 3
Junction (Get Past Metroids, Left to Right)
To: 2
Right Door
At max run speed without SpeedBooster, you can bounce on both platforms and avoid all acid. Jump from the center of the rightmost X in the background. Bounce again on the second platform to avoid any Metroid or Rinkas. Requires: "h_canUseSpringBall"
"canSpringBallBounce"
"canCarefulJump"
{
"or": [
{
"obstaclesCleared": [
"A"
]
},
"canMetroidAvoid",
"ScrewAttack",
{
"metroidFrames": 200
}
]
}
|
|
From: 3
Junction (Get Past Metroids, Left to Right)
To: 2
Right Door
Requires: "SpaceJump"
{
"or": [
{
"obstaclesCleared": [
"A"
]
},
"Ice",
"ScrewAttack",
"canPseudoScrew",
"canMetroidAvoid",
{
"metroidFrames": 270
}
]
}
|
|
From: 3
Junction (Get Past Metroids, Left to Right)
To: 2
Right Door
Use the full runway to gain echoes and enough speed to reach the far platform. Requires: "SpeedBooster"
"canCarefulJump"
{
"or": [
{
"obstaclesCleared": [
"A"
]
},
"Ice",
"ScrewAttack",
"canPseudoScrew",
"canMetroidAvoid",
{
"metroidFrames": 130
}
]
}
|
|
From: 4
Junction (Get Past Metroids, Right to Left)
To: 1
Left Door (locked)
Requires: {
"acidFrames": 65
}
{
"or": [
{
"obstaclesCleared": [
"A"
]
},
"Ice",
"ScrewAttack",
{
"and": [
"canPseudoScrew",
"canDodgeWhileShooting"
]
},
{
"and": [
"canInsaneJump",
"canMetroidAvoid"
]
},
{
"metroidFrames": 670
}
]
}
|
|
From: 4
Junction (Get Past Metroids, Right to Left)
To: 1
Left Door (locked)
Requires: {
"or": [
{
"and": [
"canDelayedWalljump",
{
"acidFrames": 20
}
]
},
{
"and": [
"HiJump",
"canWalljump",
{
"acidFrames": 20
}
]
},
{
"and": [
"Gravity",
{
"acidFrames": 10
}
]
}
]
}
{
"or": [
{
"obstaclesCleared": [
"A"
]
},
"Ice",
"ScrewAttack",
"canMetroidAvoid",
{
"and": [
"canPseudoScrew",
"canTrickyJump"
]
},
{
"metroidFrames": 420
}
]
}
{
"or": [
"canInsaneJump",
{
"and": [
"canTrickyJump",
"canLateralMidAirMorph"
]
},
{
"and": [
"canTrickyJump",
"canPreciseWalljump",
{
"acidFrames": 16
}
]
},
{
"and": [
"Gravity",
{
"acidFrames": 16
}
]
},
{
"acidFrames": 27
}
]
}
|
|
From: 4
Junction (Get Past Metroids, Right to Left)
To: 1
Left Door (locked)
Notable: true Aim the ceiling Rinka to travel horizontally across the top of the room and use it to damage boost between the two floating platforms. Killing the lower Rinka shortly before killing the higher Rinka will synchronize their respawn timers so that Samus can jump when the lower Rinka reappears in order to get a good angle on the higher Rinka. Jump to the floating platform ahead of the high Rinka, jumping extra high to lead the Metroid out of the way if it is alive. Jump into the Rinka once it reaches the left edge of the platform to reach the next platform. Then use I-frames to pass through the Metroid if it is still alive. Requires: {
"enemyDamage": {
"enemy": "Rinka",
"type": "contact",
"hits": 1
}
}
"canTrickyJump"
"canHorizontalDamageBoost"
"canCameraManip"
{
"or": [
{
"obstaclesCleared": [
"A"
]
},
{
"and": [
"canMetroidAvoid",
"canHitbox"
]
}
]
}
{
"or": [
"canInsaneJump",
{
"enemyDamage": {
"enemy": "Rinka",
"type": "contact",
"hits": 1
}
},
{
"and": [
"canTrickyJump",
"canLateralMidAirMorph"
]
},
{
"and": [
"Gravity",
{
"acidFrames": 16
}
]
},
{
"acidFrames": 27
}
]
}
|
|
From: 4
Junction (Get Past Metroids, Right to Left)
To: 1
Left Door (locked)
Requires: "SpaceJump"
{
"or": [
{
"obstaclesCleared": [
"A"
]
},
"ScrewAttack",
"canPseudoScrew",
"Ice",
"canMetroidAvoid",
{
"metroidFrames": 420
}
]
}
|
|
From: 4
Junction (Get Past Metroids, Right to Left)
To: 1
Left Door (locked)
Requires: "SpeedBooster"
"canCarefulJump"
{
"or": [
{
"obstaclesCleared": [
"A"
]
},
"Ice",
"canMetroidAvoid",
{
"metroidFrames": 200
}
]
}
{
"or": [
"canTrickyJump",
{
"acidFrames": 27
},
{
"and": [
{
"acidFrames": 16
},
"canPreciseWalljump"
]
},
{
"and": [
{
"acidFrames": 16
},
"Gravity"
]
}
]
}
|
|
From: 4
Junction (Get Past Metroids, Right to Left)
To: 1
Left Door (locked)
At max non-speed run speed, Spring Ball bounce on both platforms and avoid all acid. Land on the right side of the first platform to avoid the second Metroid. Bouncing on the second platform will usually avoid the third Metroid. Requires: "canSpringBallBounce"
"canCarefulJump"
{
"or": [
{
"obstaclesCleared": [
"A"
]
},
{
"and": [
"canTrickyJump",
"canMetroidAvoid"
]
},
{
"metroidFrames": 270
}
]
}
|
|
From: 1
Top Right Door
To: 1
Top Right Door
This is easiest by staying on the top floating platform with the two Metroids stuck below it. Note that it is necessary to exit G-Mode before exiting the room in order for the Metroids to remain killed. Entrance condition: {
"comeInWithGMode": {
"mode": "any",
"morphed": true
}
}
Requires: "canMetroidAvoid" "h_canArtificialMorphPowerBomb" "h_canArtificialMorphPowerBomb" "h_canArtificialMorphPowerBomb" Clears obstacles: A |
|
From: 1
Top Right Door
To: 2
Bottom Right Door (locked)
Entrance condition: {
"comeInShinecharged": {
"framesRequired": 102
}
}
Requires: "canShinechargeMovementTricky"
{
"shinespark": {
"frames": 22
}
}
{
"or": [
"f_KilledMetroidRoom2",
"canMetroidAvoid"
]
}
Exit condition: {
"leaveWithSpark": {}
}
|
|
From: 1
Top Right Door
To: 2
Bottom Right Door (locked)
Entrance condition: {
"comeInShinecharging": {
"length": 2,
"openEnd": 1
}
}
Requires: "canShinechargeMovementTricky"
{
"shinespark": {
"frames": 7
}
}
{
"or": [
"f_KilledMetroidRoom2",
"canMetroidAvoid"
]
}
Exit condition: {
"leaveWithSpark": {}
}
|
|
Requires: "canMetroidAvoid" |
|
From: 1
Top Right Door
To: 2
Bottom Right Door (locked)
An easy way is once Samus is on the top platform, jump and aim down to lower the camera, then place 3 PBs. Requires: {
"enemyKill": {
"enemies": [
[
"Metroid",
"Metroid"
]
],
"explicitWeapons": [
"PowerBomb"
]
}
}
{
"or": [
"canMetroidAvoid",
"canCameraManip"
]
}
Clears obstacles: A |
|
From: 2
Bottom Right Door (locked)
To: 1
Top Right Door
Spinjump into the opening below the top door. Entrance condition: {
"comeInShinecharged": {
"framesRequired": 105
}
}
Requires: "HiJump"
"canCarefulJump"
"canShinechargeMovementComplex"
{
"or": [
"f_KilledMetroidRoom2",
"canMetroidAvoid"
]
}
Exit condition: {
"leaveShinecharged": {
"framesRemaining": "auto"
}
}
|
|
From: 2
Bottom Right Door (locked)
To: 1
Top Right Door
Wall jump up the right wall and either mid-air morph to fit through the gap below the top door. Alternatively use a mid-air wiggle to reduce the height of Samus' hitbox after the walljump, to be able to fit through the gap without morphing. Entrance condition: {
"comeInShinecharged": {
"framesRequired": 140
}
}
Requires: "canWallJumpInstantMorph"
"canShinechargeMovementComplex"
{
"or": [
"f_KilledMetroidRoom2",
"canMetroidAvoid"
]
}
Exit condition: {
"leaveShinecharged": {
"framesRemaining": "auto"
}
}
|
|
From: 2
Bottom Right Door (locked)
To: 1
Top Right Door
Wall jump up the right wall and use a mid-air wiggle to reduce the height of Samus' hitbox after the walljump, to be able to fit through the gap without morphing. Entrance condition: {
"comeInShinecharged": {
"framesRequired": 120
}
}
Requires: "canWalljump"
"canMidairWiggle"
"canShinechargeMovementTricky"
{
"or": [
"f_KilledMetroidRoom2",
"canMetroidAvoid"
]
}
Exit condition: {
"leaveShinecharged": {
"framesRemaining": "auto"
}
}
|
|
From: 2
Bottom Right Door (locked)
To: 1
Top Right Door
Spinjump into the opening below the top door. Entrance condition: {
"comeInShinecharged": {
"framesRequired": 80
}
}
Requires: "HiJump"
"canCarefulJump"
"canShinechargeMovementComplex"
{
"shinespark": {
"frames": 6
}
}
{
"or": [
"f_KilledMetroidRoom2",
"canMetroidAvoid"
]
}
Exit condition: {
"leaveWithSpark": {}
}
|
|
From: 2
Bottom Right Door (locked)
To: 1
Top Right Door
Wall jump up the right wall and either mid-air morph to fit through the gap below the top door. Alternatively use a mid-air wiggle to reduce the height of Samus' hitbox after the walljump, to be able to fit through the gap without morphing. Shoot the door open and spark out. Entrance condition: {
"comeInShinecharged": {
"framesRequired": 110
}
}
Requires: "canWallJumpInstantMorph"
"canShinechargeMovementComplex"
{
"shinespark": {
"frames": 5
}
}
{
"or": [
"f_KilledMetroidRoom2",
"canMetroidAvoid"
]
}
Exit condition: {
"leaveWithSpark": {}
}
|
|
From: 2
Bottom Right Door (locked)
To: 1
Top Right Door
Wall jump up the right wall and use a mid-air wiggle to reduce the height of Samus' hitbox after the walljump, to be able to fit through the gap without morphing. Shoot the door open and spark out. Entrance condition: {
"comeInShinecharged": {
"framesRequired": 105
}
}
Requires: "canWalljump"
"canMidairWiggle"
"canShinechargeMovementTricky"
{
"shinespark": {
"frames": 5
}
}
{
"or": [
"f_KilledMetroidRoom2",
"canMetroidAvoid"
]
}
Exit condition: {
"leaveWithSpark": {}
}
|
|
From: 2
Bottom Right Door (locked)
To: 1
Top Right Door
Spinjump into the opening below the top door. Entrance condition: {
"comeInShinecharging": {
"length": 2,
"openEnd": 0
}
}
Requires: "canShinechargeMovementComplex"
"HiJump"
"canCarefulJump"
{
"or": [
"f_KilledMetroidRoom2",
{
"and": [
"canMetroidAvoid",
"canShinechargeMovementTricky"
]
}
]
}
Exit condition: {
"leaveShinecharged": {
"framesRemaining": 50
}
}
|
|
From: 2
Bottom Right Door (locked)
To: 1
Top Right Door
Notable: true 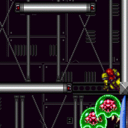
Buffer a spinjump towards the door to jump over the top metroid and land on the middle platform. Metroids can be knocked with Beam shots to clear a path. Requires: "canMetroidAvoid" |
|
From: 2
Bottom Right Door (locked)
To: 1
Top Right Door
Notable: true Kill the two Metroids with Power Bombs while avoiding damage. Requires: {
"enemyKill": {
"enemies": [
[
"Metroid",
"Metroid"
]
],
"explicitWeapons": [
"PowerBomb"
]
}
}
"canMetroidAvoid"
Clears obstacles: A |
|
From: 2
Bottom Right Door (locked)
To: 2
Bottom Right Door (locked)
Quickly artificial morph and roll off to the bottom before being grabbed by the Metroids. This is much easier in indirect artificial morph. Note that it is necessary to exit G-Mode before exiting the room in order for the Metroids to remain killed. Entrance condition: {
"comeInWithGMode": {
"mode": "any",
"morphed": true,
"mobility": "mobile"
}
}
Requires: "canMetroidAvoid" "h_canArtificialMorphSpringBall" "h_canArtificialMorphPowerBomb" "h_canArtificialMorphPowerBomb" "h_canArtificialMorphPowerBomb" Clears obstacles: A |
|
From: 2
Bottom Right Door (locked)
To: 2
Bottom Right Door (locked)
If the Metroids are alive, lure them off screen. Requires: {
"or": [
"canMetroidAvoid",
"canUseFrozenEnemies",
"ScrewAttack",
"f_KilledMetroidRoom2"
]
}
Exit condition: {
"leaveWithGModeSetup": {}
}
|
|
Kill the Metroids while artificially morphed with just Spring Ball to avoid them. A Metroid (or a Rinka) must be completely on screen while a Power Bomb explodes in order for it to lure the other Metroids. One strategy for this location is to wait for the Rinkas to fire twice, then place a Power Bomb in the hallway to the right and return to lure one. Jump over it twice and at the top of the second jump place a second Power Bomb; this one will explode when the other two Metroids arrive. Jumping high to the right can also help get them stuck in the top right corner while placing a Power Bomb. Note that it is necessary to exit G-Mode before exiting the room in order for the Metroids to remain killed. Entrance condition: {
"comeInWithGMode": {
"mode": "any",
"morphed": true
}
}
Requires: "canMetroidAvoid"
"h_canArtificialMorphSpringBall"
{
"ammo": {
"type": "PowerBomb",
"count": 4
}
}
Clears obstacles: A |
|
Requires: {
"or": [
"canMetroidAvoid",
"Ice",
"f_KilledMetroidRoom3"
]
}
"canShinechargeMovement"
{
"canShineCharge": {
"usedTiles": 29,
"openEnd": 2
}
}
Exit condition: {
"leaveShinecharged": {
"framesRemaining": 105
}
}
|
|
From: 1
Left Door
To: 2
Right Door (locked)
Group the Metroids by hitting the first Rinka with a Power Bomb. Quickly moving to the right as the Power Bomb explodes may help as that area is more open with no Rinkas. Then Kill all three Metroids with Power Bombs while avoiding damage. Requires: {
"enemyKill": {
"enemies": [
[
"Metroid",
"Metroid",
"Metroid"
]
],
"explicitWeapons": [
"PowerBomb"
]
}
}
"canMetroidAvoid"
{
"or": [
{
"metroidFrames": 120
},
"canInsaneJump"
]
}
Clears obstacles: A |
|
Requires: "canMetroidAvoid"
{
"or": [
"canTrickyJump",
"canMockball"
]
}
|
|
Requires: "canMetroidAvoid"
{
"or": [
"canTrickyJump",
"canMockball"
]
}
|
|
Group the Metroids by hitting the first Rinka with a Power Bomb. Then Kill all three Metroids with Power Bombs while avoiding damage. Requires: {
"enemyKill": {
"enemies": [
[
"Metroid",
"Metroid",
"Metroid"
]
],
"explicitWeapons": [
"PowerBomb"
]
}
}
"canMetroidAvoid"
{
"or": [
{
"ammo": {
"type": "PowerBomb",
"count": 1
}
},
"canInsaneJump",
{
"metroidFrames": 100
}
]
}
Clears obstacles: A |
|
From: 2
Right Door (locked)
To: 2
Right Door (locked)
Kill the Metroids while artificially morphed with just Spring Ball to avoid them. A Metroid (or a Rinka) must be completely on screen while a Power Bomb explodes in order for it to lure the other Metroids. Start the room with a bomb boost spring ball jump or a precise horizontal bomb boost. In general, this seems to be easiest by minimizing Samus's horizontal movement as much as possible and getting the Metroids in sync with each other while circling around her. While moving horizontally, their movement is less predictable and harder to sync. Note that it is necessary to exit G-Mode before exiting the room in order for the Metroids to remain killed. Entrance condition: {
"comeInWithGMode": {
"mode": "any",
"morphed": true
}
}
Requires: "canMetroidAvoid"
"h_canArtificialMorphSpringBall"
"h_canArtificialMorphBombHorizontally"
{
"ammo": {
"type": "PowerBomb",
"count": 3
}
}
Clears obstacles: A |
|
Requires: {
"or": [
"canMetroidAvoid",
"Ice",
"f_KilledMetroidRoom3"
]
}
{
"canShineCharge": {
"usedTiles": 29,
"openEnd": 2
}
}
{
"or": [
{
"shinespark": {
"frames": 75
}
},
{
"and": [
"canShinechargeMovementComplex",
{
"shinespark": {
"frames": 50
}
}
]
}
]
}
Exit condition: {
"leaveWithSpark": {}
}
|
|
From: 1
Top Left Door
To: 1
Top Left Door
Kill the Metroids while artificially morphed without any movement items. With just 5 Power Bombs, place one on the first platform to kill some Rinkas and to lure a second Metroid. Place a second in the same region, then drop down and quickly place a third on the second platform and fall to the third platform while the first two Metroids die. The remaining two Power Bombs can safely placed here to kill the final Metroid. Note that it is necessary to exit G-Mode before exiting the room in order for the Metroids to remain killed. Entrance condition: {
"comeInWithGMode": {
"mode": "any",
"morphed": true
}
}
Requires: "canMetroidAvoid"
{
"ammo": {
"type": "PowerBomb",
"count": 5
}
}
Clears obstacles: A |
|
Run under the top Metroid then roll beneath the second and third. Requires: "canMetroidAvoid" "Morph" |
|
From: 1
Top Left Door
To: 2
Bottom Door (locked)
Notable: true Group the Metroids by descending the room. Then Kill all three Metroids with Power Bombs while avoiding damage. Requires: {
"enemyKill": {
"enemies": [
[
"Metroid",
"Metroid",
"Metroid"
]
],
"excludedWeapons": [
"PowerBomb"
]
}
}
"canMetroidAvoid"
Clears obstacles: A |
|
From: 1
Top Left Door
To: 2
Bottom Door (locked)
Notable: true 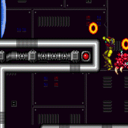
Avoid all of the Rinkas and Metroids with no equipment and taking no damage. One way to do this is to bait the top Rinkas to fire upwards, and then carefully spinjump around each corner as the Metroid below passes by. Requires: "canMetroidAvoid" "canCarefulJump" |
|
From: 2
Bottom Door (locked)
To: 1
Top Left Door
Notable: true Take out the lower two Metroids with Power Bombs while avoiding damage. Then Kill the remaining one with three more Power Bombs. Requires: {
"enemyKill": {
"enemies": [
[
"Metroid",
"Metroid"
],
[
"Metroid"
]
],
"explicitWeapons": [
"PowerBomb"
]
}
}
"canMetroidAvoid"
Clears obstacles: A |
|
From: 2
Bottom Door (locked)
To: 1
Top Left Door
Notable: true 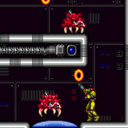
Move to the left side of the lowest section and jump morph before placing the Power Bomb to kill all three Metroids. Then Kill all three Metroids with Power Bombs while avoiding damage. Requires: {
"enemyKill": {
"enemies": [
[
"Metroid",
"Metroid",
"Metroid"
]
],
"explicitWeapons": [
"PowerBomb"
]
}
}
"canMetroidAvoid"
"canHitbox"
{
"or": [
"can4HighMidAirMorph",
"canInsaneJump"
]
}
Clears obstacles: A |
|
From: 2
Bottom Door (locked)
To: 1
Top Left Door
Notable: true
Avoid all of the Rinkas and Metroids with no equipment and taking no damage. Begin by shooting the bottom Metroid hold it in place, and wait right below the first ledge. Once the middle Metroid passes by, jump up and shoot any Rinkas that are in the way. Repeat for the next ledge, clear any Rinkas, and then run to the door. Requires: "canMetroidAvoid" "canDodgeWhileShooting" "canCarefulJump" |