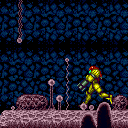
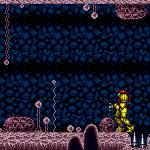
canQuickDrop (Very Hard)
Using a momentum conserving turnaround on a crumble block, an opening doorshell, or any other breaking block, to preserve Samus' momentum. This is often used when traversing with a shinecharge, or to quickly fall through a crumble block and jump back through it before it re-forms.
Dependencies: canMomentumConservingTurnaround, canBufferedMomentumConservingTurnaround
Strats ()
|
Gain a shinecharge on the long, lower platform in the screen above, then carry it left and down. Use crumble quick drops, land on the floor at the bottom, spin jump left into the doorway, and activate the spark. The required movement here is very precise, as the 180 shinecharge frames is only barely enough. Requires: {
"obstaclesNotCleared": [
"A"
]
}
"h_crouchJumpDownGrab"
{
"canShineCharge": {
"usedTiles": 17,
"openEnd": 0
}
}
"canShinechargeMovementTricky"
"canQuickDrop"
{
"shineChargeFrames": 175
}
{
"shinespark": {
"frames": 1,
"excessFrames": 0
}
}Exit condition: {
"leaveWithSpark": {}
}Dev note: This starts at node 1 to be able to unlock the door first if needed. Getting up to the platform above is possible by running to the right and crouch-jumping up. |
|
It is possible to do a quick crumble escape twice, requiring no other items or tech. It is easier to escape by doing a quick crumble escape, followed by a crumble block jump or using spring ball or space jump. Requires: "canQuickDrop" |
From: 2
Top Right Door
To: 3
Bottom Left Door
Quick dropping through the crumbles allows reaching the door with more shinecharge time remaining. Requires: {
"canShineCharge": {
"usedTiles": 20,
"openEnd": 1
}
}
"canShinechargeMovement"
"canQuickDrop"
{
"shineChargeFrames": 115
}Exit condition: {
"leaveShinecharged": {}
}Unlocks doors: {"types":["missiles"],"requires":["never"]}
{"types":["super"],"requires":[]}
{
"types": [
"powerbomb"
],
"requires": [
{
"or": [
"h_useSpringBall",
{
"and": [
"canTrickyJump",
{
"or": [
"canCrumbleJump",
"canWallJumpInstantMorph"
]
}
]
}
]
}
]
}Dev note: Should there be a tech for crumble quick drop? |
|

If the enemies are still alive, Power Bomb lag can delay the spikesuit timing. The quickdrop setup requires a small jump of 3 frames or less above the crumbles. Requires: "h_shinechargeMaxRunway"
{
"or": [
"h_useMorphBombs",
"SpringBall",
{
"ammo": {
"type": "PowerBomb",
"count": "n_spikeSuitAttempts"
}
},
{
"and": [
"HiJump",
"canInsaneJump",
"canQuickDrop"
]
}
]
}
{
"or": [
{
"spikeHits": "n_spikeSuitAttempts"
},
{
"and": [
"canPatientSpikeSuit",
{
"spikeHits": 1
},
{
"resetRoom": {
"nodes": [
1,
2
]
}
}
]
}
]
}
"canTrickySpikeSuit"
{
"shinespark": {
"frames": 1,
"excessFrames": 1
}
} |
|
Perform a long sequence of quick drops to make it past the crumbles without dashing. It is possible to hold jump the entire time, doing buffered turnaround spin jumps to the right. With each quick drop, it is recommended to center Samus over the edge between two crumble blocks, to break both of them at once. Requires: {
"notable": "Dashless Quick Drops"
}
{
"disableEquipment": "HiJump"
}
"canQuickDrop" |
|
Perform a quick-drop through the Crumble block, and grab the item. During the item message box, buffer the inputs to turn around to the right and jump. Perform a wall jump by briefly releasing and repressing jump (while continuing to hold right) after hitting the respawning crumble block, to clip up through it. Requires: {
"notable": "Mission Impossible"
}
"canQuickDrop"
"HiJump"
"canPreciseWallJump"
{
"obstaclesCleared": [
"A",
"B"
]
}Dev note: This expects that the Sidehoppers are dead. To avoid redundant requirements, they must be killed coming in. |
From: 3
Item
To: 4
Top Left Junction
Gain a shinecharge by running right-to-left, either using the short runway (with unbroken Super block) or an extended runway by taking a spike hit. Then spin jump, hit the ceiling, aim down, break the Super block, and turn around to quick drop through the crumble block. During the item message box, buffer the inputs to turn around to the right and jump. Once under the crumble block (the left part of it), press up while still holding jump, to immediately activate the spark and make it up in time. Requires: {
"notable": "Mission Impossible Shinespark"
}
{
"or": [
{
"canShineCharge": {
"usedTiles": 16,
"openEnd": 0
}
},
{
"and": [
{
"canShineCharge": {
"usedTiles": 23,
"openEnd": 0
}
},
{
"spikeHits": 1
},
"canUseIFrames"
]
}
]
}
"canShinechargeMovementComplex"
"canQuickDrop"
{
"or": [
{
"shinespark": {
"frames": 19,
"excessFrames": 7
}
},
{
"and": [
{
"shinespark": {
"frames": 19,
"excessFrames": 15
}
},
"canCrumbleJump"
]
}
]
}
{
"obstaclesCleared": [
"A",
"B"
]
}Dev note: This expects that the Sidehoppers are dead. To avoid redundant requirements, they must be killed coming in. |
From: 3
Item
To: 4
Top Left Junction


Spin jump, hit the ceiling, aim down, break the Super block, and turn around to quick drop through the crumble block. During the item message box, buffer the inputs to turn around to the right and jump. Once under the crumble block (the left part of it), press up while still holding jump, to immediately activate the spark and make it up in time. Requires: {
"notable": "Mission Impossible Shinespark"
}
"canQuickDrop"
"h_storedSpark"
{
"or": [
{
"shinespark": {
"frames": 19,
"excessFrames": 7
}
},
{
"and": [
{
"shinespark": {
"frames": 19,
"excessFrames": 15
}
},
"canCrumbleJump"
]
}
]
}
{
"obstaclesCleared": [
"A",
"B"
]
}Dev note: This expects that the Sidehoppers are dead. To avoid redundant requirements, they must be killed coming in. |
From: 3
Item
To: 4
Top Left Junction
Perform a quick-drop through the Crumble block, and grab the item. During the item message box, buffer the inputs to turn around to the right and jump. Break spin just before you would hit the respawning crumble block, in order to clip up through it. Then perform a crumble jump to make it out. Requires: {
"notable": "Mission Impossible Walljumpless"
}
"canQuickDrop"
"HiJump"
"canCrumbleJump"
{
"obstaclesCleared": [
"A",
"B"
]
}Dev note: This expects that the Sidehoppers are dead. To avoid redundant requirements, they must be killed coming in. |
|
Requires: {
"resetRoom": {
"nodes": [
2
]
}
}
{
"or": [
"canQuickDrop",
{
"cycleFrames": 30
}
]
}
{
"or": [
{
"and": [
"Wave",
{
"cycleFrames": 120
}
]
},
{
"and": [
"Grapple",
"canDodgeWhileShooting",
{
"cycleFrames": 240
}
]
},
{
"and": [
"Morph",
"canTrickyJump",
{
"cycleFrames": 300
}
]
},
{
"and": [
"canTrivialMidAirMorph",
"Bombs",
{
"cycleFrames": 1100
}
]
},
{
"and": [
"Morph",
{
"or": [
{
"notable": "Return Through Crumble Blocks"
},
"Bombs"
]
},
{
"or": [
"canWallJump",
{
"and": [
"HiJump",
"canSpringBallJumpMidAir",
"h_doubleEquipmentScreenCycleFrames"
]
},
"SpaceJump"
]
},
{
"cycleFrames": 510
}
]
},
{
"cycleFrames": 2160
}
]
}
{
"or": [
"canDash",
{
"cycleFrames": 90
}
]
}Resets obstacles: A, B, C, D Farm cycle drops: 1 Sova |
|
Requires: {
"heatFrames": 105
}
{
"or": [
"canQuickDrop",
{
"heatFrames": 30
}
]
}
{
"or": [
"canDash",
{
"heatFrames": 5
}
]
} |
|
Entrance condition: {
"comeInShinecharged": {},
"comesThroughToilet": "any"
}Requires: {
"shineChargeFrames": 105
}
"canShinechargeMovementComplex"
"canQuickDrop"
{
"heatFrames": 105
}Exit condition: {
"leaveShinecharged": {}
}Unlocks doors: {"types":["super"],"requires":[]}
{"types":["missiles","powerbomb"],"requires":["never"]} |
From: 2
Top Door
To: 1
Left Door


Entrance condition: {
"comeInShinecharged": {},
"comesThroughToilet": "any"
}Requires: {
"shineChargeFrames": 95
}
"canShinechargeMovementComplex"
"canQuickDrop"
{
"heatFrames": 120
}
{
"shinespark": {
"frames": 6,
"excessFrames": 0
}
}Exit condition: {
"leaveWithSpark": {}
}Unlocks doors: {"types":["super"],"requires":[]}
{"types":["missiles","powerbomb"],"requires":["never"]} |
|
Requires: "canDash"
{
"heatFrames": 210
}
{
"or": [
"canQuickDrop",
{
"heatFrames": 60
}
]
}Exit condition: {
"leaveWithRunway": {
"length": 11,
"openEnd": 0
}
}Unlocks doors: {"types":["missiles"],"requires":[{"heatFrames":50}]}
{"types":["super"],"requires":[]}
{"types":["powerbomb"],"requires":[{"heatFrames":50}]} |
|
Requires: "canDash"
{
"heatFrames": 135
}
{
"or": [
"canQuickDrop",
{
"heatFrames": 30
}
]
}Exit condition: {
"leaveWithRunway": {
"length": 9,
"openEnd": 0
}
}Unlocks doors: {"types":["missiles"],"requires":[{"heatFrames":50}]}
{"types":["super"],"requires":[]}
{"types":["powerbomb"],"requires":[{"heatFrames":50}]} |
|
Requires: "canDash"
{
  "heatFrames": 90
}
{
  "or": [
    "canQuickDrop",
    {
      "heatFrames": 30
    }
  ]
}Exit condition: {
"leaveWithRunway": {
"length": 5,
"openEnd": 0
}
}Unlocks doors: {"types":["missiles"],"requires":[{"heatFrames":50}]}
{"types":["super"],"requires":[]}
{"types":["powerbomb"],"requires":[{"heatFrames":50}]} |
|
Requires: {
"heatFrames": 90
}
{
"or": [
"canQuickDrop",
{
"heatFrames": 30
}
]
}Dev note: This assumes landing on the ground before touching the item. |
|
Entrance condition: {
"comeInShinecharged": {}
}Requires: "canShinechargeMovementTricky"
"canQuickDrop"
{
"shineChargeFrames": 40
}Exit condition: {
"leaveShinecharged": {}
}Unlocks doors: {"types":["super"],"requires":[]}
{"types":["missiles","powerbomb"],"requires":["never"]}Dev note: This requires jumping through the door, but we don't use 'comeInShinechargedJumping' because it's not required to come from an air environment. FIXME: clean up the way this kind of cross-room movement is expressed. |
From: 1
Left Door
To: 2
Bottom Sand Exit

Entrance condition: {
"comeInShinecharging": {
"length": 0,
"openEnd": 1
}
}Requires: "canShinechargeMovementTricky"
"canQuickDrop"
{
"or": [
{
"and": [
"Gravity",
{
"shineChargeFrames": 70
}
]
},
{
"shineChargeFrames": 80
}
]
}Exit condition: {
"leaveShinecharged": {}
}Unlocks doors: {"types":["super"],"requires":[]}
{"types":["missiles","powerbomb"],"requires":["never"]}Dev note: FIXME: It is possible to leave with more frames remaining by falling directly into the sand (e.g., with a down-back turnaround); but then it would not be possible to mid-air shinespark in the next room before landing, and we don't yet have a way to model that. |
|
Entrance condition: {
"comeInShinecharged": {}
}Requires: "canShinechargeMovementTricky"
"canQuickDrop"
{
"shineChargeFrames": 40
}Exit condition: {
"leaveShinecharged": {}
}Unlocks doors: {"types":["super"],"requires":[]}
{"types":["missiles","powerbomb"],"requires":["never"]}Dev note: This requires jumping through the door, but we don't use 'comeInShinechargedJumping' because it's not required to come from an air environment. FIXME: clean up the way this kind of cross-room movement is expressed. |
From: 3
Right Door
To: 2
Bottom Sand Exit

Entrance condition: {
"comeInShinecharging": {
"length": 0,
"openEnd": 1
}
}Requires: "canShinechargeMovementTricky"
"canQuickDrop"
{
"or": [
{
"and": [
"Gravity",
{
"shineChargeFrames": 70
}
]
},
{
"shineChargeFrames": 80
}
]
}Exit condition: {
"leaveShinecharged": {}
}Unlocks doors: {"types":["super"],"requires":[]}
{"types":["missiles","powerbomb"],"requires":["never"]}Dev note: FIXME: It is possible to leave with more frames remaining by falling directly into the sand (e.g., with a down-back turnaround); but then it would not be possible to mid-air shinespark in the next room before landing, and we don't yet have a way to model that. |