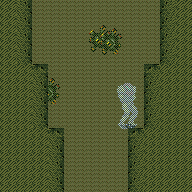
Plasma Beach Quicksand Room
Room ID: 212

From: 1
Top Sand Entrance
To: 1
Top Sand Entrance
Requires: {
"enemyDamage": {
"enemy": "Bull",
"type": "contact",
"hits": 1
}
} |
|
|
From: 1
Top Sand Entrance
To: 2
Bottom Sand Exit

If in a falling state (as opposed to jumping), spin jump off the bottom ledge in order to be able to mid-air spark in the room below. Entrance condition: {
"comeInShinecharged": {},
"comesThroughToilet": "any"
}Requires: "canShinechargeMovementTricky"
{
"shineChargeFrames": 135
}Exit condition: {
"leaveShinecharged": {}
} |
|
Entrance condition: {
"comeInWithGMode": {
"mode": "any",
"morphed": false
},
"comesThroughToilet": "any"
}Requires: {
"or": [
"canTrickyDodgeEnemies",
{
  "enemyDamage": {
    "enemy": "Bull",
    "type": "contact",
    "hits": 1
  }
}
]
}Exit condition: {
"leaveWithGMode": {
"morphed": false
}
} |
|
Entrance condition: {
"comeInWithGMode": {
"mode": "any",
"morphed": true
},
"comesThroughToilet": "any"
}Requires: {
"or": [
"canTrickyDodgeEnemies",
{
"enemyDamage": {
"enemy": "Bull",
"type": "contact",
"hits": 1
}
}
]
}Exit condition: {
"leaveWithGMode": {
"morphed": true
}
} |
{
"$schema": "../../../schema/m3-room.schema.json",
"id": 212,
"name": "Plasma Beach Quicksand Room",
"area": "Maridia",
"subarea": "Inner",
"subsubarea": "Yellow",
"roomAddress": "0x7D86E",
"roomEnvironments": [
{
"heated": false
}
],
"mapTileMask": [
[
1
]
],
"nodes": [
{
"id": 1,
"name": "Top Sand Entrance",
"nodeType": "entrance",
"nodeSubType": "sandpit",
"doorOrientation": "up",
"mapTileMask": [
[
2
]
]
},
{
"id": 2,
"name": "Bottom Sand Exit",
"nodeType": "exit",
"nodeSubType": "sandpit",
"nodeAddress": "0x001a8a0",
"doorOrientation": "down",
"mapTileMask": [
[
2
]
]
}
],
"enemies": [
{
"id": "e1",
"groupName": "Plasma Beach Quicksand Bulls",
"enemyName": "Bull",
"quantity": 3,
"homeNodes": [
1,
2
]
}
],
"strats": [
{
"link": [
1,
1
],
"name": "Base (Come In Normally)",
"entranceCondition": {
"comeInNormally": {}
},
"requires": [],
"flashSuitChecked": true,
"blueSuitChecked": true
},
{
"link": [
2,
2
],
"name": "Base (Unlock Door)",
"requires": [],
"unlocksDoors": [
{
"types": [
"ammo"
],
"requires": []
}
],
"flashSuitChecked": true,
"blueSuitChecked": true
},
{
"id": 1,
"link": [
1,
1
],
"name": "G-Mode Regain Mobility",
"requires": [
{
"enemyDamage": {
"enemy": "Bull",
"type": "contact",
"hits": 1
}
}
],
"gModeRegainMobility": {},
"flashSuitChecked": true,
"blueSuitChecked": true
},
{
"id": 2,
"link": [
1,
2
],
"name": "Base",
"requires": [],
"flashSuitChecked": true,
"blueSuitChecked": true
},
{
"id": 6,
"link": [
1,
2
],
"name": "Carry Shinecharge",
"entranceCondition": {
"comeInShinecharged": {},
"comesThroughToilet": "any"
},
"requires": [
"canShinechargeMovementTricky",
{
"shineChargeFrames": 135
}
],
"exitCondition": {
"leaveShinecharged": {}
},
"flashSuitChecked": true,
"blueSuitChecked": true,
"note": [
"If in a falling state (as opposed to jumping), spin jump off the bottom ledge in order to be able to mid-air spark in the room below."
]
},
{
"id": 3,
"link": [
1,
2
],
"name": "G-Mode",
"entranceCondition": {
"comeInWithGMode": {
"mode": "any",
"morphed": false
},
"comesThroughToilet": "any"
},
"requires": [
{
  "or": [
    "canTrickyDodgeEnemies",
    {
      "enemyDamage": {
        "enemy": "Bull",
        "type": "contact",
        "hits": 1
      }
    }
  ]
}
],
"exitCondition": {
"leaveWithGMode": {
"morphed": false
}
},
"flashSuitChecked": true,
"blueSuitChecked": true
},
{
"id": 4,
"link": [
1,
2
],
"name": "G-Mode Morph",
"entranceCondition": {
"comeInWithGMode": {
"mode": "any",
"morphed": true
},
"comesThroughToilet": "any"
},
"requires": [
{
  "or": [
    "canTrickyDodgeEnemies",
    {
      "enemyDamage": {
        "enemy": "Bull",
        "type": "contact",
        "hits": 1
      }
    }
  ]
}
],
"exitCondition": {
"leaveWithGMode": {
"morphed": true
}
},
"flashSuitChecked": true,
"blueSuitChecked": true
}
],
"notables": [],
"nextStratId": 7,
"nextNotableId": 1
}