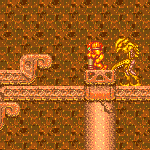
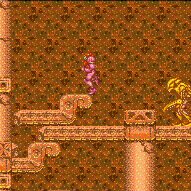
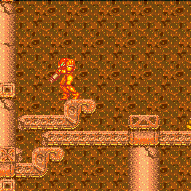
Amphitheatre: Reverse Acid Dive (Very Hard)


Dive into the acid and get to the doorway high on the left wall. Note that you can wall jump climb in acid without gravity.
Strats ()
|


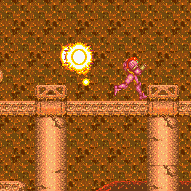
Dive into the acid to the left of the first floating platform to quickly drop down the room, holding left. Use a flash suit to activate a diagonal shinespark after falling just far enough to clear the large stalactite. Requires: "canDash"
{
"notable": "Reverse Acid Dive"
}
{
"obstaclesNotCleared": [
"A"
]
}
"Gravity"
{
"heatFrames": 405
}
{
"acidFrames": 280
}
{
"useFlashSuit": {}
}
{
"shinespark": {
"frames": 38,
"excessFrames": 0
}
}Unlocks doors: {"types":["super"],"requires":[]}
{"types":["missiles","powerbomb"],"requires":["never"]} |
|


Dive into the acid to the left of the first floating platform to quickly drop down the room, holding left. Breaking spin may make the entry a bit easier to control; maintaining spin allows taking slightly less damage, because Samus reaches higher horizontal base speed when spinning. Use a flash suit to activate a diagonal shinespark after falling almost a screen below the large stalactite; Samus must spark relatively low because the acid physics makes the spark happens at a steeper angle. Requires: "canDash"
{
"notable": "Reverse Acid Dive"
}
{
"obstaclesNotCleared": [
"A"
]
}
"canSuitlessLavaDive"
{
"heatFrames": 415
}
{
"acidFrames": 290
}
{
"useFlashSuit": {}
}
{
"shinespark": {
"frames": 41,
"excessFrames": 0
}
}Unlocks doors: {"types":["super"],"requires":[]}
{"types":["missiles","powerbomb"],"requires":["never"]} |
|


Dive into the acid to the left of the first floating platform to quickly sink to the bottom of the room. It is possible to jump directly over the pirate at the bottom of the ramp directly to the gap between platforms. Falling in this way will land between the platforms at the bottom of the room. Requires: {
"notable": "Reverse Acid Dive"
}
{
"obstaclesNotCleared": [
"A"
]
}
"canSuitlessLavaDive"
{
"or": [
"SpaceJump",
"canTrickyJump",
{
"and": [
"canLateralMidAirMorph",
"canCarefulJump"
]
},
{
"and": [
"ScrewAttack",
"canCarefulJump"
]
},
{
"and": [
"h_heatProof",
{
"enemyKill": {
"enemies": [
[
"Yellow Space Pirate (standing)"
]
]
}
},
"canCarefulJump"
]
}
]
}
{
"or": [
{
"and": [
"canDash",
{
"heatFrames": 320
},
{
"acidFrames": 195
}
]
},
{
"and": [
"canPreciseWallJump",
{
"heatFrames": 480
},
{
"acidFrames": 250
}
]
},
{
"and": [
"SpaceJump",
{
"heatFrames": 470
},
{
"acidFrames": 210
}
]
},
{
"and": [
{
"heatFrames": 460
},
{
"acidFrames": 315
}
]
}
]
}Dev note: It is faster to fall all the way to the bottom and then jump onto the platform to the left, than to morph/unmorph to reset fall speed to reach it directly. |
From: 2
Right Door
To: 4
Center Floating Platforms Junction
Jump over the pirate and fall straight down to land on an upper-middle floating platform. Requires: {
"notable": "Reverse Acid Dive"
}
{
"obstaclesNotCleared": [
"A"
]
}
"canSuitlessLavaDive"
{
"or": [
{
"and": [
"canDash",
{
"heatFrames": 180
},
{
"acidFrames": 80
}
]
},
{
"and": [
{
"heatFrames": 210
},
{
"acidFrames": 110
}
]
}
]
} |
From: 2
Right Door
To: 5
Below Left Door Junction


Enter the room blue with very low run speed (e.g. with a 4-tap). Use a precisely timed jump to bonk the large stalagtite in the ceiling and fall through both pirates, killing them with the blue speed. Enter the acid while aiming down to shrink Samus' hitbox. This strat works with all combinations of movement items and suits. Entrance condition: {
"comeInGettingBlueSpeed": {
"length": 9,
"openEnd": 1,
"gentleDownTiles": 4
}
}Requires: {
"notable": "Reverse Acid Dive"
}
{
"notable": "Reverse Thread the Needle"
}
{
"obstaclesNotCleared": [
"A"
]
}
"h_blueJump"
"canInsaneJump"
"canSuitlessLavaDive"
"canSlowShortCharge"
{
"heatFrames": 330
}
{
"acidFrames": 210
} |
From: 2
Right Door
To: 5
Below Left Door Junction

Begin running from the top of the second slope and jump at the bottom of the third slope, bonking the large stalagtite in the ceiling. Kill the first pirate with Screw Attack (or ahead of time with Charge+Plasma), and pass through the second pirate using a charged plasma shot. Enter the acid while aiming down to shrink Samus' hitbox. This strat works with all combinations of movement items and suits. Requires: "canDash"
{
"notable": "Reverse Acid Dive"
}
{
"notable": "Reverse Thread the Needle"
}
{
"obstaclesNotCleared": [
"A"
]
}
"canInsaneJump"
"canSuitlessLavaDive"
"Charge"
"Plasma"
"canHitbox"
{
"or": [
"ScrewAttack",
{
"heatFrames": 210
}
]
}
{
"heatFrames": 330
}
{
"acidFrames": 210
} |
|
There is just enough runway below the left door to build a shinespark. Requires: {
"notable": "Reverse Acid Dive"
}
{
"obstaclesNotCleared": [
"A"
]
}
"h_heatProof"
"Gravity"
"canSuitlessLavaDive"
{
"canShineCharge": {
"usedTiles": 13,
"openEnd": 1
}
}
{
"shinespark": {
"frames": 55,
"excessFrames": 0
}
}
{
"acidFrames": 600
}Unlocks doors: {"types":["super"],"requires":[]}
{"types":["missiles","powerbomb"],"requires":["never"]}Dev note: This strat is only used to avoid walljumping. |
|
SpaceJump diagonally towards the door through the acid. Requires: {
"notable": "Reverse Acid Dive"
}
{
"obstaclesNotCleared": [
"A"
]
}
"canSuitlessLavaDive"
"Gravity"
"SpaceJump"
{
"or": [
{
"and": [
{
"heatFrames": 280
},
{
"acidFrames": 280
}
]
},
{
"and": [
"HiJump",
{
"heatFrames": 250
},
{
"acidFrames": 250
}
]
},
{
"and": [
"HiJump",
"canDash",
{
"heatFrames": 220
},
{
"acidFrames": 220
}
]
}
]
}Unlocks doors: {"types":["super"],"requires":[]}
{"types":["missiles","powerbomb"],"requires":["never"]}Dev note: FIXME: Add requirements to unlock the door with Missiles and Power Bombs. |
|
Clear the runway by killing the pirate. Then Gravity jump after building as much run speed as possible. Requires: {
"notable": "Reverse Acid Dive"
}
{
"obstaclesNotCleared": [
"A"
]
}
"HiJump"
"canTrickyDashJump"
"canGravityJump"
{
"enemyKill": {
"enemies": [
[
"Yellow Space Pirate (standing)"
]
],
"explicitWeapons": [
"ScrewAttack",
"Super",
"Charge+Plasma"
]
}
}
{
"heatFrames": 240
}
{
"acidFrames": 240
}
{
"gravitylessHeatFrames": 150
}
{
"gravitylessAcidFrames": 150
}Unlocks doors: {"types":["super"],"requires":[]}
{"types":["missiles","powerbomb"],"requires":["never"]}Dev note: This strat is only used to avoid walljumping. |
|


Avoid the pirate while moving through the acid to get closer to the wall. Requires: {
"notable": "Reverse Acid Dive"
}
{
"obstaclesNotCleared": [
"A"
]
}
"canSuitlessLavaDive"
{
"or": [
{
"and": [
"Gravity",
"canDash",
{
"heatFrames": 105
},
{
"acidFrames": 105
}
]
},
{
"and": [
{
"heatFrames": 170
},
{
"acidFrames": 170
}
]
}
]
} |
From: 3
Bottom Platform Junction
To: 5
Below Left Door Junction


Kill the Pirate and perform a Crystal Flash. Requires: {
"notable": "Reverse Acid Dive"
}
{
"obstaclesNotCleared": [
"A"
]
}
{
"obstaclesNotCleared": [
"R-Mode"
]
}
"canSuitlessLavaDive"
{
"or": [
{
"and": [
"canTrickyDodgeEnemies",
{
"enemyKill": {
"enemies": [
[
"Yellow Space Pirate (standing)"
]
],
"explicitWeapons": [
"Super",
"Charge+Plasma"
]
}
}
]
},
{
"enemyKill": {
"enemies": [
[
"Yellow Space Pirate (standing)"
]
],
"explicitWeapons": [
"Charge+Ice+Wave+Plasma"
]
}
},
{
"and": [
"Gravity",
{
"enemyKill": {
"enemies": [
[
"Yellow Space Pirate (standing)"
]
],
"explicitWeapons": [
"ScrewAttack"
]
}
}
]
}
]
}
{
"or": [
{
"and": [
"Gravity",
"canDash",
{
"heatFrames": 80
},
{
"acidFrames": 80
}
]
},
{
"and": [
{
"heatFrames": 130
},
{
"acidFrames": 130
}
]
}
]
}
"h_heatedAcidCrystalFlash"
{
"heatFrames": 35
}
{
"acidFrames": 35
} |
From: 4
Center Floating Platforms Junction
To: 1
Left Door
Land on the fourth platform from the top and build some speed to spacejump across straight to the door. The optimal platform can be hit by simpily holding right when entering the acid. Requires: {
"notable": "Reverse Acid Dive"
}
{
"obstaclesNotCleared": [
"A"
]
}
"Gravity"
"SpaceJump"
{
"or": [
{
"and": [
"canDash",
{
"heatFrames": 360
},
{
"acidFrames": 360
}
]
},
{
"and": [
{
"heatFrames": 460
},
{
"acidFrames": 460
}
]
}
]
}Unlocks doors: {"types":["super"],"requires":[]}
{"types":["missiles","powerbomb"],"requires":["never"]}Dev note: Includes a little bit extra frame count to drop down two platforms first. FIXME: this lower platform could be modeled more cleanly as a separate junction node; it would be useful as another place to Crystal Flash when traversing the room left-to-right. |
From: 4
Center Floating Platforms Junction
To: 3
Bottom Platform Junction
Jump off the platform to the left with low horizontal speed and hold left to avoid landing on any pirates. Requires: {
"notable": "Reverse Acid Dive"
}
{
"obstaclesNotCleared": [
"A"
]
}
{
"or": [
{
"and": [
"Gravity",
"canDash",
{
"heatFrames": 180
},
{
"acidFrames": 180
}
]
},
{
"and": [
{
"heatFrames": 240
},
{
"acidFrames": 240
}
]
}
]
} |
From: 5
Below Left Door Junction
To: 1
Left Door
Climb to the top left door while in Acid. Requires: {
"notable": "Reverse Acid Dive"
}
{
"obstaclesNotCleared": [
"A"
]
}
"Gravity"
{
"or": [
{
"and": [
"HiJump",
"canConsecutiveWallJump",
{
"heatFrames": 150
},
{
"acidFrames": 150
}
]
},
{
"and": [
"canConsecutiveWallJump",
{
"heatFrames": 210
},
{
"acidFrames": 210
}
]
}
]
}Unlocks doors: {"types":["super"],"requires":[]}
{"types":["missiles","powerbomb"],"requires":["never"]} |
From: 5
Below Left Door Junction
To: 1
Left Door


It is possible to walljump in acid without Gravity Suit. Requires: {
"notable": "Reverse Acid Dive"
}
{
"obstaclesNotCleared": [
"A"
]
}
"canConsecutiveWallJump"
{
"or": [
{
"and": [
"HiJump",
{
"heatFrames": 280
},
{
"acidFrames": 280
}
]
},
{
"and": [
{
"heatFrames": 400
},
{
"acidFrames": 400
}
]
}
]
}Unlocks doors: {"types":["super"],"requires":[]}
{"types":["missiles","powerbomb"],"requires":["never"]} |
From: 5
Below Left Door Junction
To: 1
Left Door
Perform a gravity jump followed by a springball jump to reach the left side door. The gravity jump will only get high enough if it is within the last two frames, and the Spring Ball jump must be delayed and near the peak of the jump. Requires: {
"notable": "Reverse Acid Dive"
}
{
"obstaclesNotCleared": [
"A"
]
}
"HiJump"
"canTrickyJump"
"canGravityJump"
{
"or": [
"h_crouchJumpDownGrab",
{
"and": [
"canTrickyCarryFlashSuit",
"canDownGrab"
]
}
]
}
"canSpringBallJumpMidAir"
{
"heatFrames": 50
}
{
"acidFrames": 50
}
{
"gravitylessHeatFrames": 300
}
{
"gravitylessAcidFrames": 300
}Unlocks doors: {"types":["super"],"requires":[]}
{"types":["missiles","powerbomb"],"requires":["never"]}Dev note: It is possible to do this with a flash suit, and no crouch jump, but it requires a frame perfect jump and then a Spring Ball jump within 3 pixels of its peak. |
|

Acid allows for more time than water to perform Spring Ball jumps. This gives just barely enough time to fit in three spring ball jumps. Requires: {
"notable": "Reverse Acid Dive"
}
{
"obstaclesNotCleared": [
"A"
]
}
"h_heatProof"
"canSuitlessLavaDive"
"h_doubleSpringBallJumpWithHiJump"
"canTrickyJump"
{
"acidFrames": 375
}
{
"or": [
"canInsaneJump",
{
"acidFrames": 450
}
]
}Unlocks doors: {"types":["super"],"requires":[]}
{"types":["missiles","powerbomb"],"requires":["never"]}Dev note: A crouch jump is not required. The leniency frames are worst-case scenario of not having enough time for the last jump, which is the most common way to fail. |