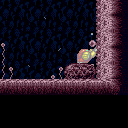
Big Pink: Off Screen Super Block (Hard)
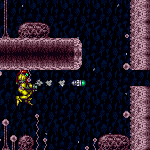

Break the bomb blocks then shoot a super into the morph tunnel to break the super block off screen. Requires pixel precision, although there are several pixels that work. The camera must be fully scrolled to the right, which may require going far left and back.
Strats ()
From: 13
Central Junction
To: 7
Right Side - Door Behind Super Block


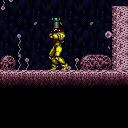
Break the bomb blocks by jumping into them with speed. These is more easily done at low run speed. It is most lenient if Samus is still moving up while entering the tunnel. Requires: {
"notable": "Off Screen Super Block"
}
{
"notable": "Break Raised Bomb Blocks with Blue Speed"
}
{
"getBlueSpeed": {
"usedTiles": 20,
"openEnd": 2
}
}
"canSlowShortCharge"
"canSpeedball"
"canLateralMidAirMorph"
"canTrickyJump"
"canOffScreenSuperShot"Clears obstacles: F |
From: 13
Central Junction
To: 7
Right Side - Door Behind Super Block
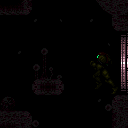
Break the bomb blocks then shoot a Super into the morph tunnel to break the Super block off screen. Requires pixel precision, although there are several pixels that work. The camera must be fully scrolled to the right, which may require going far left and back. One normalized setup that doesn't rely on a visual cue: perform a full-height jump and press against the overhang to the left, while holding angle up and down to lock Samus' position after landing, while continuing to hold left. This works with or without HiJump equipped. Requires: {
"haveBlueSuit": {}
}
"Morph"
{
"notable": "Off Screen Super Block"
}
"canOffScreenSuperShot"
"canCameraManip"Clears obstacles: F |
From: 13
Central Junction
To: 7
Right Side - Door Behind Super Block
Break the bomb blocks then shoot a Super into the morph tunnel to break the Super block off screen. Requires pixel precision, although there are several pixels that work. The camera must be fully scrolled to the right, which may require going far left and back. One normalized setup that doesn't rely on a visual cue: perform a full-height jump and press against the overhang to the left, while holding angle up and angle down to lock Samus' position after landing, while continuing to hold left. This works with or without HiJump equipped. Requires: {
"notable": "Off Screen Super Block"
}
"canOffScreenSuperShot"
"h_bombThings"
"canCameraManip"Clears obstacles: F Dev note: It is possible to avoid a mid-air morph by rolling off the platform above |
From: 13
Central Junction
To: 7
Right Side - Door Behind Super Block
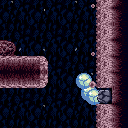
Stop with Temporary Blue in front of the bomb blocks then jump and bounce into the morph tunnel to clear them. Requires: {
"notable": "Off Screen Super Block"
}
{
"notable": "Break Raised Bomb Blocks with Blue Speed"
}
{
"canShineCharge": {
"usedTiles": 22,
"openEnd": 2
}
}
"canTemporaryBlue"
"canTrickyJump"
"canLateralMidAirMorph"
"canOffScreenSuperShot"Clears obstacles: F |