Botwoon Hallway: Right-to-Left Shinespark (Very Hard)

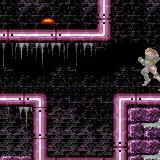
Quickly move next to the first set of speed blocks at the left end of the hole. Shoot a Wave shot, then just before it goes off screen, horizontally spark to the left to get through all the shot and speed blocks. A spin jump may be used to move horizontally into place much quicker.
Strats ()
From: 2
Right Door
To: 1
Bottom Left Door
Quickly move next to the first set of speed blocks at the left end of the hole. Shoot a Wave shot, then just before it goes off screen, horizontally spark to the left to get through all the shot and speed blocks. A spin jump may be used to move horizontally into place much quicker. Entrance condition: {
"comeInShinecharged": {}
}Requires: {
"shineChargeFrames": 120
}
{
"notable": "Right-to-Left Shinespark"
}
"canSuitlessMaridia"
"canCarefulJump"
"Wave"
"canShinechargeMovementComplex"
{
"shinespark": {
"frames": 75,
"excessFrames": 8
}
} |
From: 2
Right Door
To: 1
Bottom Left Door


Quickly move next to the first set of speed blocks at the left end of the hole. Shoot a Wave shot, then just before it goes off screen, horizontally spark to the left to get through all the shot and speed blocks. A spin jump may be used to move horizontally into place much quicker. Entrance condition: {
"comeInShinecharging": {
"length": 2,
"openEnd": 1
}
}Requires: {
"notable": "Right-to-Left Shinespark"
}
"canWaterShineCharge"
"Wave"
"canShinechargeMovementComplex"
{
"shinespark": {
"frames": 75,
"excessFrames": 8
}
}Dev note: The number of usable tiles in room is dependent upon the length of the shinecharge; 2 unusable tiles seems to be reasonable. |