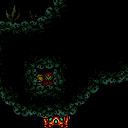
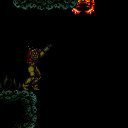
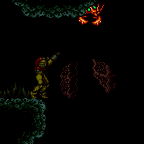
Main Street: G-Mode Overload Speed Blocks then use Global Crab (Extreme)
Overload PLMs with Bombs or Power Bombs, then use the global crab to obtain the speed locked item. With Ice, freeze a crab on the edge of the speed blocks, such that Samus can jump inside and stand on the crab. Samus must exit G-Mode to grab the item, but she will be stuck on top of the crab. Either use Wave or Kago the crab to get out, or place a Bomb or Power Bomb before exiting G-Mode, so the crab dies before it thaws. This is also possible without Ice, by Crystal Flashing and then using the crab to trigger reserves in order to exit G-Mode.
Strats ()
|
Entrance condition: {
"comeInWithGMode": {
"mode": "direct",
"morphed": false
},
"comesThroughToilet": "no"
}Requires: {
"notable": "G-Mode Overload Speed Blocks then use Global Crab"
}
"canComplexGMode"
"h_navigateUnderwater"
{
"or": [
"canGravityJump",
{
"and": [
"Gravity",
"canWallJump"
]
},
{
"and": [
"Gravity",
"canTrickyUseFrozenEnemies",
"h_underwaterCrouchJumpDownGrab"
]
},
{
"and": [
"HiJump",
{
"or": [
{
"and": [
{
"notable": "Underwater Walljumps"
},
"canUnderwaterWallJump"
]
},
"canSpringBallJumpMidAir",
{
"and": [
"canTrickyUseFrozenEnemies",
"h_underwaterCrouchJump"
]
}
]
}
]
},
{
"and": [
"h_underwaterMaxHeightSpringBallJump",
"canTrickyUseFrozenEnemies",
"canBeVeryPatient",
{
"or": [
"canStationaryLateralMidAirMorph",
{
"ammo": {
"type": "Super",
"count": 1
}
}
]
}
]
}
]
}Clears obstacles: B |
From: 1
Bottom Door
To: 12
G-Mode Junction By Middle Right Door
Entrance condition: {
"comeInWithGMode": {
"mode": "indirect",
"morphed": false
},
"comesThroughToilet": "any"
}Requires: {
"notable": "G-Mode Overload Speed Blocks then use Global Crab"
}
"canComplexGMode"
"h_navigateUnderwater"
{
"or": [
"canGravityJump",
{
"and": [
"Gravity",
"canWallJump"
]
},
{
"and": [
"Gravity",
"canTrickyUseFrozenEnemies",
"h_underwaterCrouchJumpDownGrab"
]
},
{
"and": [
"HiJump",
{
"or": [
{
"and": [
{
"notable": "Underwater Walljumps"
},
"canUnderwaterWallJump"
]
},
"canSpringBallJumpMidAir",
{
"and": [
"canTrickyUseFrozenEnemies",
"h_underwaterCrouchJump"
]
}
]
}
]
},
{
"and": [
"h_underwaterMaxHeightSpringBallJump",
"canTrickyUseFrozenEnemies",
"canBeVeryPatient",
{
"or": [
"canStationaryLateralMidAirMorph",
{
"ammo": {
"type": "Super",
"count": 1
}
}
]
}
]
}
]
} |
From: 2
Bottom Right Door
To: 12
G-Mode Junction By Middle Right Door
Entrance condition: {
"comeInWithGMode": {
"mode": "direct",
"morphed": false
}
}Requires: {
"notable": "G-Mode Overload Speed Blocks then use Global Crab"
}
"canComplexGMode"
"h_navigateUnderwater"
{
"or": [
"canGravityJump",
{
"and": [
"Gravity",
"canWallJump"
]
},
{
"and": [
"Gravity",
"canTrickyUseFrozenEnemies",
"h_underwaterCrouchJumpDownGrab"
]
},
{
"and": [
"HiJump",
{
"or": [
{
"and": [
{
"notable": "Underwater Walljumps"
},
"canUnderwaterWallJump"
]
},
"canSpringBallJumpMidAir",
{
"and": [
"canTrickyUseFrozenEnemies",
"h_underwaterCrouchJump"
]
}
]
}
]
},
{
"and": [
"h_underwaterMaxHeightSpringBallJump",
"canTrickyUseFrozenEnemies",
"canBeVeryPatient",
{
"or": [
"canStationaryLateralMidAirMorph",
{
"ammo": {
"type": "Super",
"count": 1
}
}
]
}
]
}
]
}Clears obstacles: B |
From: 2
Bottom Right Door
To: 12
G-Mode Junction By Middle Right Door
Entrance condition: {
"comeInWithGMode": {
"mode": "indirect",
"morphed": false
}
}Requires: {
"notable": "G-Mode Overload Speed Blocks then use Global Crab"
}
"canComplexGMode"
"h_navigateUnderwater"
{
"or": [
"canGravityJump",
{
"and": [
"Gravity",
"canWallJump"
]
},
{
"and": [
"Gravity",
"canTrickyUseFrozenEnemies",
"h_underwaterCrouchJumpDownGrab"
]
},
{
"and": [
"HiJump",
{
"or": [
{
"and": [
{
"notable": "Underwater Walljumps"
},
"canUnderwaterWallJump"
]
},
"canSpringBallJumpMidAir",
{
"and": [
"canTrickyUseFrozenEnemies",
"h_underwaterCrouchJump"
]
}
]
}
]
},
{
"and": [
"h_underwaterMaxHeightSpringBallJump",
"canTrickyUseFrozenEnemies",
"canBeVeryPatient",
{
"or": [
"canStationaryLateralMidAirMorph",
{
"ammo": {
"type": "Super",
"count": 1
}
}
]
}
]
}
]
} |
From: 3
Middle Right Door
To: 12
G-Mode Junction By Middle Right Door
Entrance condition: {
"comeInWithGMode": {
"mode": "direct",
"morphed": false
}
}Requires: {
"notable": "G-Mode Overload Speed Blocks then use Global Crab"
}
"canComplexGMode"Clears obstacles: B Dev note: FIXME: Immobile strats may need canBeVeryPatient if they can't be done before the crab is in position |
From: 3
Middle Right Door
To: 12
G-Mode Junction By Middle Right Door
Entrance condition: {
"comeInWithGMode": {
"mode": "indirect",
"morphed": false
}
}Requires: {
"notable": "G-Mode Overload Speed Blocks then use Global Crab"
}
"canComplexGMode"Dev note: FIXME: Immobile strats may need canBeVeryPatient if they can't be done before the crab is in position |
From: 4
Top Right Door
To: 10
Direct G-Mode Morph, On Ledge Above Speed Blocks
Carefully descend to the ledge left of the morph tunnel item. Entrance condition: {
"comeInWithGMode": {
"mode": "direct",
"morphed": true
}
}Requires: {
"notable": "G-Mode Overload Speed Blocks then use Global Crab"
}
"canComplexGMode"
"h_navigateUnderwater"Clears obstacles: B |
From: 4
Top Right Door
To: 11
G-Mode, Below Speed Blocks (Overloaded PLMs)
Place bombs against the speed blocks until they are overloaded. Entrance condition: {
"comeInWithGMode": {
"mode": "direct",
"morphed": true
}
}Requires: {
"notable": "G-Mode Overload Speed Blocks then use Global Crab"
}
"canComplexGMode"
"h_navigateUnderwater"
"h_artificialMorphBombs"
{
"or": [
{
"and": [
"h_artificialMorphSpringBall",
{
"or": [
"Gravity",
"HiJump"
]
}
]
},
{
"and": [
"Morph",
{
"or": [
"Gravity",
"HiJump",
"h_underwaterCrouchJump"
]
}
]
},
{
"and": [
"Gravity",
"h_artificialMorphCeilingBombJump"
]
},
{
"and": [
"Gravity",
"h_artificialMorphIBJ",
"canBeVeryPatient"
]
}
]
}Clears obstacles: B |
From: 4
Top Right Door
To: 11
G-Mode, Below Speed Blocks (Overloaded PLMs)
Place bombs against the speed blocks until they are overloaded. Entrance condition: {
"comeInWithGMode": {
"mode": "indirect",
"morphed": true
}
}Requires: {
"notable": "G-Mode Overload Speed Blocks then use Global Crab"
}
"canComplexGMode"
"h_navigateUnderwater"
"h_artificialMorphBombs"
{
"or": [
{
"and": [
"h_artificialMorphSpringBall",
{
"or": [
"Gravity",
"HiJump"
]
}
]
},
{
"and": [
"Morph",
{
"or": [
"Gravity",
"HiJump",
"h_underwaterCrouchJump"
]
}
]
},
{
"and": [
"Gravity",
"h_artificialMorphCeilingBombJump"
]
},
{
"and": [
"Gravity",
"h_artificialMorphIBJ",
"canBeVeryPatient"
]
}
]
} |
|
After grabbing the item, turnaround as the crab thaws to Kago it and escape. Requires: "canComplexGMode"
{
"notable": "G-Mode Overload Speed Blocks then use Global Crab"
}
"canKago"
{
"or": [
{
"enemyDamage": {
"enemy": "Sciser",
"type": "contact",
"hits": 1
}
},
"h_pauseAbuseMinimalReserveRefill"
]
}
{
"obstaclesCleared": [
"C"
]
}Dev note: This strat is here instead of part of 11->6, because if the item is an E-Tank, Samus can use it to escape. |
From: 6
Speed Blocked Item
To: 9
Junction Below Speed Blocks
After grabbing the item, quickly shoot the crab with a diagonal Wave shot to kill it and escape. Requires: "canComplexGMode"
{
"notable": "G-Mode Overload Speed Blocks then use Global Crab"
}
"Wave"
{
"obstaclesCleared": [
"C"
]
}Dev note: This strat is here instead of part of 11->6, because if the item is Wave, Samus can use it to escape. |
From: 10
Direct G-Mode Morph, On Ledge Above Speed Blocks
To: 6
Speed Blocked Item

Overloading the PLMs can be done with as few as 2 Power Bombs if they are placed precisely. Place them two ledges above the item - to the left of the morph tunnel item. It is important that they are placed on either of the flat tiles, not the sloped tile on the right. Samus can use the second Power Bomb to Crystal Flash to have enough Energy to take a crab hit or to get some Reserve Energy, but then she will not be able to use X-Ray to exit G-Mode, and will require a Reserve Trigger. If Samus uses the first Power Bomb to Crystal Flash, she is no longer able to place a second. Samus then needs to jump into the speed-locked item and hit the crab to trigger Reserves and exit G-Mode. This can be done with HiJump, Gravity, Spring Ball, or Ice. Turn around while inside the item to collect it. Requires: "canPowerBombItemOverloadPLMs"
{
"notable": "G-Mode Overload Speed Blocks then use Global Crab"
}
"canBePatient"
"h_navigateUnderwater"
"h_artificialMorphCrystalFlash"
{
"or": [
"h_artificialMorphPowerBomb",
{
"and": [
{
"itemNotCollectedAtNode": 7
},
"canRiskPermanentLossOfAccess"
]
}
]
}
{
"or": [
"HiJump",
"Gravity",
"canSpringBallJumpMidAir",
{
"and": [
"h_underwaterCrouchJump",
"canTrickyUseFrozenEnemies"
]
}
]
}
{
"autoReserveTrigger": {}
}Dev note: An item is expected at node 6, otherwise this strat isn't useful. It takes 2 PBs to overload PLMs, or only 1 if both items are uncollected. FIXME: If Samus has a lot of tanks, it could take too much time to damage down. Ice can be used to take multiple hits from a crab before it leaves. |
From: 10
Direct G-Mode Morph, On Ledge Above Speed Blocks
To: 11
G-Mode, Below Speed Blocks (Overloaded PLMs)
Overloading the PLMs can be done with as few as 2 Power Bombs if they are placed precisely. Place them two ledges above the item - to the left of the morph tunnel item. It is important that they are placed on either of the flat tiles, not the sloped tile on the right. Requires: "canPowerBombItemOverloadPLMs"
{
"notable": "G-Mode Overload Speed Blocks then use Global Crab"
}
"h_navigateUnderwater"
"h_artificialMorphPowerBomb"
{
"or": [
"h_artificialMorphPowerBomb",
{
"and": [
{
"itemNotCollectedAtNode": 7
},
"canRiskPermanentLossOfAccess"
]
}
]
}Dev note: An item is expected at node 6, otherwise this strat isn't useful. It takes 2 PBs to overload PLMs, or only 1 if both items are uncollected. |
From: 11
G-Mode, Below Speed Blocks (Overloaded PLMs)
To: 6
Speed Blocked Item

Samus can Crystal Flash to have enough Energy to take a crab hit or to get some Reserve Energy, but then she will not be able to use X-Ray to exit G-Mode, and will require a Reserve Trigger. The Crystal Flash needs to be done before unmorphing, while being careful not to kill the global crab. Samus then needs to jump into the speed-locked item and hit the crab to trigger Reserves and exit G-Mode. This can be done with HiJump, Gravity, Spring Ball, or Ice. Turn around while inside the item to collect it. Wait for the global crab to get into position. Note that if the crab is arriving too early, it may be possible to slow the crab with Ice or lure the crab from above instead. Alternatively, she may have to wait for the global crab to circle the room. Requires: "canComplexGMode"
{
"notable": "G-Mode Overload Speed Blocks then use Global Crab"
}
"canBePatient"
"h_navigateUnderwater"
"h_artificialMorphCrystalFlash"
{
"or": [
"Gravity",
"HiJump",
"canSpringBallJumpMidAir",
{
"and": [
"h_underwaterCrouchJump",
"canTrickyUseFrozenEnemies"
]
}
]
}
{
"autoReserveTrigger": {}
}
{
"obstaclesCleared": [
"B"
]
}Dev note: Samus needs to use Bombs or Power Bombs to overload PLMs, so Morph or artificial Morph is already required. FIXME: If Samus has a lot of tanks, it could take too much time to damage down. Ice can be used to take multiple hits from a crab before it leaves. |
From: 11
G-Mode, Below Speed Blocks (Overloaded PLMs)
To: 6
Speed Blocked Item

Freeze a crab on the edge of the speed blocks, such that Samus can jump inside and stand on the crab. If using Bombs, it is important to freeze the crab with all other beams turned off, so that the crab has 30 remaining Energy or less. Place a Bomb or Power Bomb, then quickly get into the crouch position and use X-Ray to exit G-Mode before it goes off. It is important to be crouched, not standing, and have Gravity off, or the bomb will boost Samus and she will be stuck in the speed blocks. Note that if the crab is arriving too early, it may be possible to slow the crab with Ice or lure the crab from above instead. Alternatively, she may have to wait for the global crab to circle the room. It is possible to kago the bomb boost in order to do this strat with Gravity still equipped. Requires: "canComplexGMode"
{
"notable": "G-Mode Overload Speed Blocks then use Global Crab"
}
"canBePatient"
"h_navigateUnderwater"
"canTrickyUseFrozenEnemies"
{
"or": [
"Gravity",
"HiJump",
"h_underwaterCrouchJump",
"canSpringBallJumpMidAir"
]
}
{
"or": [
{
"disableEquipment": "Gravity"
},
"canKago"
]
}
"h_bombThings" |
From: 11
G-Mode, Below Speed Blocks (Overloaded PLMs)
To: 6
Speed Blocked Item
Freeze a crab on the edge of the speed blocks, such that Samus can jump inside and stand on the crab. Exit G-Mode and rotate to obtain the item. Samus will now be stuck on the crab, and if it thaws and hits her, she will be pushed up and stuck in the speed blocks. Note that if the crab is arriving too early, it may be possible to slow the crab with Ice or lure the crab from above instead. Alternatively, she may have to wait for the global crab to circle the room. Requires: "canComplexGMode"
{
"notable": "G-Mode Overload Speed Blocks then use Global Crab"
}
"canBePatient"
"h_navigateUnderwater"
"canTrickyUseFrozenEnemies"
{
"or": [
"Gravity",
"HiJump",
"h_underwaterCrouchJump",
"canSpringBallJumpMidAir"
]
}Clears obstacles: C |
From: 11
G-Mode, Below Speed Blocks (Overloaded PLMs)
To: 11
G-Mode, Below Speed Blocks (Overloaded PLMs)
Crystal Flash to gain enough Energy to tank a crab hit. This needs to be done before unmorphing, while being careful not to kill the global crab. Requires: "canComplexGMode"
{
"notable": "G-Mode Overload Speed Blocks then use Global Crab"
}
"h_artificialMorphCrystalFlash"
{
"obstaclesNotCleared": [
"B"
]
}Dev note: Samus needs to use Bombs or Power Bombs to overload PLMs, so Morph or artificial Morph is already required. A Crystal Flash in direct G-Mode will prevent Samus from using X-Ray, so it would not be able to use the 11->6 strats. |
From: 12
G-Mode Junction By Middle Right Door
To: 11
G-Mode, Below Speed Blocks (Overloaded PLMs)


Place bombs against the speed blocks until they are overloaded. With a slow ascent, such as with Spring Ball and Ice, the crab will need to circle the entire room, it is possible to use a Super when it passes the speed blocks to speed this up significantly. Requires: "canComplexGMode"
{
"notable": "G-Mode Overload Speed Blocks then use Global Crab"
}
"h_useMorphBombs"
"h_navigateUnderwater"
{
"or": [
"canGravityJump",
{
"and": [
"Gravity",
"canWallJump"
]
},
{
"and": [
"HiJump",
{
"or": [
"canSpringBallJumpMidAir",
{
"and": [
{
"notable": "Underwater Walljumps"
},
"canUnderwaterWallJump"
]
}
]
}
]
},
{
"and": [
"canTrickyUseFrozenEnemies",
{
"or": [
"HiJump",
"Gravity",
"h_underwaterMaxHeightSpringBallJump"
]
}
]
}
]
}
{
"or": [
{
"and": [
"Gravity",
"h_useSpringBall"
]
},
{
"and": [
"HiJump",
"h_useSpringBall"
]
},
{
"and": [
"Gravity",
"canCeilingBombJump"
]
},
"canBeVeryPatient"
]
} |
From: 13
G-Mode Morph Junction By Middle Right Door
To: 11
G-Mode, Below Speed Blocks (Overloaded PLMs)
This is a long climb, and getting around the fish under the missiles can be tricky or slow. Place bombs against the speed blocks until they are overloaded. Requires: "canComplexGMode"
{
"notable": "G-Mode Overload Speed Blocks then use Global Crab"
}
"h_navigateUnderwater"
"h_artificialMorphBombs"
{
"or": [
{
"and": [
"Gravity",
{
"or": [
"h_artificialMorphIBJ",
{
"and": [
"h_artificialMorphSpringBall",
"HiJump"
]
},
{
"and": [
"h_artificialMorphSpringBall",
"canGravityJump"
]
}
]
},
{
"or": [
"h_artificialMorphSpringBall",
"h_artificialMorphCeilingBombJump",
"canBeVeryPatient"
]
}
]
},
"h_artificialMorphDoubleSpringBallJump"
]
} |