Main Street: Underwater Walljumps (Extreme)

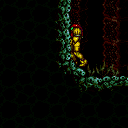
Climbing all of the room with only HiJump and Underwater Walljumps.
Strats ()
|
Entrance condition: {
"comeInWithGMode": {
"mode": "direct",
"morphed": false
},
"comesThroughToilet": "no"
}Requires: {
"notable": "G-Mode Overload Speed Blocks then use Global Crab"
}
"canComplexGMode"
"h_navigateUnderwater"
{
"or": [
"canGravityJump",
{
"and": [
"Gravity",
"canWallJump"
]
},
{
"and": [
"Gravity",
"canTrickyUseFrozenEnemies",
"h_underwaterCrouchJumpDownGrab"
]
},
{
"and": [
"HiJump",
{
"or": [
{
"and": [
{
"notable": "Underwater Walljumps"
},
"canUnderwaterWallJump"
]
},
"canSpringBallJumpMidAir",
{
"and": [
"canTrickyUseFrozenEnemies",
"h_underwaterCrouchJump"
]
}
]
}
]
},
{
"and": [
"h_underwaterMaxHeightSpringBallJump",
"canTrickyUseFrozenEnemies",
"canBeVeryPatient",
{
"or": [
"canStationaryLateralMidAirMorph",
{
"ammo": {
"type": "Super",
"count": 1
}
}
]
}
]
}
]
}Clears obstacles: B |
From: 1
Bottom Door
To: 12
G-Mode Junction By Middle Right Door
Entrance condition: {
"comeInWithGMode": {
"mode": "indirect",
"morphed": false
},
"comesThroughToilet": "any"
}Requires: {
"notable": "G-Mode Overload Speed Blocks then use Global Crab"
}
"canComplexGMode"
"h_navigateUnderwater"
{
"or": [
"canGravityJump",
{
"and": [
"Gravity",
"canWallJump"
]
},
{
"and": [
"Gravity",
"canTrickyUseFrozenEnemies",
"h_underwaterCrouchJumpDownGrab"
]
},
{
"and": [
"HiJump",
{
"or": [
{
"and": [
{
"notable": "Underwater Walljumps"
},
"canUnderwaterWallJump"
]
},
"canSpringBallJumpMidAir",
{
"and": [
"canTrickyUseFrozenEnemies",
"h_underwaterCrouchJump"
]
}
]
}
]
},
{
"and": [
"h_underwaterMaxHeightSpringBallJump",
"canTrickyUseFrozenEnemies",
"canBeVeryPatient",
{
"or": [
"canStationaryLateralMidAirMorph",
{
"ammo": {
"type": "Super",
"count": 1
}
}
]
}
]
}
]
} |
From: 2
Bottom Right Door
To: 12
G-Mode Junction By Middle Right Door
Entrance condition: {
"comeInWithGMode": {
"mode": "direct",
"morphed": false
}
}Requires: {
"notable": "G-Mode Overload Speed Blocks then use Global Crab"
}
"canComplexGMode"
"h_navigateUnderwater"
{
"or": [
"canGravityJump",
{
"and": [
"Gravity",
"canWallJump"
]
},
{
"and": [
"Gravity",
"canTrickyUseFrozenEnemies",
"h_underwaterCrouchJumpDownGrab"
]
},
{
"and": [
"HiJump",
{
"or": [
{
"and": [
{
"notable": "Underwater Walljumps"
},
"canUnderwaterWallJump"
]
},
"canSpringBallJumpMidAir",
{
"and": [
"canTrickyUseFrozenEnemies",
"h_underwaterCrouchJump"
]
}
]
}
]
},
{
"and": [
"h_underwaterMaxHeightSpringBallJump",
"canTrickyUseFrozenEnemies",
"canBeVeryPatient",
{
"or": [
"canStationaryLateralMidAirMorph",
{
"ammo": {
"type": "Super",
"count": 1
}
}
]
}
]
}
]
}Clears obstacles: B |
From: 2
Bottom Right Door
To: 12
G-Mode Junction By Middle Right Door
Entrance condition: {
"comeInWithGMode": {
"mode": "indirect",
"morphed": false
}
}Requires: {
"notable": "G-Mode Overload Speed Blocks then use Global Crab"
}
"canComplexGMode"
"h_navigateUnderwater"
{
"or": [
"canGravityJump",
{
"and": [
"Gravity",
"canWallJump"
]
},
{
"and": [
"Gravity",
"canTrickyUseFrozenEnemies",
"h_underwaterCrouchJumpDownGrab"
]
},
{
"and": [
"HiJump",
{
"or": [
{
"and": [
{
"notable": "Underwater Walljumps"
},
"canUnderwaterWallJump"
]
},
"canSpringBallJumpMidAir",
{
"and": [
"canTrickyUseFrozenEnemies",
"h_underwaterCrouchJump"
]
}
]
}
]
},
{
"and": [
"h_underwaterMaxHeightSpringBallJump",
"canTrickyUseFrozenEnemies",
"canBeVeryPatient",
{
"or": [
"canStationaryLateralMidAirMorph",
{
"ammo": {
"type": "Super",
"count": 1
}
}
]
}
]
}
]
} |
From: 3
Middle Right Door
To: 9
Junction Below Speed Blocks
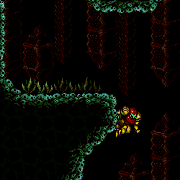
This underwater walljump is relatively long. Requires: {
"notable": "Underwater Walljumps"
}
"canUnderwaterWallJump" |
|
Jump from the bottom left slope for a bit of extra height to start. Requires: {
"notable": "Underwater Walljumps"
}
"canUnderwaterWallJump" |
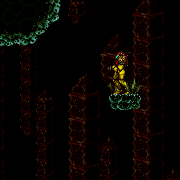
From: 9
Junction Below Speed Blocks
To: 4
Top Right Door
Jump from the slope for a bit of extra height to start. Requires: {
"notable": "Underwater Walljumps"
}
"canUnderwaterWallJump" |
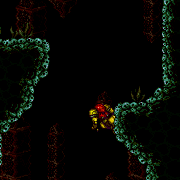
From: 12
G-Mode Junction By Middle Right Door
To: 10
Direct G-Mode Morph, On Ledge Above Speed Blocks
Climb to the ledge left of the morph tunnel item. With Ice, carefully and quickly freeze the last crab high enough to use as a platform. With a slow ascent, such as with Spring Ball and Ice, the crab will need to circle the entire room, it is possible to use a Super when it passes the speed blocks to speed this up significantly. Requires: {
"obstaclesCleared": [
"B"
]
}
"Morph"
"h_navigateUnderwater"
{
"or": [
"canGravityJump",
{
"and": [
"Gravity",
"canWallJump"
]
},
{
"and": [
"Gravity",
"canTrickyUseFrozenEnemies"
]
},
{
"and": [
"HiJump",
{
"or": [
"canSpringBallJumpMidAir",
{
"and": [
{
"notable": "Underwater Walljumps"
},
"canUnderwaterWallJump"
]
}
]
}
]
},
{
"and": [
"HiJump",
"canTrickyUseFrozenEnemies",
{
"or": [
"h_underwaterCrouchJump",
"canDownGrab"
]
}
]
},
{
"and": [
"h_underwaterMaxHeightSpringBallJump",
"canTrickyUseFrozenEnemies",
"canBeVeryPatient"
]
}
]
}Dev note: FIXME: HiJump strats may need canBeVeryPatient if they can't be done before the crab is in position |
From: 12
G-Mode Junction By Middle Right Door
To: 11
G-Mode, Below Speed Blocks (Overloaded PLMs)


Place bombs against the speed blocks until they are overloaded. With a slow ascent, such as with Spring Ball and Ice, the crab will need to circle the entire room, it is possible to use a Super when it passes the speed blocks to speed this up significantly. Requires: "canComplexGMode"
{
"notable": "G-Mode Overload Speed Blocks then use Global Crab"
}
"h_useMorphBombs"
"h_navigateUnderwater"
{
"or": [
"canGravityJump",
{
"and": [
"Gravity",
"canWallJump"
]
},
{
"and": [
"HiJump",
{
"or": [
"canSpringBallJumpMidAir",
{
"and": [
{
"notable": "Underwater Walljumps"
},
"canUnderwaterWallJump"
]
}
]
}
]
},
{
"and": [
"canTrickyUseFrozenEnemies",
{
"or": [
"HiJump",
"Gravity",
"h_underwaterMaxHeightSpringBallJump"
]
}
]
}
]
}
{
"or": [
{
"and": [
"Gravity",
"h_useSpringBall"
]
},
{
"and": [
"HiJump",
"h_useSpringBall"
]
},
{
"and": [
"Gravity",
"canCeilingBombJump"
]
},
"canBeVeryPatient"
]
} |